| KIT #: | F-161 |
| PRICE: | £10.00 |
| DECALS: | Two options |
| REVIEWER: | Peter Chiu |
| NOTES: | Part of a set that includes Nimrod, P.1185 and Merlin HC.3 |
| HISTORY |
 History (from the
instruction)
History (from the
instruction)
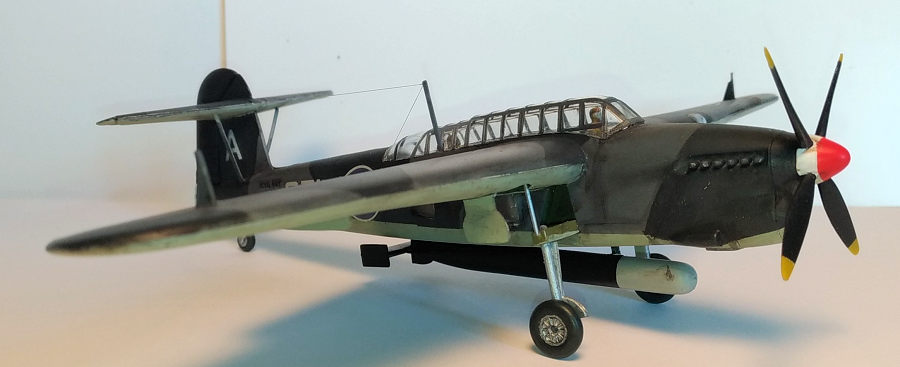
The Barracuda first flew in December 1940 and was the Royal Navy’s first monoplane torpedo bomber. 25 Mk. 1’s were built followed by the Mk II which became the main production version. Their most memorable action took place on the 3rd April 1944 when a force of 42 barracudas bombed the German battleship Tirpitz. The Mk. III version was introduced later and employed on anti-submarine reconnaissance duties.
Specification: Engine – 1,640 hp Rolls Royce Merlin 32: Max speed 228 m.p.h. at 1,750ft: Armament Twin Vickers ‘K@ guns and one 1,620 lb torpedo or four 450 lb depth charge or six 250 lb bombs.
| THE KIT |
 I was interested in
building the Barracuda, intrigued by its ungainly (ugly?) design. The original
kit was released by Frog in 1964, my kit was reboxed with new artwork and
released in 1975. This kit has been reboxed numerous times under various brands
since then. The kit was moulded in grey plastic, it has raised detail for panel
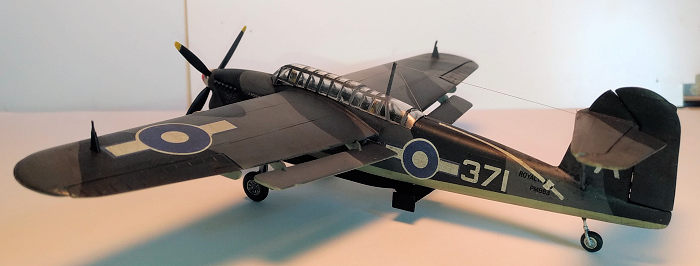
lines and some flash on most of the sprues and parts. Markings are for Barracuda
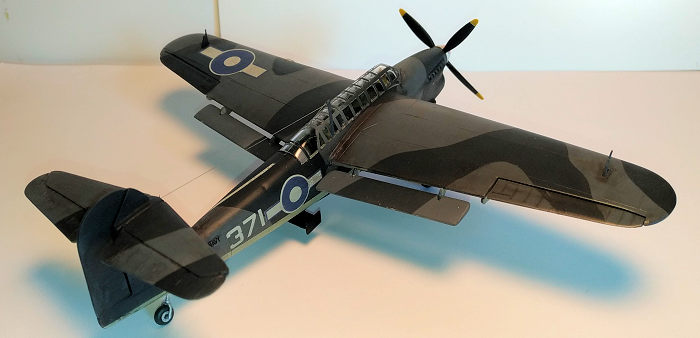
Mk II PM 953 flown by Lt Poole of 812 NAS FAA aboard HMS Vengeance Dec 1945. The
other being for a Barracuda of 829 NAS FAA based on HMS Victorious that took
part in Operation Tungsten, the attack on Tirpitz.
I was interested in
building the Barracuda, intrigued by its ungainly (ugly?) design. The original
kit was released by Frog in 1964, my kit was reboxed with new artwork and
released in 1975. This kit has been reboxed numerous times under various brands
since then. The kit was moulded in grey plastic, it has raised detail for panel
lines and some flash on most of the sprues and parts. Markings are for Barracuda
Mk II PM 953 flown by Lt Poole of 812 NAS FAA aboard HMS Vengeance Dec 1945. The
other being for a Barracuda of 829 NAS FAA based on HMS Victorious that took
part in Operation Tungsten, the attack on Tirpitz.
The paint scheme for both call for Extra Dark Sea Grey matt and Dark Slate Grey matt on the top with Matt Sky (Type s) on the underside. No specific brand of paint is identified.
| CONSTRUCTION |
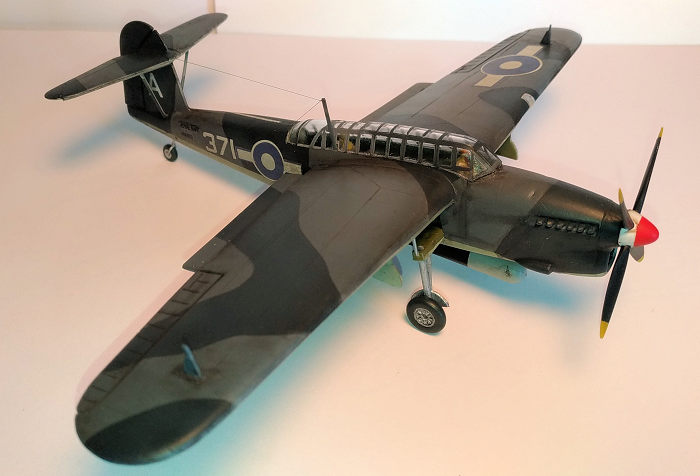
I decided to try rescribing the kit. I sanded down the raised panel lines on the wings and fuselage. As I am still a novice when it comes to this technique, I kept it simple by sticking to the panel markings as laid out in the Frog paint / decal guide. I’m sure the actual panel lines are more complex than what I have done, but it would do for a beginner like myself.
The cockpit was pretty
sparse, so I decide to scratch build something a bit more interesting with
plastic card and some left over parts in my spares box. I cut think pieces of
plastic card to simulate the interior structure of the cockpit. Searching the
web I found some archive images and MM very own Tom Cleavers build of a Special
Hobby Barracuda to provide some guidance on what to do. I painted the interior a
mix of 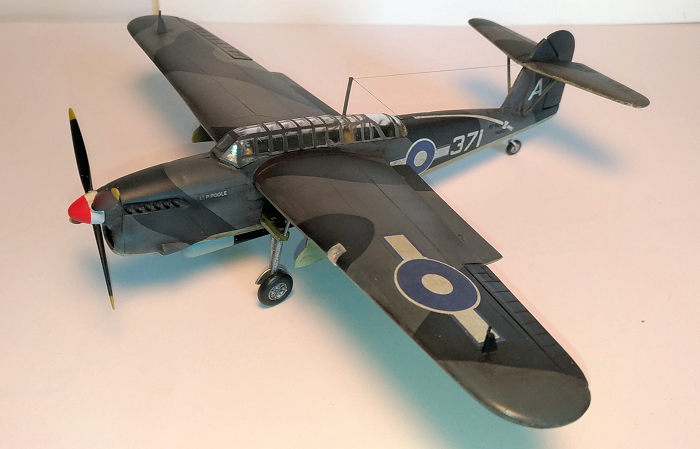 Vallejo interior green and Russian green. I then dry brushed aluminium
and then gave a quick black wash to highlight the detail.
Vallejo interior green and Russian green. I then dry brushed aluminium
and then gave a quick black wash to highlight the detail.
The two parts of the fuselage was closed up and the seams were smoothed with some scraping tools and sanding. The wings went together and I boxed in the wheel wells as they are left open in the kit.
I had to add some plastic putty to the wing roots and to the joins for the rear elevators. The kit was then primed with Vallejo light grey Primer.
The original pilot figures were not particularly accurate, so I replaced them with unused pilot figures, mostly from newer tool Airfix kits I had not used.
The greenhouse style canopy was carefully masked off using Tamiya tape, a sharp blade and headset with magnifying lenses (plus a certain degree of patience). This was then fixed to the fuselage using Kristal clear glue.
The Torpedo was put together with some minor sanding to smooth the seam line and get the stabilizer fins even. This was painted in black and light grey.
| COLORS & MARKINGS |
 I first sprayed the
undercarriage bays interior green along with the undercarriage. The oleos were
sprayed aluminium. I generally wet tissue paper and stuff it into the
undercarriage bays to prevent overspray. Then the underside of the kit was
sprayed using Vallejo Sky Type S. Then following the paint guide I masked off
the underside wings and fuselage and sprayed Vallejo USAF Medium Grey. I then
cut masks using Tamiya tape to follow the camouflage pattern and sprayed Extra
Dark Sea grey to complete the main part of the painting. The undercarriage was
then added to complete the build.
I first sprayed the
undercarriage bays interior green along with the undercarriage. The oleos were
sprayed aluminium. I generally wet tissue paper and stuff it into the
undercarriage bays to prevent overspray. Then the underside of the kit was
sprayed using Vallejo Sky Type S. Then following the paint guide I masked off
the underside wings and fuselage and sprayed Vallejo USAF Medium Grey. I then
cut masks using Tamiya tape to follow the camouflage pattern and sprayed Extra
Dark Sea grey to complete the main part of the painting. The undercarriage was
then added to complete the build.
Once dry I sprayed a coat of Alclad II acrylic gloss before applying the decals from the kit. They had faded slightly but were still usable, I decided to use the set for the plane flown by Lt Poole. I applied them using a Micro Set /Sol and they went down without any problem. I then tried a recently bought product, Ultimate Weathering products Dark Dirt wash. I applied liberally over the kit, waited 30 mins before wiping off with cotton buds.
Once completely dry I sprayed a coat of Vallejo Matt varnish. I finally added the antenna to the cockpit and used ezline wire complete the kit.
| CONCLUSIONS |
I was very pleased with the finished build considering the age of the kit. The lack of interior was a chance for me to practice scratch building. I’ve not built many Frog kits before and found it to be a relatively straight forward kit of an less well known aircraft. There are more modern toolings of the Barracuda that would offer more detail but I enjoyed the build and would recommend to those modellers who like to build more vintage kits.
Peter Chiu
1 February 2022
Copyright ModelingMadness.com. All rights reserved. No reproduction in part or in whole without express permission.
If you would like your product reviewed fairly and fairly quickly, please contact the editor or see other details in the Note to Contributors.