Revell 1/72 Hawker Tempest V
| KIT #: | 4176 |
| PRICE: | $6.00 MSRP |
| DECALS: | Two options |
| REVIEWER: | Greg Ewald |
| NOTES: | Needs a new canopy and probably aftermarket decals. |
| HISTORY |
In September, 1942, the first Mark Five Tempest took to the skies, a long and somewhat painful evolution from the early Typhoon fighter/attack aircraft resulting in a thoroughbred plane that was just a little too late. The impressive(430+) top speed of the clipped wing monster gave it the ability to chase down pulse jet bombs (the ugly V-1) and even provide some competition for the new ME-262 jet fighter. Interestingly, the plane was ordered into production before the first prototype had even flown, which may have been a mistake, as the plane did not live up to some of it’s designer’s intents.
The Mark Five was produced in two lots, series one being somewhat Frankensteined together, and series two being reinforced and with better engineering, and having established hard points. (series one could not carry drop tanks, bombs, or rockets)
| THE KIT |
 Sigh. This kit was
given to me as a sort of joke, as I had been bashing the Tempest on a site,
and was roundly abused for daring to doubt the “best of British fighters of
WW2” (their words, not mine). I have to eat a fair amount of crow, as
doing research for this kit, I did learn quite a bit about this plane, and
gain a huge amount of respect for the design. That all being said, the
Revell kit is something less than wonderful, being compromised of 30 pieces
of grey styrene with moderate detail and little flash (unusual for ROG).
The cockpit is so simple as to be ludicrous, but the exterior detail is
alright. The clear canopy was so crazed during molding as to render it
unusable, even after sanding, filling, and clear finishing per MM’s
instructions:
Sigh. This kit was
given to me as a sort of joke, as I had been bashing the Tempest on a site,
and was roundly abused for daring to doubt the “best of British fighters of
WW2” (their words, not mine). I have to eat a fair amount of crow, as
doing research for this kit, I did learn quite a bit about this plane, and
gain a huge amount of respect for the design. That all being said, the
Revell kit is something less than wonderful, being compromised of 30 pieces
of grey styrene with moderate detail and little flash (unusual for ROG).
The cockpit is so simple as to be ludicrous, but the exterior detail is
alright. The clear canopy was so crazed during molding as to render it
unusable, even after sanding, filling, and clear finishing per MM’s
instructions:
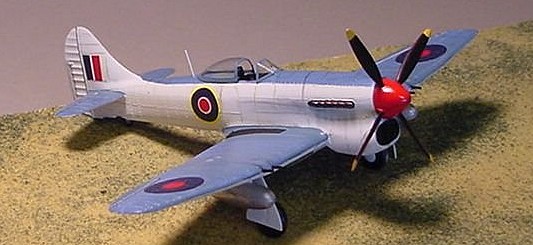
So another was ordered from Squadron, and sanded to fit ( I wanted an open one anyway).
For some odd reason , this kit looks more like a series one plane, with the protruding cannons, etc, but they include drop tanks and rockets (no bombs)…but after reading more accounts, it turns out that cannons were intermixed in the aircraft, so perhaps it isn’t so out of bounds?
| CONSTRUCTION |
 The 10 step
instructions are big and easy to understand, and the fit of the plastic is
actually quite good, almost falling together. I did have to use some putty
on the upper wing fairing joints, and the lower fuselage attachment point,
but very little. If you want to add on drop tanks or rockets, you will have
to notch out the bottom wing prior to assembly accordingly in step 5.Since
I was building a prototype series 2, I decided not to use the rockets, but
did use the drop tanks…note here: the tanks have molded in “dents” which I
thought was a neat touch. In step 9, you attach the landing gear, but the
attachment point is really weak, and may need to be beefed up…there are
also no actuating struts provided. The gear doors go on without a hitch,
and then you have to put the canopy on, as long as yours was workable !
The 10 step
instructions are big and easy to understand, and the fit of the plastic is
actually quite good, almost falling together. I did have to use some putty
on the upper wing fairing joints, and the lower fuselage attachment point,
but very little. If you want to add on drop tanks or rockets, you will have
to notch out the bottom wing prior to assembly accordingly in step 5.Since
I was building a prototype series 2, I decided not to use the rockets, but
did use the drop tanks…note here: the tanks have molded in “dents” which I
thought was a neat touch. In step 9, you attach the landing gear, but the
attachment point is really weak, and may need to be beefed up…there are
also no actuating struts provided. The gear doors go on without a hitch,
and then you have to put the canopy on, as long as yours was workable !
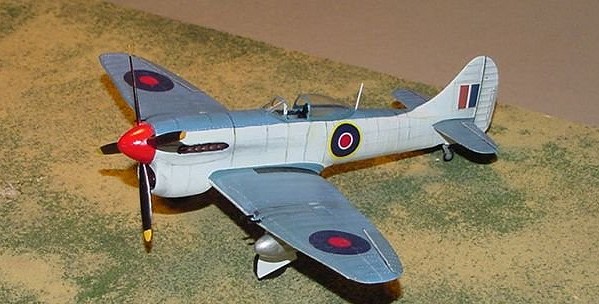
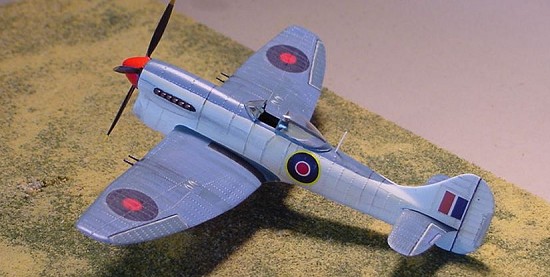
| COLORS & MARKINGS |
 In the course
of the investigation into the Tempest, I have run across some neat sites
and some very interesting people…in one exchange of information, it came up
that some MK5’s had been typed out as land based water interdiction
aircraft, presumably for hunting down Schnellboots and the like, as well as
possibly hitting V-1’s over the water, so I came up with a theoretical
colouration for this plane, using the Seafire as a guide, flat aluminium
white with blue on the upper surfaces. I could not find any photos of such
aircraft, so did not put on any ID numbers (if anyone out there has one,
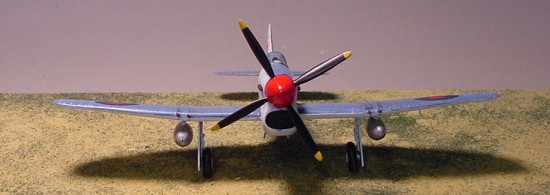
let me know !) I did attach the drop tanks, surmising that they would be
necessary for long patrols, but decided against using the rockets, so as
not to drag the plane’s speed down at all. The kit decals are awful, and
require a lot of setting solutions, as well as generous applications of
Future…be sure to pick up some aftermarket !!! Weathering was done using
charcoal and coloured pencils, as well as a .01 permanent marker to set off
the movable surfaces.
In the course
of the investigation into the Tempest, I have run across some neat sites
and some very interesting people…in one exchange of information, it came up
that some MK5’s had been typed out as land based water interdiction
aircraft, presumably for hunting down Schnellboots and the like, as well as
possibly hitting V-1’s over the water, so I came up with a theoretical
colouration for this plane, using the Seafire as a guide, flat aluminium
white with blue on the upper surfaces. I could not find any photos of such
aircraft, so did not put on any ID numbers (if anyone out there has one,
let me know !) I did attach the drop tanks, surmising that they would be
necessary for long patrols, but decided against using the rockets, so as
not to drag the plane’s speed down at all. The kit decals are awful, and
require a lot of setting solutions, as well as generous applications of
Future…be sure to pick up some aftermarket !!! Weathering was done using
charcoal and coloured pencils, as well as a .01 permanent marker to set off
the movable surfaces.
| FINAL CONSTRUCTION |
Added on the upper antennae made from stretched sprue, and the lower pitot tube as well. The spinner hub was painted gloss red, and the plane was finished !
| CONCLUSIONS |
For an out of the box quick build, this one certainly has it’s merits…if you want a more detailed version, pick up the academy kit (only 3 bucks more) and save yourself the grief of trying to accurize this one. I can’t really recommend this kit, even though I am happy with how it turned out.
| REFERENCES |
There is a fantastic website dedicated to this plane: http://www.hawkertempest.se/index.htm
Review kit courtesy of: a friend with a warped sense of humour !
Greg Ewald
October 2005
Copyright ModelingMadness.com
If you would like your product reviewed fairly and fairly quickly, please contact the editor or see other details in the Note to Contributors.