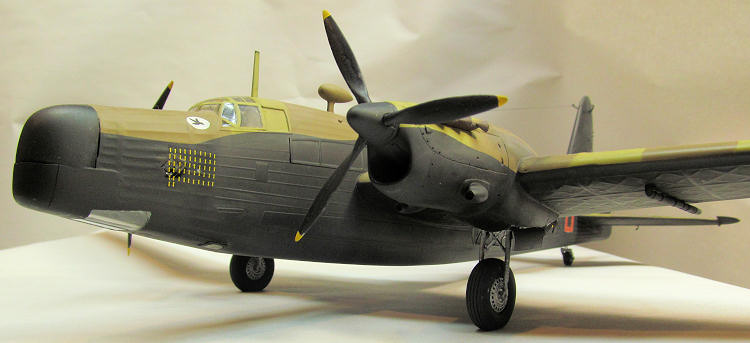
Trumpeter 1/48 Wellington IIC
| KIT #: | ? |
| PRICE: | $ |
| DECALS: | ? |
| REVIEWER: | Patrick Earing |
| NOTES: |
Alley Cat 1/48 scale Resin Conversion for Trumpeter
|
| HISTORY |
| THE KIT |
Alley Cat’s conversion consists of twelve grey resin components including two direct kit replacement full engine cowlings, spinners, propeller blades, lower turret plate, nose turret cover, two clear resin waist windows and decals for five aircraft options. The kit also includes a one page instruction sheet.
| CONSTRUCTION |
 Ever
since the release of the 1/48 scale Trumpeter
Ever
since the release of the 1/48 scale Trumpeter
Alley Cat states in their instructions that the
Overall the resin parts supplied by Alley
Cat are well cast with no warpage or pin holes.
The panel lines are also well done and match the Trumpeter effect well.
Sadly, the resin engines provided in my kit were somewhat smaller than
the opening they were intended to mount into on the Trumpeter kit.
I don’t know if this is a common problem with all of the Alley Cat
conversions or just
 shrinkage with mine.
In any case, the fit was horrible with one engine showing nearly a ¼ inch
step/gap. Hmmm, shades of that CMK
Beaufighter Mk II conversion that is still haunting me from the shelf of doom
possibly? In the end, not really a
big ordeal, just time consuming.
shrinkage with mine.
In any case, the fit was horrible with one engine showing nearly a ¼ inch
step/gap. Hmmm, shades of that CMK
Beaufighter Mk II conversion that is still haunting me from the shelf of doom
possibly? In the end, not really a
big ordeal, just time consuming.
I matched the lines at the top of the
replacement engines to the top of the Trumpeter nacelles.
Take care here with the Trumpeter parts P16 that they are correctly
placed and fully cured before installing the Alley Cat resin engines.
Once convinced that my engines were securely mounted I began trying to
fill the gap/step at the bottom with CA glue.
 Eventually, I just gave in and broke out my automotive filler (bondo) and
filled the gaps and sanded to shape with 80 grit sand paper.
Unfortunately because of the limitations of creating a drop fit
conversion engine replacement, Alley Cat has not quite gotten the complex shape
of the Mk II’s lower cowling correct; a shape issue whereby the resin engine
cowling is stepped up too sharply to the existing Trumpeter nacelle (or would
have had they fit). In any case, I
was able to reshape this area for a better look with judicious filler, sanding
and primer. Once in a final primer
I rescribed all of the lost panel lines, remade the lost intake mounting plates
from 10 thousand card stock and began focusing on the fuselage changes that were
needed.
Eventually, I just gave in and broke out my automotive filler (bondo) and
filled the gaps and sanded to shape with 80 grit sand paper.
Unfortunately because of the limitations of creating a drop fit
conversion engine replacement, Alley Cat has not quite gotten the complex shape
of the Mk II’s lower cowling correct; a shape issue whereby the resin engine
cowling is stepped up too sharply to the existing Trumpeter nacelle (or would
have had they fit). In any case, I
was able to reshape this area for a better look with judicious filler, sanding
and primer. Once in a final primer
I rescribed all of the lost panel lines, remade the lost intake mounting plates
from 10 thousand card stock and began focusing on the fuselage changes that were
needed.
 Alley Cat states that the conversion is
best used with the Trumpeter Mk IC kit.
However, for the Z8524 aircraft I wanted to model, I feel that a Mk
Alley Cat states that the conversion is
best used with the Trumpeter Mk IC kit.
However, for the Z8524 aircraft I wanted to model, I feel that a Mk
 slightly frustrated over this omission, I pulled up an online copy
of the Trumpeter Mk
slightly frustrated over this omission, I pulled up an online copy
of the Trumpeter Mk
It was slightly stressful making those
first cuts into the flank of the beast, but with care and patience I achieved an
excellent fit using both an Olfa P cutter and Xacto #11 blades.
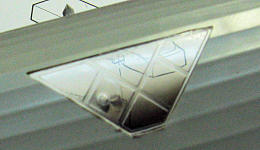
Additionally, Alley Cat does not provide any of the interior parts that
are unique to Wellingtons with waist windows-although the parts can be found in
the Trumpeter Mk 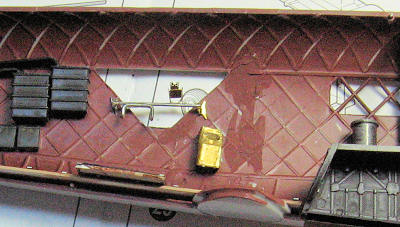 HyperScale reader I was able to borrow a copy of the now rare 4+ text on the
Vickers Wellington that provided the necessary images for me to scratch build
the machine gun mounts and ammunition bins for the Mk II waist windows.
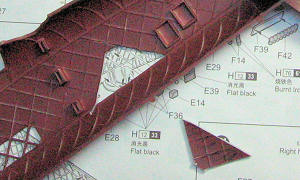
Once finished with the kit interior I mounted everything to the left
fuselage side and proceeded to install the provided resin lower turret plug and
scratch build the necessary rear fuselage walkway.
Both the lower turret plug and the nose turret plug fit perfectly.
The Wellington nose turret requires a fairing on top that cover some
necessary mounting bits, which on any model using the resin turret plug must be
carefully removed. The resulting
gaps I filled with a guestamated small plasticard panel.
HyperScale reader I was able to borrow a copy of the now rare 4+ text on the
Vickers Wellington that provided the necessary images for me to scratch build
the machine gun mounts and ammunition bins for the Mk II waist windows.
Once finished with the kit interior I mounted everything to the left
fuselage side and proceeded to install the provided resin lower turret plug and
scratch build the necessary rear fuselage walkway.
Both the lower turret plug and the nose turret plug fit perfectly.
The Wellington nose turret requires a fairing on top that cover some
necessary mounting bits, which on any model using the resin turret plug must be
carefully removed. The resulting
gaps I filled with a guestamated small plasticard panel.
At this point construction followed the Trumpeter instruction and I must say that I was pleasantly surprised at how well the kit fit and how quickly it went together given the astounding parts count.
| COLORS & MARKINGS |
 I
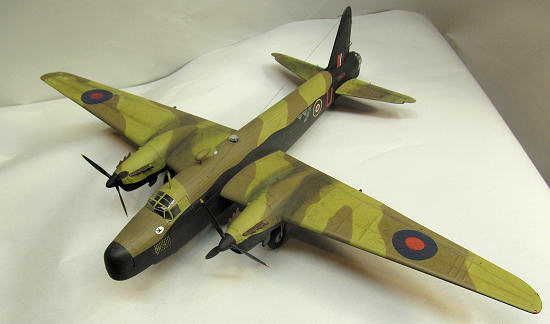
had planned from the start to model red U of 104 squadron.
I used Model Master Enamels for the Middle Stone and Dark Earth
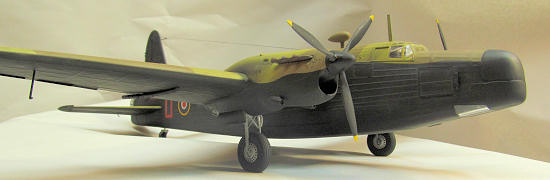
camouflage on the top surfaces and Floquil Engine Black for the bottom surface.
The colors were sprayed with an Iwata HP-TR1 with all colors reduced 50%
with Testors Universal thinner. The
camouflage demarcation was achieved using Silly Putty, and lightened color was
used to highlight and show fading from exposure on all topside surfaces.
The decals provided by Alley Cat were used exclusively over Testors clear
lacquer Glosscoat and worked exceptionally well; although they did tend to stick
fiercely, requiring careful placement.
A final application of Testors Dullcoat and some weathering with pastels
completed the build.
I
had planned from the start to model red U of 104 squadron.
I used Model Master Enamels for the Middle Stone and Dark Earth
camouflage on the top surfaces and Floquil Engine Black for the bottom surface.
The colors were sprayed with an Iwata HP-TR1 with all colors reduced 50%
with Testors Universal thinner. The
camouflage demarcation was achieved using Silly Putty, and lightened color was
used to highlight and show fading from exposure on all topside surfaces.
The decals provided by Alley Cat were used exclusively over Testors clear
lacquer Glosscoat and worked exceptionally well; although they did tend to stick
fiercely, requiring careful placement.
A final application of Testors Dullcoat and some weathering with pastels
completed the build.
| CONCLUSIONS |
Although marketed as a no fuss
conversion, the Alley Cat Mk II kit that I received required more than beginner
modeling skills. That said, the
resin is exceptionally well cast, and although there were fit issues, they were
not terminal. Recommended.
| REFERENCES |
 4+ Vickers Wellington
British Warplanes of World War II
Daniel March, Ed.
New York, 1998
Wikipedia
Alley Cat:
http://www.a2zeemodels.co.uk/index.asp
January 2012
If you would like your product reviewed fairly and quickly, please contact me or see other details in the Note to Contributors.