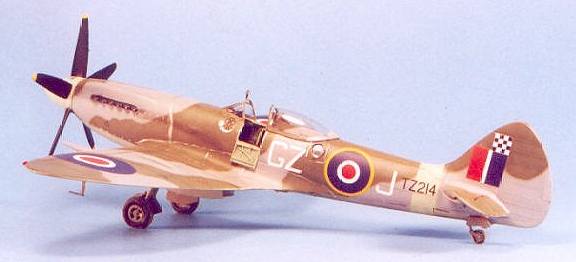
Falcon 1/48 Spitfire FR.XVIII
|
KIT # |
|
|
PRICE: |
$22.50 |
|
DECALS: |
32 Sq, circa 1947 |
|
REVIEWER: |
|
|
NOTES: |
EEEK! IT'S A VACUFORM!! RUN FOR YOUR LIFE! |

|
HISTORY |
It's a strange but interesting fact that the only "built for that specific powerplant" Spitfire to achieve a large production run was the Mk.I; while there were several other Marks specifically designed to make maximum benefit of the additional power of later Merlins and then the Griffons, in each case the "interim" type cobbled together to bring the additional performance operational as soon as possible was the version that saw the most widespread production. This began with the Mk.V, which was essentially a beefed-up Mk.I airframe to take advantage of the Merlin 45's additional 400 h.p.; this was followed by the Mk.IX, a beefed-up Mk.V to take advantage of the Merlin 60 series while the Mk.VIII was being designed to take maximum advantage of this engine; and the Mk.XIV, a beefed-up Mk.VIII airframe to use the Griffon.
The Type 394 Spitfire Mk. XVIII bears the same relationship to the Spitfire XIV that the Spitfire VIII bore to the Spitfire IX: designed to use the particular engine to best advantage, yet not produced in numbers approaching the "interim" type. This type introduced a new wing which was specific for the "E" type armament, rather than the "universal" wing used since the Spitfire Vc. Originally, the aircraft used the same Griffon 65 as the Spitfire XIV, but the Griffon 67 - which offered an additional 300 h.p. - was quickly introduced.
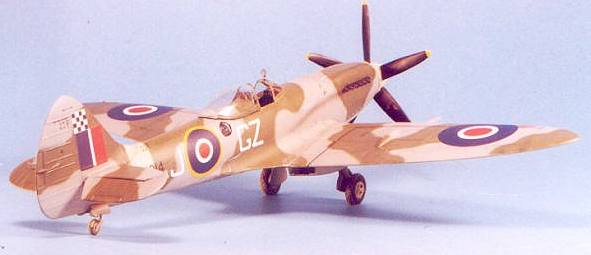 The Spitfire XVIII
appeared just too late for use in the Second World War, with the first delivered
to the RAF on May 28, 1945; as a result, only 300 F.Mk.XVIIIs and 200 F.R.XVIIIs
were produced. The majority of the pure fighter variants were delivered to
maintenance units and never saw operations, while the F.R.XVIII was delivered to
two squadrons in the Middle East (32 and 208 Squadrons) and two squadrons in the
Far East (28 and 60 Squadrons. The Spitfires of 32 and 208 Squadrons saw
considerable action in the unstable immediate post-war years in the Middle East
involving the end of the British Mandate and the Israeli War of Independence in
1948. Beginning in 1949 in Malaya, 28 and 60 Squadrons flew combat operations
against communist terrorists in the colony, with the last operational Spitfire
combat strike by a 60 Squadron aircraft occurring on January 1, 1951.
The Mk.XVIII had to be handled with respect by its pilot on takeoff, as was common with all Griffon-powered Spitfires with the 5-blade prop; even with full rudder applied, it was not possible to hold the aircraft straight with full power applied. Once airborne, the automatic throttle and boost setting control made aerobatics easy, and the Spitfire XVIII was completely viceless.
|
THE KIT |
Falcon vacuform kits were first produced in the 1980s, and quickly became known as "the Cadillac of vacuforms." Today, they have only been outpaced by the "Rolls-Royce of vacuforms," Dynavector. When I first ran across them seventeen years ago, they produced the only 1/48 kits of the Spitfire XVIII, Hawker Sea Fury, Seafire 47 and Spitfire 24, Bf-109B-1, and Ta-152H. Their Sea Fury and Bf-109B kits still make up into more accurate-looking models than their injection-molded successors. By the late 80s, Falcon had also produced the Supermarine Spiteful and Seafang, Supermarine Attacker F.B.2, and Supermarine Swift F.R.5, and the Hawker Seahawk - with the exception of the Spiteful/Seafang these are still the only available kits of these types in 1/48, and the Spiteful/Seafang still makes up into a far more accurate model of that type than the generally-worthless Silver Cloud botch-up. Their conversion sets for the Spitfire P.R.XI and F.Mk.XII also make up into the only good models of these types generally available; using the P.R.XI fuselage with the Hasegawa or ICM Spitfire IX kit, and the Mk.XII fuselage with a Tamiya or Hasegawa Spitfire V (modified to the "C" wing) makes a very good model of these versions.
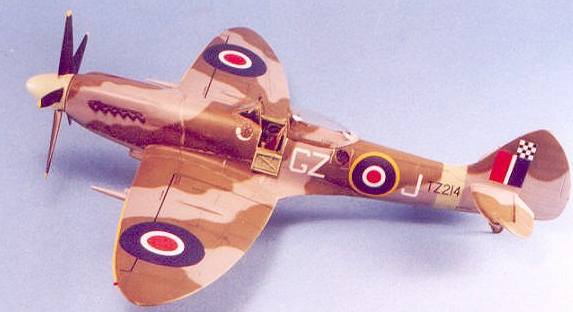 The Spitfire XVIII
in fact is still the most-accurate mid-range Griffon-powered Spitfire kit
available, and with only a very little bit of "kit bashing" to attach parts to
make an early "turtleback" fuselage, one can produce a Spitfire XIV that looks
far better than the Academy product, it you use the Academy kit as "spare parts"
for this project.
Most modelers are afraid of vacuforms because they involve more work in such areas as cockpits than an equivalent injection-molded kit. However, since the introduction of resin cockpit aftermarket sets, this problem no longer exists. Using injection-molded spares from the parts box for landing gear and other detail areas also makes a vacuform ultimately no more difficult than any limited-run injection-molded kit.
|
CONSTRUCTION |
All those who run from vacuforms do so primarily because of the first step involved: cutting the parts free of the backing sheet, and sanding them down for fit. I don't know, maybe it's because I started building things like the Hawk Nieuports when I was too young to know they were "too hard to build," but none of this has ever caused me any difficulty when it came to building a vacuform, which I have now been doing for 30 years.
An easy way to take care of this - as is shown in the kit instructions - is to draw around the part while it's on the backing sheet with a pencil. Then take your #11 X-acto blade and score around the part till you can pop it free. The pencil line will still be there. Take a sheet of medium-rough grit wet-or-dry and tape it on a hard, flat surface (I use a mirror). Take the part and sand it down until the pencil line just disappears. Voila! It's done!! Anyone with the hand-eye coordination to operate a computer to be reading this article has all the ability necessary to do this.
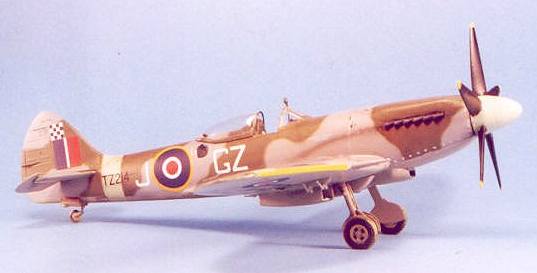 One thing I do past
that - which I also do on most limited-run injection kits - is to be sure to
sand down the trailing edges of the wings, horizontal stabilizer and rudder, to
get them nice and thin.
While some vacuforms are made on plastic sheets that are really too thin to provide the necessary stiffness in the separated parts, this is not a problem with Falcon kits (as it isn't with Dynavector kits). I take some Evergreen strip and glue it around the centerline joint of one fuselage half, so that when they are glued together the joint will be sufficiently strong; on a vacuform this size, it's not really necessary to make any bulkheads for additional strength.
On this kit, since I had a lot of spare Spitfire parts in the parts dungeon, I cut off the wheel wells from a discarded wing, and glued those in position on this wing, then cut out the wheel well on the lower surface.
I had a True Details Spitfire IX cockpit, which I used on this model. With only a tiny bit of modification - the same kind of modification one might use to put this cockpit in an ICM injection kit rather than the Occidental kit it was originally designed for - I had no problem installing the cockpit, and the result looked good.
Before assembling the fuselage,, I put in some backing sheet for the exhaust stacks to attach to. I used round-barrel exhausts from the Hasegawa Spitfire IX for these, since those were the same as used on the Griffon engine.
When I attached the wing sub-assembly to the fuselage sub-assembly, I attached some Evergreen strip along the wing root joint, and fore and aft on the fuselage for the under wing pieces to attach to. This guaranteed everything would fit right, with proper strength in the joints.
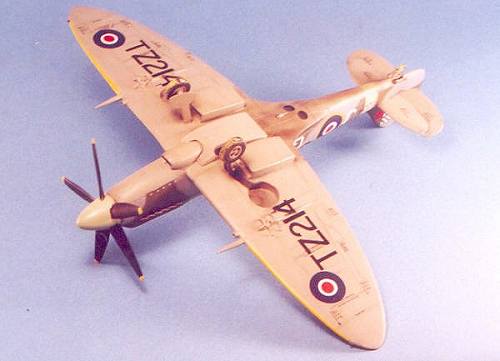 Since I was doing a
fighter-recon version, I drilled out the camera ports, and painted the interior
black. 32 Squadron did not use cameras on their planes, so I had no need of
putting anything in there, and I eventually used Micro Krystal-Klear glue to
make the windows.
Once everything was assembled, fit was so good I only had to use Mr. Surfacer 500 on all the seams and joints. A bit of sanding and all was well.
The Falcon kits come from the days of raised panel lines, and the kit has them. These are very petite, and one could leave them alone. However, sanding the joints gets rid of them in important places, so I took the time once the model was assembled and sanded smooth to re-scribe the panel lines with my X-acto.
I used a plastic Rotol propeller from Aeroclub, the under wing bomb racks from the Hasegawa Spitfire IX, and the "slipper" tank from an Airfix Spitfire 24 to complete the model.
|
PAINT & DECALS |
Painting:
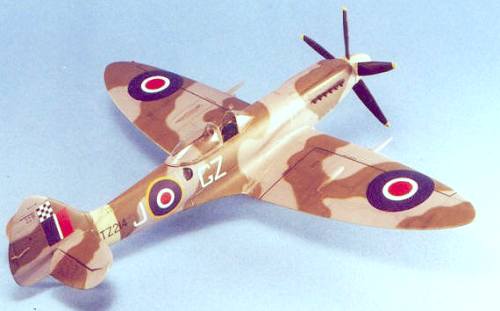 There is a lot of
controversy over how RAF camouflage was applied. I have long been a believer in
mats. However, I have recently been able to be around ML417, the real Spitfire
IX that was restored by The Fighter Collection, and is commonly considered one
of the most-accurate restorations ever done. It is clear on close examination
that this airplane was not painted with mats; rather, the camouflage pattern was
drawn on the airplane after the Ocean Grey was applied, and the Dark Green camo
was applied using a spraygun with a fine tip, following the drawings. It is a
very tight overspray pattern, so much so that at a distance of more than 5-6
feet it looks "hard edge." In 1/48, it will be hard-edge, unless you
have a fine-tip on your airbrush and a very steady hand to free-hand the
camouflage, I strongly recommend that you use my method of masking-off the
pattern, using drafting tape and running thread just in from the pattern edge,
to lift it; the result will be a bit of "scale overspray" that looks excellent
when you remove the masks. It's time-consuming but worth it for most modelers.
For this airplane, the photographs I had revealed that - as with many late-production Spitfires - the camouflage pattern was not sprayed so tight that it could not be replicated painting the model freehand. I painted this model with my Paasche Model H, with the Number 1 fine tip. The Gunze paints were thinned 50-50 with rubbing alcohol; with the brush tightened down to the maximum, it put out a line a bit thicker than a pencil line. I do a lot of freehand airbrushing and have been doing Spitfire camouflage for most of the past 30 years, so doing the pattern this way was easy for me; if you have doubts of your ability to do this yourself, the time you take to do it as described above will save you much grief.
Decals:
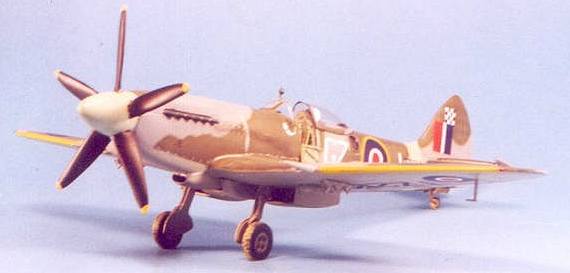 The decals provided
by Falcon are nice, but the red is much too bright, being the same color as the
post-war "D" markings. I used national markings out of the decal dungeon from a
generic Aeromaster sheet, and used the very nice kit decals for the individual
markings and squadron codes. I had a lot of doubt about using the white squadron
codes, but staring at pictures of this airplane, I think there is a tonal
difference between the tail band, which is sky, and the squadron codes; 32
Squadron was an ex-Desert Air Force squadron, and white codes were common in the
DAF, so I went with the kit decals. The decision was helped by the fact that I
didn't have any Sky codes in the correct font, but I really do think the final
result looks right compared with the photos.
One thing I discovered studying the photos was that these airplanes had the post-war under wing serial numbers - at least at the time of these photos in 1948. I used letter and number decals from the decal dungeon to piece together these serials.
Final finish:
I "dinged" the airplane as seen in the photos, using Model Master non-buffing Aluminum metalizer, then applied exhaust stains with Tamiya "Smoke." Once this was dry, I gave the model several coats of thinned Dullcote, then attached the very nice Falcon vacuform canopy (they're the folks who do the Squadron canopies; Falcon canopies are quite simply "the best of all".
|
CONCLUSIONS |
Sitting this Spitfire model next to an Academy Spitfire XIV reveals every fault of the later injection-molded kit at a distance of several yards. This 17 year old vacuform compares very favorably as a completed model with any recent injection-molded Spitfire you have in your collection.
Copyright ModelingMadness.com
Thanks to Falcon Models - http://www.falconmodels.co.nz - for the chance to review this oldie-but-goodie kit.
mailto:svanaken61@gmail.com If you would like your product reviewed fairly and fairly quickly, please contact the editor or see other details in the Note to Contributors.
Back to Reviews Page 2017