|
KIT: |
Classic Airframes 1/48 Fairey Battle I |
|
KIT # |
428 |
|
PRICE: |
$44.95 |
|
DECALS: |
Three versions: see text |
|
REVIEW & |
|
|
NOTES: |
|
|
HISTORY |
May 10, 1940: the long-awaited German attack in the West has begun. Everywhere, the Wehrmacht is breaking through. In strategic Belgium, they have taken the Maastricht bridge over the Albert Canal when Allied forces retreat too quickly to blow it as they have all the other bridges along the natural barrier of the Meuse River. Once the Germans have put sufficient forces across the bridge, they will be able to split the Allied front in Belgium in two. The Allies are hard-pressed to find a way to stem the tide. The whole operation in Europe depends on that one bridge.
At the headquarters of the Advanced Air Striking Force of the British Expeditionary Force, orders go out to the bomber squadrons to knock out the bridge. That day and the next, the RAF made eight separate attacks - all unsuccessful. On May 12, a squadron of Blenheims attacked the bridge, again unsuccessfully. Of 12 sent out, 8 return, all hit by the deadly German flak that now rings the bridge.
At Amifontaine, France, the Officer Commanding 12 Squadron calls for volunteers to attack the bridge. In a moment right out of the First World War, all the pilots volunteered. Since only five aircraft were to make the mission, the young men scribbled their names on slips of paper and the five crews were chosen by lottery. The five Fairey Battles were led by Flying Officer Donald Garland, 21, newly-promoted from Pilot Officer three months earlier. His gunner, Sergeant Thomas Gray, had been in the RAF since 1929. The bombers were to be escorted in their attack by a squadron of Hurricanes.
As the formation neared the bridge, German fighters attacked the Hurricanes, drawing them away as the five single-engine bombers headed into the wall of flak. Garland pushed over directly toward the bridge, diving through bursts of 20mm fire, and delivering his dive-bombing attack from the lowest possible altitude as the other four airplanes followed. The first of four 250 lb. bombs struck beside one of the supports as a truck belched oil from the shrapnel and came to a stop a third of the way across the bridge, halting the traffic behind. The next bomb scored a direct hit in the center of the roadway. The surface crumbled and struts collapsed as the Battle disappeared into the smoke of the explosions and the whole bridge became a mass of flames. Later reconnaissance would confirm that one end of the bridge was demolished by Garland's attack, and the structure temporarily put out of action.
On the way out, the inevitable happened. The Messerschmitts broke past the Hurricanes and attacked the five battered bombers. Garland and Gray, in the lead, attracted the most enemy attention. They were last seen heading down in flames. Of the five aircraft that set out to attack the bridge, only one - too badly damaged to ever fly again - returned to Amifontaine.
Two days later, the Germans crossed the Meuse again, near Sedan. At first it seemed possible to destroy the pontoon bridges they were using. Six Battles made the first attack at 0500, and all returned. The bridges were not knocked out. At 1500, 67 Battles took off to strike the bridges. This time the Luftwaffe was ready and waiting. Thirty-two attacking airplanes were shot down by the Messerschmitts and the intense flak. Two of the pontoon bridges were damaged and two permanent bridges received direct hits. The bravery of the aircrews were of little account, however, as the French were as badly broken as the bridges. The Blitzkrieg would roar on to success in Northern France despite their bravery and losses. Flying Officer Garland and Sergeant Gray were posthumously awarded the Victoria Cross, the first RAF V.C.'s of the war.
The Fairey Battle first took flight in March 1936, designed by Marcel Lobell, in response to an RAF requirement for a light day bomber to replace the Hawker Hind biplane. Conceptually, the Battle was to perform the role that the deHavilland D.H.4 had carried out during the First World War. A clean, all-metal, low-wing monoplane powered by a 1.030 h.p. Merlin I or II, with a top speed of 233 mph, the airplane could show a clean set of heels to most contemporary fighters. Finally awakened to the menace of Hitler's Nazi Germany, the RAF ordered the Battle into mass production, along with the Bristol Blenheim, as the first modern aircraft the service received.
Aviation technical development was such that by the time of Munich, in October 1938, the Battle was already obsolescent, with the German Bf-109B/C/D more than capable of dealing with it. Such was the need for numbers of aircraft in the face of Luftwaffe expansion, however, that the Air Ministry maintained the airplane in production in the race to keep numerical parity (forget qualitative parity) with Germany. Despite its known obsolescence, the Battle was numerically the most important aircraft of the Advanced Air Striking Force sent to France in 1939. In the third week of September, a gunner aboard a Battle shot down the first German aircraft to be lost over France in the war.
Due to the high production rate that had been maintained into 1940, there was a large number of Battles available. They served throughout the remainder of the war as trainers and target
tugs throughout the British Empire.|
THE KIT |
Prior to the appearance of this kit from Classic Airframes, the only other available Battle was produced in 1/72 by Airfix in the early 1960s. This is the first 1/48 kit of this aircraft to come into production, and is likely the only one that will ever see the light of day. Classic Airframes has already announced plans to release a kit of the Battle target tug and two-canopy trainer in the near future.
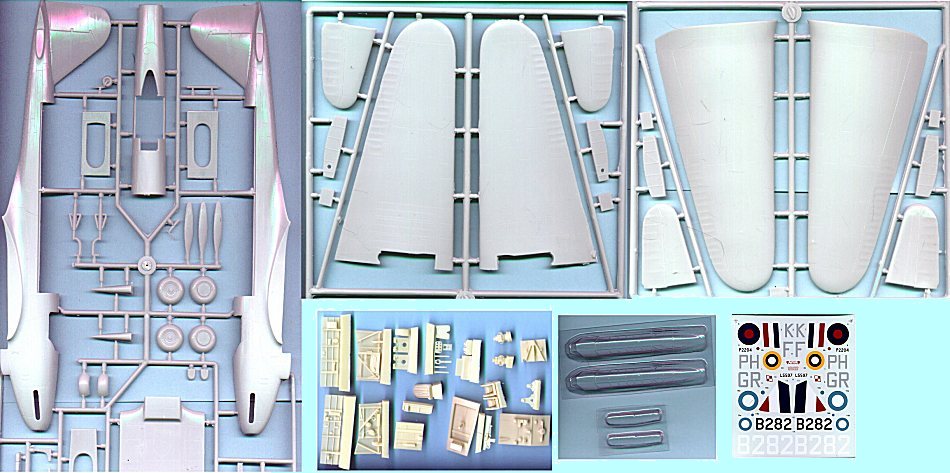
The first thing you realize on opening the box is that this airplane is big for a single-engine multi-seat airplane. In dimensions, it is close to the Mosquito in overall size. The kit comes on two large sprues of light grey plastic, with a large number of ejection pins on the inner surfaces; fortunately, none of these result in sink holes on the nicely-done exterior surfaces. Surface detail consists of petite engraved panel lines and restrained fabric effect on the control surfaces. The area around the cockpit is a separate piece on the fuselage parts, which is due to the plans for further changes in the airplane to the target tug and trainer versions. Two very nice large "greenhouse" canopies are provided in vacuform, along with two sets of the large landing light covers.
The cockpit is provided in nice sharp tan resin. The bombardier's cockpit between the pilot and gunner, which is not visible externally, is not provided. A modeler striving for accuracy will need to cut open the two very small side windows for this area. Full detail is provided for the wheel wells, and the complex landing gear is all there. The four wing bomb bays are closed; a modeler could open these and scratchbuild the simple interior, then use some of the extra 250-lb. bombs left over from Swordfish and Hurricane kits (this is a model that will likely only be purchased and built by we RAF fans, so those parts are to be found in our spares boxes).
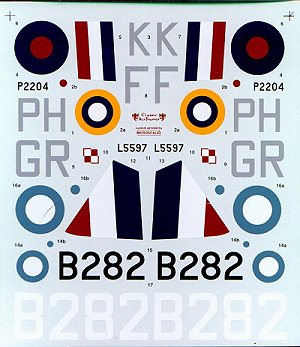
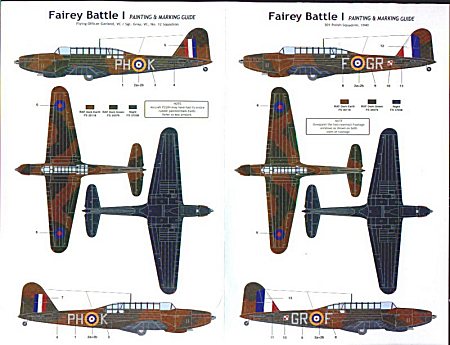
The very nice MicroScale decal sheet provides markings for the 12 Squadron Battle flown by Garland and Gray, a Battle flown by 301 (Polish) Squadron for strikes on the French invasion ports during the Battle of Britain, and an aircraft of 33 Mira Vomvardismou, Royal Hellenic Air Force in 1940.
Like all Classic Airframes kits, this is not a model for the shake 'n' bake assembler. However, it looks to provide the basis of a nice model of an historically-important airplane for the modeler willing to put in the time, effort and talent to create it.