RAF No. 7 Squadron was founded at Farnborough Airfield on 1 May
1914, being the last squadron of the Royal Flying Corps (RFC) to be formed
before the First World War. Having been disbanded and reformed several times
ever since, it is still active today, flying Chinooks. The squadron spent
most of the First World War in observation and interception roles and was
responsible for the first ever interception of an enemy aircraft over
Britain.
During the Interwar years it was re-formed at RAF Bircham Newton on
1 June 1923 to perform heavy night bombing, starting with the Vickers Vimy
and continuing in this role with a succession of types, such as the Vick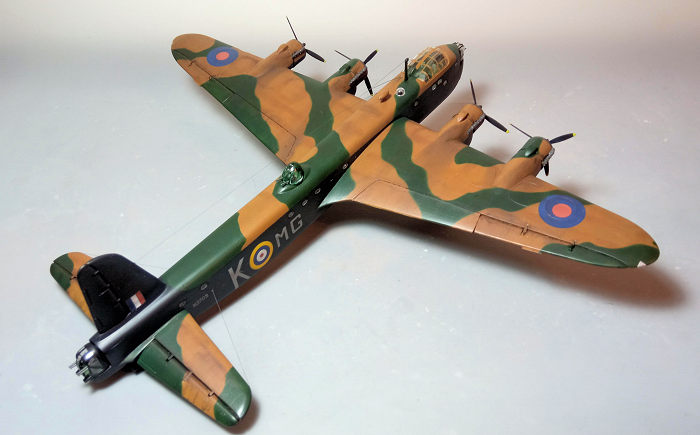 ers
Virginia, the Handley Page Heyford, the Vickers Wellesley, the Armstrong
Whitworth Whitley, the Avro Anson and the Handley Page Hampden, gaining the
reputation of being one of the leading RAF heavy bomber squadrons.
ers
Virginia, the Handley Page Heyford, the Vickers Wellesley, the Armstrong
Whitworth Whitley, the Avro Anson and the Handley Page Hampden, gaining the
reputation of being one of the leading RAF heavy bomber squadrons.
On 1 August 1940 it was equipped with Short Stirlings, becoming the first
RAF squadron to operate four engined bombers during the Second World War and
was re-equipped with the Avro Lancaster from 11 May 1943. In total, the
squadron carried out 5,060 operational sorties with the loss of 165 aircraft
during the war.
Post-war it was successively equipped with Avro Lincolns, Vickers Valiants,
English Electric Canberras and, from 1982 onwards, Chinooks. In March 2020
it was awarded the right to emblazon battle honors on its squadron standard,
recognising its role in the British military intervention in Sierra Leone in
2000 and the War in Afghanistan between 2001 and 2014.
Regarding the Short Stirling itself, despite the not extremely wise design
requirement to limit its wing span to 100ft (which, among others, decisively
compromised its service ceiling), together with the inherent drawbacks of
the dimensionally limited bomb bays (meaning the longer “super” bombs could
not be carried) and, finally, the elongated (aka prone to collapsing) main
landing gear to improve take-offs, it was, especially for those early war
times, a very fine machine: a delight to fly, able to perform its missions
concisely and absorb quite substantial battle damage, making it back home.
 This
is the elderly 1966 Airfix mold that has accompanied us through the
years. By all means a vintage kit, soft in details, but with seemingly
correct basic shapes and with its relatively low parts count promising a
not too complicated build of the iconic four engine bomber.
This
is the elderly 1966 Airfix mold that has accompanied us through the
years. By all means a vintage kit, soft in details, but with seemingly
correct basic shapes and with its relatively low parts count promising a
not too complicated build of the iconic four engine bomber.
The specific kit was the 1992 rebox, bought around 2005 for what seemed
to be a fair price. After spending a good two decades in my Shelf of
Doom (SoD), it was pulled out and built. For a more in-depth look at the
kit’s contents, you may read its preview found
at the MM archives.
I started by attaching all small side windows from the insides of the
fuselage. The side entry door was also glued “closed” and had its
transparency affixed, as well (in retrospect, should I build this kit
again, I would not use those less than stellar looking small windows,
but, rather, replicate them with Clearfix or similar product at end
stages: less effort would be required and way better looks would be
achieved).
I continued by joining the fuselage halves, trapping the two floors, the
cockpit rear bulkhead and the top turret base in between. In order to
facilitate painting, I deviated from the instructions call-ons and
elected not to attach the cockpit bits and, most importantly, all three
turrets, hoping to be able to mount them at end stages with not too much
drama.
Airfix provides the distinctive dual pitots, located under the nose,
molded on a sort of a common base, which is essentially an insert to be
attached to the corresponding underside opening. Since treatment of the
emerging gaps would be challenging with the pitots present, I decided to
remove the latter by carefully cutting them off and attaching the
"remaining" base only, planning to glue the pitots at end stages.
 It
was then subassembly time, with the kit providing a good number of them,
like the main wings, ailerons, horizontal stabilizers, elevators,
rudder, fin and engines, all 2-piece affairs that were happily put
together: subassemblies act as a mojo booster to a number of us,
especially when dealing with more complex kits.
It
was then subassembly time, with the kit providing a good number of them,
like the main wings, ailerons, horizontal stabilizers, elevators,
rudder, fin and engines, all 2-piece affairs that were happily put
together: subassemblies act as a mojo booster to a number of us,
especially when dealing with more complex kits.
The wings, horizontal stabilizers and fin were then attached to the
fuselage. Having decided to go for closed bomb bays, I glued the one
piece main bomb bay door and the twelve wing bomb bay doors in “closed”
position.
Moving to the engines, all four top air inlets exhibited a nasty sink
mark right in their middle. These were treated with multiple
applications of liquefied styrene, then sanded smooth and, finally,
attached in position. The engines were attached to their cowlings at
this time, as well.
Engines had dark blue-gray crankshafts and black cylinders, the latter
heavily dry brushed with silver. Cowling and air inlet innards were
painted black, whereas the cowling lips (essentially the exhaust
collector rings) were painted Testors Burned metal.
Overall fit varied from average (fuselage halves) to challenging (main
wing-to-fuselage joint). All gaps were initially treated with liquefied
styrene, then with “normal” filler. Filling was also necessary to the
various sink marks that were witnessed at various places, mainly at the
aerodynamic surfaces (and I am sure I missed a few).
After a respectable number of filling and sanding rounds, I covered all
windows with liquid mask, blanked all openings with wet tissue,
temporarily attached the engines in position and took the bird to the
paint shop!
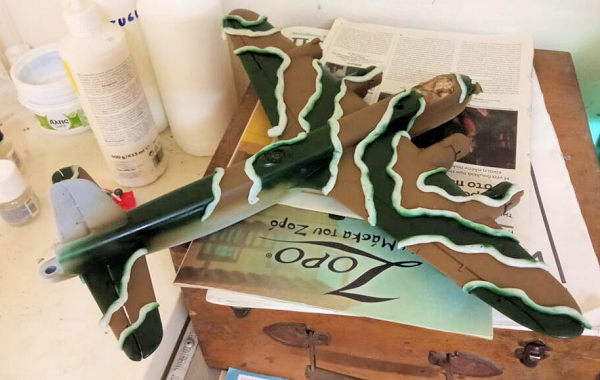
I first applied a coat of Hu29 Dark Earth on all topsides sans the
vertical stabilizer, as it is supposed to be black, which dried to a
really nice shade, but also totally flat and looked sensitive to the
slightest touch (most probably I messed up with the thinners). A coat of
Future strengthened it nicely, though. For the green, I applied Testors
2116 IJN Green (which, a number of you might find too bluish), using
strings of tack and carefully spraying at more or less right angles, in
order to obtain reasonably tight demarcation lines.
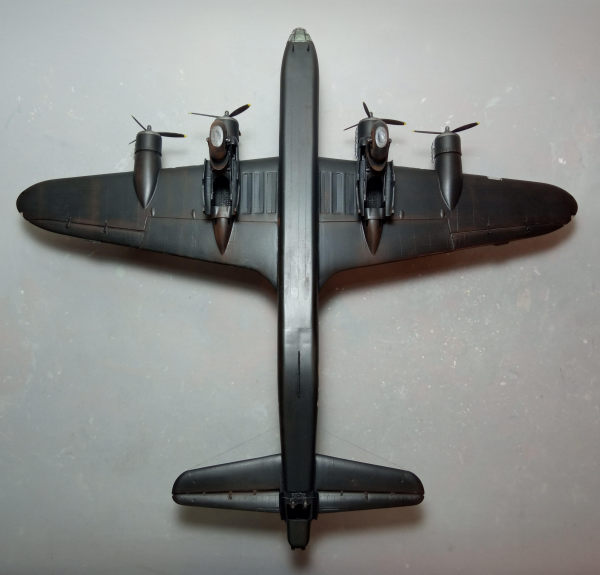
 Upon
feeling satisfied, I masked the top with masking tape and applied Hu33
black at all undersides and the complete vertical stabilizer. Though
tempted to have the landing gear attached, as everything was to be
painted black, together with the undersides, I refrained from doing so,
as the legs would have no chance to survive Yours Truly less than
delicate handling qualities. Upon removing the masks, a coat of Future
prepared the Stirling for decaling.
Upon
feeling satisfied, I masked the top with masking tape and applied Hu33
black at all undersides and the complete vertical stabilizer. Though
tempted to have the landing gear attached, as everything was to be
painted black, together with the undersides, I refrained from doing so,
as the legs would have no chance to survive Yours Truly less than
delicate handling qualities. Upon removing the masks, a coat of Future
prepared the Stirling for decaling.
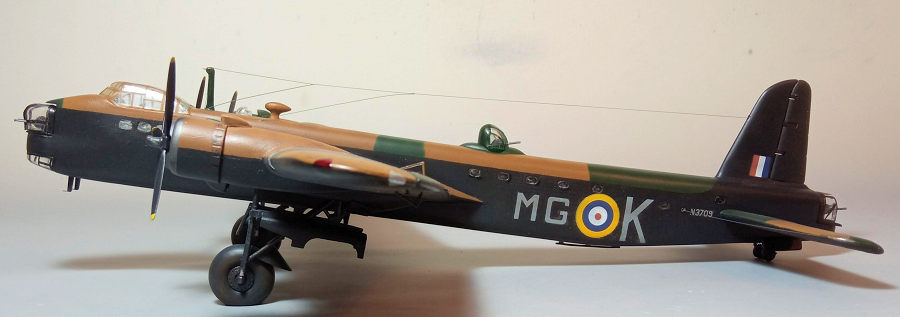
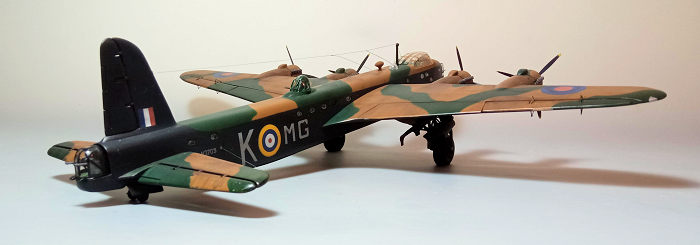
I used the kit decals, in order to represent N3709 MG-K, as it stood in
Cambridgeshire in May 1942, prior to taking part in the so called
"Thousand Bomber Raids", a term used to describe three night bombing
raids performed by the RAF against German cities in summer 1942. The
acceptably printed decals behaved reasonably well, managing to follow
the surface texture with the help of decal softener. Since they were
quite intolerant to repositioning, possibly due to their age, I did my
best to get them right first time. A coat of Future sealed them.
Finalizing the cockpit, I mounted the instrument panel, the control
columns and the seats. Tiny pieces of stretched sprue were attached onto
the central console, to simulate throttle levers. Basic interior color
was Hu78 Interior Green, yokes instrument panel and central console were
black and seat cushions were painted “leather”. The seats received seat
belts made from masking tape, while the various instruments and knobs
were simulated by silver, white, red and yellow paint applied with a
very fine brush. Some black “boxes” were finally replicated by painting
black rectangles on the cockpit sidewalls.
The main landing gear legs were assembled and attached in position,
followed by their side doors and mudguards. Their distinctively shaped
rear doors not only looked simplified, but also their placement per the
instructions had little to do with what was observed in reality. By
consulting a very informative net available video showing the Stirling’s
main gear retraction sequence, I attached those doors at an angle and
adjacent to the gear struts. Finally, brake lines were attached, made
from stretched sprue, whereas pieces of fine mesh were glued to the
bays' top walls, to make them look less plain.
 The
twin tail wheels were also very simplified. Moreover, there was no bay
to speak of, just a shallow flat plane. To make the area more
believable, I partly cut-off the aforementioned area, in order to create
a sort of bay and used stretched sprue pieces to recreate the quite
complex structure that is observed around the tailwheel legs.
The
twin tail wheels were also very simplified. Moreover, there was no bay
to speak of, just a shallow flat plane. To make the area more
believable, I partly cut-off the aforementioned area, in order to create
a sort of bay and used stretched sprue pieces to recreate the quite
complex structure that is observed around the tailwheel legs.
The front wheels were next assembled and after being filed down to look
weighted, were painted and attached to the main legs, with the Stirling
now proudly standing on her feet!
All landing gear parts, including bays, wheel rims and tires were
painted black, which simplified things a lot. Oleos were highlighted
with my fine tip silver pen, while all gear structural details were
lightly dry brushed with silver, to look more realistic.
The right for my version (smaller) exhausts had their ends drilled for
extra realism. After being painted Testors Burned Metal, they were
attached to the cowlings. The props were painted black with yellow tips
and also mounted, with all four completed engines then permanently glued
to the main model. The elevators were finally attached “drooped”.
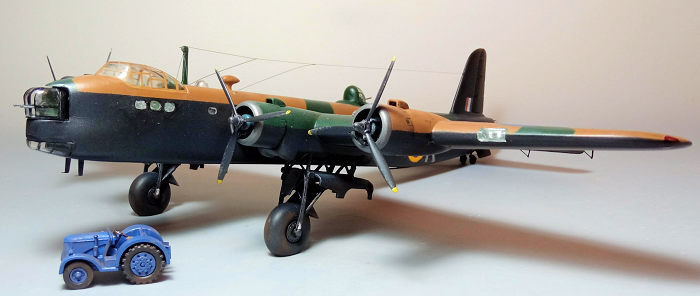
Whereas the kit-supplied bomb carts looked too crude, the tug looked
interesting and I decided to build it. It was painted Hu25 Blue, with
black instrument panel, tires and steering wheel and khaki seat cushion.
It was then time for some weathering. I first applied some black wash to
all moving surfaces’ hinges, followed by dark brown/black dry pastels
application to every area where dirt, grime or engine staining would be
evident. Some silver dry brushing was then applied to the blade leading
edges, with a satin, towards matt coat giving the bird and its tug their
final shade.
The canopy and the bomber’s glazing had their frames hand painted and
were attached in position, as was the astrodome and the port mounted
leading edge landing light (which was, interestingly, extendable in
reality). Fit presented, at areas, notable gaps, which were treated with
white glue. The landing light housing was painted the same Hu78 interior
green and the bulbs (represented as bulges), silver.
 The
top mounted DFloop and the fore mounted antenna mast were attached and
painted fuselage color (though black is a serious and, possibly, more
correct, candidate for the DFloop). The distinctive front mounted
underside pitot bodies were attached, with two tiny pitot tubes made
from stretched sprue attached to their ends and painted gunmetal. A
lookalike tube was also attached to the front of the top mounted antenna
mast.
The
top mounted DFloop and the fore mounted antenna mast were attached and
painted fuselage color (though black is a serious and, possibly, more
correct, candidate for the DFloop). The distinctive front mounted
underside pitot bodies were attached, with two tiny pitot tubes made
from stretched sprue attached to their ends and painted gunmetal. A
lookalike tube was also attached to the front of the top mounted antenna
mast.
The three turrets were assembled, painted and attached in position. This
was an operation easier said than done, since it not only required
judicious shaving of their bases (luckily not visible in the end), but
also the transparencies themselves needed spot-trimming, in order to fit
in an acceptable manner. Since I did not use the gunner figures (which
"doubled" as gun holders, I mounted the guns in small styrene pieces of
circular cross section that were glued to the floors. Turrets innards
were painted the same Hu78 interior green, guns painted gunmetal and
transparencies were hand painted with camo shades.
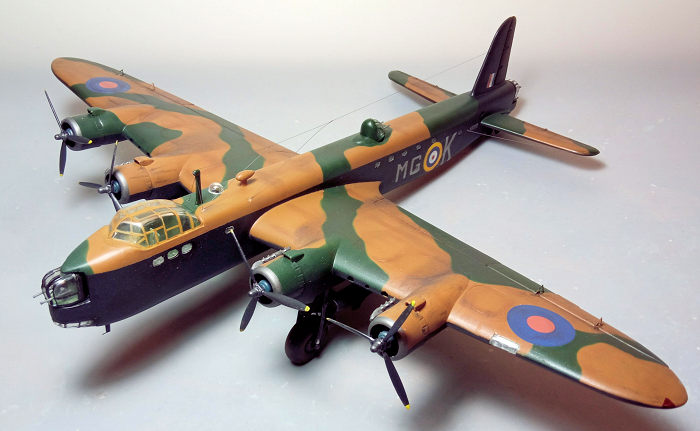
The distinctive main aerial wire that runs from the fin to the front
mast, with all its sub-branches, was fabricated from pieces of stretched
sprue, its pattern taken from net drawings. The two smaller wires that
run from the stabilizers to the fuselage were equally replicated with
stretched sprue.
I decided I couldn't live without the prominent upper and lower elevator
actuating rods, 8 of them in total, so I fabricated from stretched sprue
pieces, attached and accordingly painted. The front located wingtip
lights were rendered with red and green clear paints, whereas the ones
at the rear were replicated with chrome paint, before calling the
charming British bomber (and its little tug) done!
Italeri came in 2014 with its new tool Stirling. Modern
in every respect, with great details and reasonably priced, it,
understandably, supersedes the Airfix kit in every respect. Whereas the
Italeri’s engraved panel lines may look tad deeper than what most of us
would expect and the build itself presents a certain complexity, it is
clearly the way to go if you want a modern, detailed Stirling.
The Airfix offering is vintage down to every respect: though its overall
shape is correct, its details are not up to modern standards, let alone
the fact that, though initially seeming a not too complex build (for a
four engine bomber), its less than stellar fit will present a certain
degree of difficulty.
That said, the Airfix kit is definitely buildable and, with some extra
effort, it will present a respectable result. Since a number of us have
an affection for Vintage Airfix kits and, though not having been reboxed
since 2013, Airfix might pleasantly surprise us with yet another reissue
of this kit in the future. If you happen to own one or find one at a
good price, go on and build it! A charming result will emerge, almost
beyond belief considering the mold’s origins!
Happy modeling!