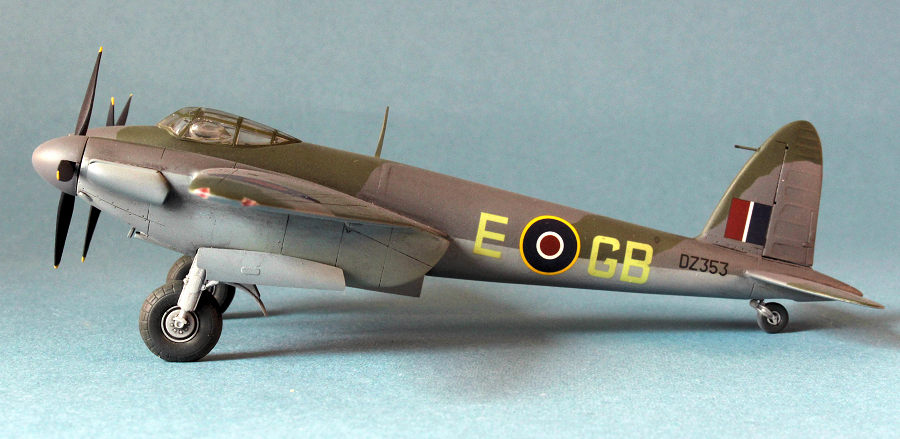
Hasegawa 1/72 Mosquito B.IV
| KIT #: | 51217 |
| PRICE: | $21.00 |
| DECALS: | Two options |
| REVIEWER: | Lee Kolosna |
| NOTES: | Basic kit build |
| HISTORY |
The de Havilland Mosquito was a twin-engine multi-purpose aircraft built mainly from wood. This provided the advantage of substantially reduced weight when compared to similarly-sized British aluminum aircraft like the Blenheim and Beaufort and therefore drastically improved bomb load capacity and overall speed.
The airframe proved remarkably versatile. In addition to the medium bomber role, it served as a photo-reconnaissance aircraft, day and night fighter, and in the maritime strike, target tug, and clandestine transport roles. Nearly 7,800 Mosquitos were built and served with numerous air forces during the war and afterwards.
 The
Mark IV entered service in May 1942 as the bomber variant of the Mosquito, with
a crew of two (pilot and bomb aimer). 273 were produced with 54 of them
modified with bulged bomb bay doors to allow the carriage of the 4,000 lb.
“Cookie” bomb then coming on-line. The bomber variant was extremely fast for
the type with a 265 MPH cruising speed (compared to around 200 MPH for a
Lancaster or Halifax on night missions), with a top speed of 380 MPH. German
night fighters found it very difficult to intercept the speedy Mosquito and
losses for air-to-air intercepts were very low compared to the lumbering
four-engine “Heavies”.
The
Mark IV entered service in May 1942 as the bomber variant of the Mosquito, with
a crew of two (pilot and bomb aimer). 273 were produced with 54 of them
modified with bulged bomb bay doors to allow the carriage of the 4,000 lb.
“Cookie” bomb then coming on-line. The bomber variant was extremely fast for
the type with a 265 MPH cruising speed (compared to around 200 MPH for a
Lancaster or Halifax on night missions), with a top speed of 380 MPH. German
night fighters found it very difficult to intercept the speedy Mosquito and
losses for air-to-air intercepts were very low compared to the lumbering
four-engine “Heavies”.
The bomber variants of the Mosquito continued on with progressively more powerful two-stage supercharged engines that made the aircraft even faster, the B Mk. IX, B Mk. XVI, B Mk. XX, and finally the B Mk. 35 (I guess the Brits realized that Roman numerals tend to confuse everybody and switched over to Arabic number designations). The final B Mk. 35 was blazingly fast for a piston-engine bomber, with a top speed of 422 MPH.
Mosquitos were used extensively by Bomber Command for pathfinder duties, flying in the dark of night nearly impervious to enemy interception and laying out flares and bombs in specific patterns on the target to guide the incoming heavy bomber streams as to where to aim their bombs as they arrived a few minutes later.
| THE KIT |
Hasegawa produced a very simple kit in 1999 with only 76 parts. There is an option to portray the bomb bay doors open or closed, and an extra set of paddle-blade propellers along with the “toothpick” type typically seen on most Mk. IVs are included. Four 500 lb. bombs are provided. Interior detail is very basic with a decal provided for the instrument panel. The kit is considered generally accurate in outline, more so than the Tamiya 1/72 scale offerings, if a bit less detailed.
 Decals are
for two aircraft, one in Ocean Grey/Dark Green over Night, and another in Ocean
Grey/Dark Green over Medium Sea Grey. White markings on the decal sheet are
printed in true white, and I found the decals to be of high quality with no
problems encountered with application.
Decals are
for two aircraft, one in Ocean Grey/Dark Green over Night, and another in Ocean
Grey/Dark Green over Medium Sea Grey. White markings on the decal sheet are
printed in true white, and I found the decals to be of high quality with no
problems encountered with application.
The kit has one major issue and that is with the canopy, which has a slightly bulged profile that is nearly impossible to replicate with conventional plastic injection-molding processes. Hasegawa engineered it in two pieces, split down the middle. Even with careful gluing of the two pieces together, there is a very visible seam to contend with.
In case you hadn’t noticed, I like bombers. Therefore, I’m drawn to the Mosquito as a bomber rather than the more popular fighter version. Hasegawa’s Mk. VI fighter variant has a single piece canopy that avoids the main issue with this Mk. IV kit. There were vacuum-formed aftermarket replacements for the canopy available at one time, but I wasn’t able to find one so I chugged along knowing that I would have to work with what was in the kit.
| CONSTRUCTION |
The interior areas were painted with Vallejo Model Air Interior Grey-Green. The leather seat pads were painted dark brown. I cut out thin strips of paper and painted them tan to depict seat harnesses. Control boxes were painted flat black and the kit decal was applied to the instrument panel piece. I didn’t spend a whole lot of time on the interior because almost nothing can be seen inside once the fuselage is closed up.
I glued the fuselage halves together, added the front fuselage halves, and filled all the seams with CA glue. These were sanded smooth, followed by a coat of Mr. Surfacer 500 to fill any micro-holes that were not filled by the cyanoacrylate glue. Another sanding and the fuselage was done.
 I
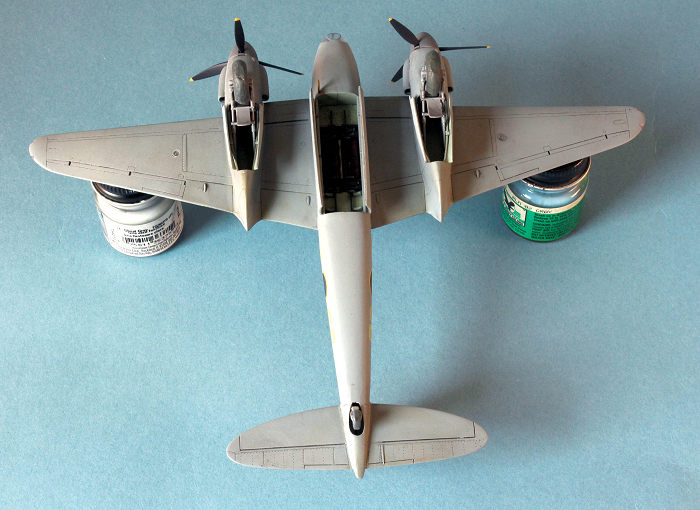
did not use the bombs but elected to depict the bomb bay doors in the open
position. This involves cutting the door piece in half. The wings have a very
classic assembly design with a top and a bottom, an insert in the wheel wells,
and left and right pieces for each engine cowl. I did not install the landing
gear at this time. The seams were filled with CA glue.
I
did not use the bombs but elected to depict the bomb bay doors in the open
position. This involves cutting the door piece in half. The wings have a very
classic assembly design with a top and a bottom, an insert in the wheel wells,
and left and right pieces for each engine cowl. I did not install the landing
gear at this time. The seams were filled with CA glue.
I put a tiny blob of red paint and green paint on the wingtip navigation light recesses to depict the colored bulbs, and then added the clear light covers. The gaps around these were filled with CA glue and sanded down to the contour of the wingtip. Novus Plastic Polish #2 was applied to bring the clear pieces back to clarity.
The wings and horizontal stabilizers were glued in and the seams at the roots were filled with CA glue and sanded smooth. I glued on the nose canopy and filled the seam around it to make a smooth transition to the surrounding fuselage.
This model went together exceedingly quickly due to the low parts count and simple engineering. I sanded smooth all the stray marks introduced in the seam filling process and washed the model with mild dish soap and rinsed it with clean water. The model was allowed to air dry in preparation for paint. There are essentially no panel lines so re-scribing wasn’t required.
| COLORS & MARKINGS |
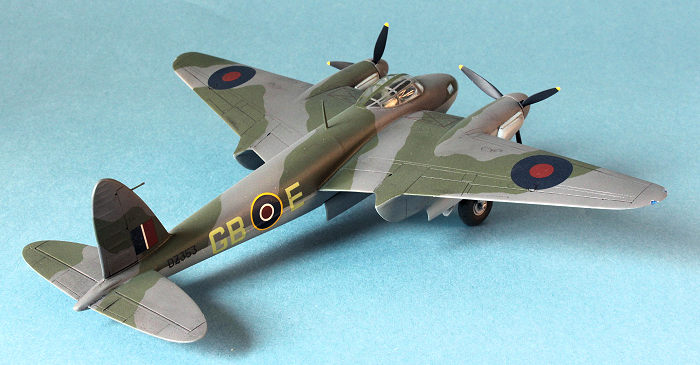
I chose to use the kit decals for a Mosquito B. IV, Air Ministry number DZ353, of 105 Squadron as seen in photographs taken in December 1942. I first primed the model with Vallejo Grey Surface Primer. The undersides were sprayed with Vallejo Model Air Medium Sea Grey. When dry, I masked off the upper camouflage demarcation lines and sprayed Polly Scale Ocean Gray. I used drafting tape to lay out the disruptive camouflage pattern and sprayed Vallejo US Forest Green FS34079, which is a reasonable approximation for RAF Dark Green. The masking was removed and attention was given to painting the propellers with 4 scale inch yellow tips, flat black prop blades, and an Ocean Grey spinner.
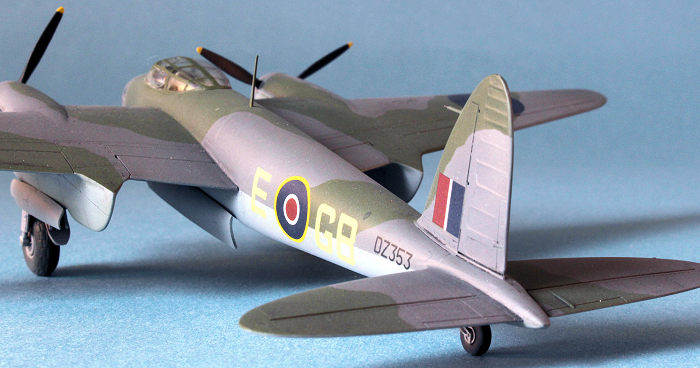 The
landing gear was painted with Alclad II Lacquer Aluminum. The wheels were also
Aluminum, and the tires were painted with Vallejo Model Air Tire Black. A coat
of Future Floor polish prepared the model for decals.
The
landing gear was painted with Alclad II Lacquer Aluminum. The wheels were also
Aluminum, and the tires were painted with Vallejo Model Air Tire Black. A coat
of Future Floor polish prepared the model for decals.
The kit decals went on with no fuss whatsoever. I had a little silvering on the “no walk” area on top of the radiators, which was mitigated with an application of Micro Sol. Another coat of Future sealed in the decals.
I applied a pre-made enamel dark wash by MIG Productions to dirty up the wheel wells and bomb bay and to provide more definition to the control surfaces. A final coat of Testors Acryl Flat Clear sealed in the wash. I sprayed a thinned coat of Polly Scale Mud around the undercarriage to depict dirt that had splashed up from the grass fields that Mosquitos frequently operated from.
| FINAL CONSTRUCTION |
The canopy halves were glued together, with the resultant expected visible seam. I filled the seam by carefully applying Mr. Surfacer 500 with a toothpick along the seam and then using sandpaper wrapped around a popsicle stick I sanded the seam smooth. It filled the seam nicely, but the width of the sandpaper track is about twice as wide as it should be. Oh well. I masked off the canopy frames, painted the dark grey and dark green areas, and carefully glued the canopy into place.
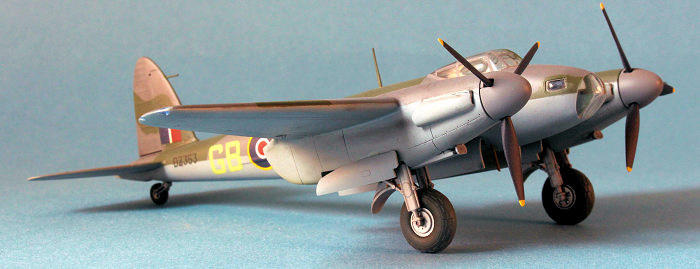
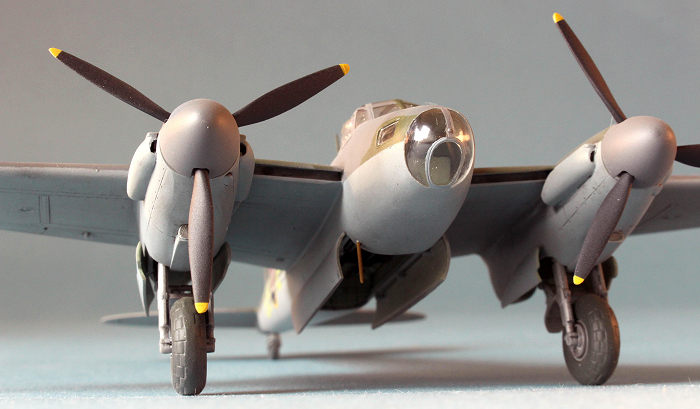 The
propellers went into the spinners, the landing gear were glued inside the
nacelles, the wheels inserted inside the struts of the landing gear, and the
antenna mast and pitot tube glued into their respective holes. There are
screens in front of the air intakes which are provided as separate solid
pieces. This is not accurate, but too tiny in 1/72 scale to worry about. I
managed to lose one to the Carpet Monster under my workbench, so I cut out a
piece of sheet styrene and sanded it to the proper shape as a replacement.
The
propellers went into the spinners, the landing gear were glued inside the
nacelles, the wheels inserted inside the struts of the landing gear, and the
antenna mast and pitot tube glued into their respective holes. There are
screens in front of the air intakes which are provided as separate solid
pieces. This is not accurate, but too tiny in 1/72 scale to worry about. I
managed to lose one to the Carpet Monster under my workbench, so I cut out a
piece of sheet styrene and sanded it to the proper shape as a replacement.
Weathering was limited to prominent exhaust staining on the sides of each nacelle, which I made with numerous applications of medium gray chalk pastel dust until I was satisfied with the look.
The images of the airplane I modeled show two aerial wires extending from the aerial post back to the leading edge of the vertical tail fin. There is no way that the flimsy aerial post provided in the kit was going to be strong enough to mount two wires made nylon thread, so I elected not to include the wires at all.
| CONCLUSIONS |
This model went together faster than almost any kit that I’ve ever built. It took only twenty-two hours of effort and the results are just fine, except for that too-wide window frame right down the centerline of the canopy. It’s a shame because this is a delightful kit to work with, only to be marred by this one highly visible design choice by Hasegawa. If you have an alternate canopy from an old Airfix kit or can find one of those Falcon vacu-formed pieces, then this one major issue can be addressed without detracting from the rest of the model’s ease of assembly, accurate outline, and depiction of the bomber variant of one of the most significant aircraft of World War II.
Airfix has a new-tool B Mk. XVI kit which provides the canopy with a single piece of clear plastic. It is better than this twenty-seven-year-old Hasegawa kit with more detail in the bomb bay, wheel wells, and interior, but it does have an issue with how Airfix molded the bulged bomb bay underneath the rear fuselage, mistakenly modeling a TT.35 with target tug features rather than the proper bomber configuration. It’s not a terribly difficult thing to fix and will be described in my review of that kit.
24 September 2026
Copyright ModelingMadness.com.
All rights reserved. No reproduction in part or in whole without express
permission from the editor. If you would like your product reviewed fairly and fairly quickly, please
contact the editor
or see other details in the
Note to
Contributors. Back to the Main Page
Back to the Review
Index Page
Back to the Previews Index Page