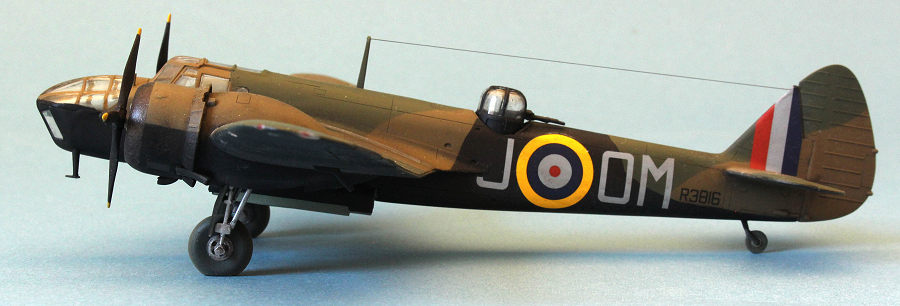
Airfix 1/72 Blenheim IV
| KIT #: | A04023 |
| PRICE: | $34.00 |
| DECALS: | Two options |
| REVIEWER: | Lee Kolosna |
| NOTES: | Basic kit build |
| HISTORY |
The Royal Air Force went to war in 1939 with five bomber aircraft: the Battle, the Whitley, the Wellington, the Hampden, and the Blenheim. All were built to pre-war requirements which they more or less satisfied, but initial combat encounters using these aircraft revealed that four of them -- Battle, Hampden, Whitley, and Blenheim -- were essentially obsolete. The Battle was withdrawn from operations almost immediately, while the Hampden, Whitley, and Blenheim continued serving until newer, more modern designs could come on line in 1942. Only the Wellington continued serving throughout the war, although in declining numbers as the Lancaster and Halifax assumed the top role in Bomber Command.
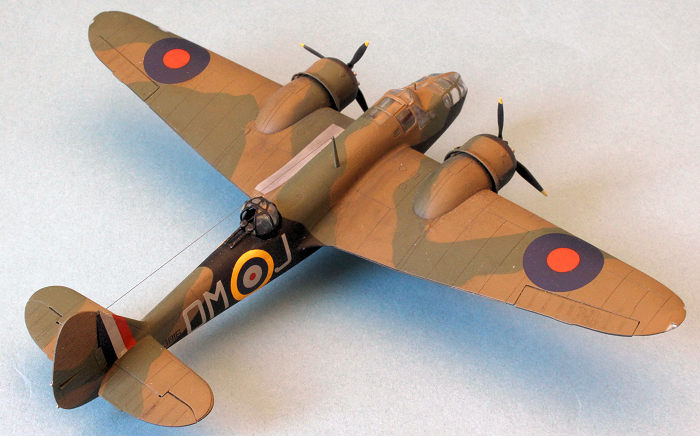 Blenheims
were deployed to France to assist French forces in a vain attempt to stop the
German advance beginning in May 1940. The loss rate was high and the bombers
were recalled back to Great Britain. The encounters with German fighters
revealed that the Blenheim was inadequately armed defensively and much too
slow. Still, attacks were pressed on from England in the second half of 1940
against targets in now-occupied France which saw the Blenheims continuing to get
mauled by 100 MPH faster Bf 109s and Bf 110s. In some missions, the loss rate
was 100%. The bravery of the crews of these Blenheims is without question, as
they faced near-certain death every time they went out.
Blenheims
were deployed to France to assist French forces in a vain attempt to stop the
German advance beginning in May 1940. The loss rate was high and the bombers
were recalled back to Great Britain. The encounters with German fighters
revealed that the Blenheim was inadequately armed defensively and much too
slow. Still, attacks were pressed on from England in the second half of 1940
against targets in now-occupied France which saw the Blenheims continuing to get
mauled by 100 MPH faster Bf 109s and Bf 110s. In some missions, the loss rate
was 100%. The bravery of the crews of these Blenheims is without question, as
they faced near-certain death every time they went out.
Short of desperately needed attack aircraft, Blenheims were deployed to the Mediterranean and Middle East starting in 1941 and then onto Southeast Asia for battle against the Japanese in 1942. In these theatres of operation, the Blenheim performed fairly well given the large expanses of area involved with a somewhat lower chance of being intercepted by German, Italian, and Japanese fighters. By 1943 the type had been withdrawn from combat operations, replaced by more capable Beauforts, Bostons, and Mitchells.
The Mark IV had an extended nose section for use by the bomb aimer, along with upgraded self-sealing fuel tanks, crew amour, a dual gun mount for the dorsal turret, and slightly more powerful radial engines. Fairchild Aircraft in Canada built a Mark IV-based design that was designated the Bolingbroke. Nearly all Blenheims on display in museums today are actually Bolingbrokes or have a combination of Blenheim and Bolingbroke components in them.
| THE KIT |
This is another new-tool kit from Airfix, first released as a Mark I in 2014 with a fighter variant Mark IVF coming one year later and this bomber Mark IV the year following. Like all modern Airfix kits, the model has recessed panel lines, thin clear pieces, very accurate outlines, and excellent fit. Cartograf prints the decals, so they are of top quality. This kit has two decal options, one for a Free French aircraft serving in Libya in 1941 with Dark Earth and Middle Stone disruptive camouflage over Azure Blue and other a Scotland-based RAF aircraft with a Dark Earth and Dark Green over Night paint scheme. The French aircraft features the awkward rearward firing gun fitted to it in the chin position, a defensive feature that was most likely useless in combat.
There are a few issues with this kit, mostly caused by the fact that the museum aircraft that Airfix measured to gather dimension and details are actually Bolingbrokes:
· The upper nacelles are wider and fatter in profile over the top of the wing, a feature of a Bolingbroke rather than the thinner Blenheim nacelles. This is a very difficult thing to fix, requiring a lot of work for very little reward.
· The engine exhaust collectors which make up the leading edges of the cowling have a small air inlet that fed into the cockpit heating system of a Bolingbroke, but are not present in a Blenheim. This is easily corrected by snipping off the inlets and sanding down the area to blend it in with the surrounding area.
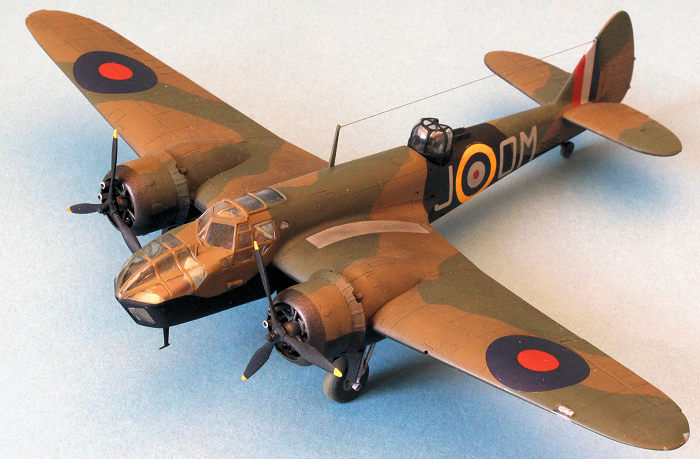 · The control surface rib detail is a bit too prominently
molded. I sanded those pieces down to reduce their height.
· The control surface rib detail is a bit too prominently
molded. I sanded those pieces down to reduce their height.
· The wingtip position lights are molded solid with the wing pieces. I cut mine out, inserted pieces of clear sprue in the notches, and sanded the pieces down to the proper wingtip shape.
. The kit painting instructions have an error for the RAF aircraft R3816 regarding the continuation of the Dark Green camouflage pattern extending onto the starboard side of the nose section. The side profile shows this area as being painted Dark Earth, but period photographs of Blenheims show this to be Dark Green.
Flaps and the landing gear can be positioned up or down. Two bombs are provided. The bomb bay doors can be depicted either open or closed. The control surfaces are separate pieces so some deflection of the ailerons, elevators, and rudder can be made if desired. There is a figure provided for the pilot, but not for the bomb aimer or gunner. Interior detail is basic with seats, instrument consoles, and flight controls. There is a decal for the instrument panel
We have another good, solid, reasonably detailed kit of an airplane that courageously carried the fight for the RAF in the first half of World War II, replacing the 1960s-era Blenheim kits in Airfix’s catalog.
| CONSTRUCTION |
The interior areas of the fuselage, bomb bay, and wheel wells were painted with Vallejo Model Air Interior Grey-Green. The leather seat pads were painted with Testors Acryl Leather. I cut out thin strips of paper and painted them tan to depict seat harnesses. Control boxes were painted flat black and the kit decal was applied to the instrument panel piece. A dark wash was applied to deepen the shadows and some dry-brushing with a light gray done to bring out the highlights of the interior parts.
The construction process is a little different than most models in that the wings are assembled first. I looked at many period photos of Blenheims and didn’t see any that showed the flaps down when at rest, so I glued the separate flap pieces in the retracted position. As mentioned above, the wingtip position lights are molded solid with just outlines to indicate their presence. After gluing in a spar and the top and bottom wing pieces together, I cut out the notches in the wingtips and glued in pieces cut from a clear sprue. These were sanded down to the shape of the wingtip and polished back to clarity with a nail buffer and Novus Plastic Polish #2.
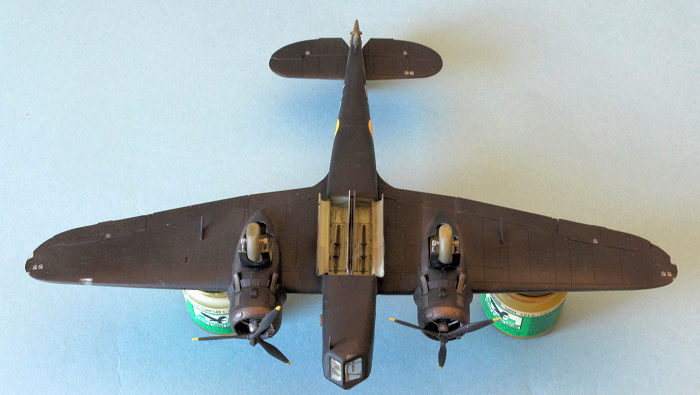 I assembled
the rear fuselage pieces and glued them to the wing assembly. The forward
fuselage section containing the cockpit and bomb aimer’s compartment was glued
together and mated with the wing/rear fuselage sections.
I assembled
the rear fuselage pieces and glued them to the wing assembly. The forward
fuselage section containing the cockpit and bomb aimer’s compartment was glued
together and mated with the wing/rear fuselage sections.
Seams in the wings and fuselage were filled with CA glue and sanded down, followed by a coat of Mr. Surfacer 500 to fill any micro-holes that were not filled by the cyanoacrylate glue. This too was sanded smooth.
The four clear parts that make up the extensive cockpit and forward greenhouse were glued onto the front of the aircraft. There were gaps between the pieces, and gaps between the clear parts and the surrounding fuselage sides. I very carefully filled these seams with CA glue and sanded just the seams, protecting the clear panes with tape to ensure that they were not marred by the process.
The two engines were assembled and painted with Alclad Jet Exhaust, which is a dark metallic color. The cowlings are rather complex with nine pieces each to be assembled around the engines. As mentioned in the list of issues above, there are small intake tubes directly in front of the exhaust ports that need to be removed and sanded flush. I used CA glue to fill the gaps between the pieces of cowling that were glued together. The completed engine and cowling assemblies went on the front of the nacelles.
The landing gear were next. There are trusses up inside the gear wells, which are glued to the typical British dual main strut arrangement, followed with a set of retraction struts. After all the parts were glued and dried, I painted the landing gear aluminum overall. Airfix recommends flat black, but period photos seem to indicate that aluminum is correct, even on aircraft that had Night undersides. I glued the landing gear into their spots in the engine nacelles and masked them off while I painted the underside camouflage color.
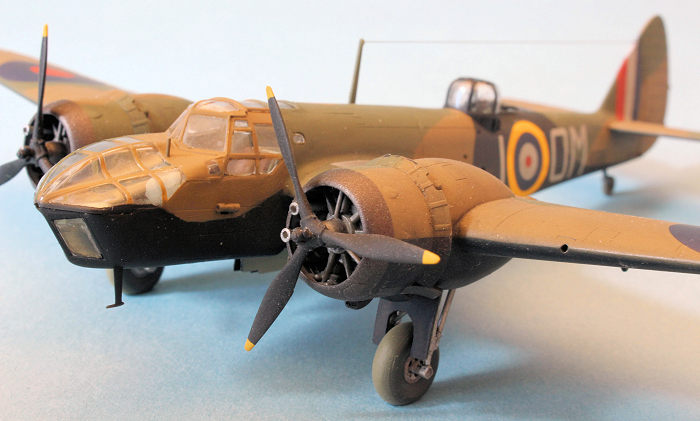 The bomb bay doors are
surprisingly complicated, built up from eight individual pieces. I had to do
some seam-filling here with the front and back door sections to ensure that they
appear to be made of one long piece each. These were painted with Interior
Grey-Green on the insides, and flat black on the outside.
The bomb bay doors are
surprisingly complicated, built up from eight individual pieces. I had to do
some seam-filling here with the front and back door sections to ensure that they
appear to be made of one long piece each. These were painted with Interior
Grey-Green on the insides, and flat black on the outside.
I chose to finish my model with the RAF markings, so the backward-firing chin turret was left out as it was not fitted to this particular aircraft. The upper turret interior was painted with Vallejo Interior Grey-Green and the dual machines guns painted flat black and dry-brushed with aluminum.
I glued in the ailerons, elevators, and rudder in the neutral position. Referring to period photographs, about half the time a Blenheim at rest would have the elevators deflected downwards, so I wasn’t wrong with the way I chose to pose mine, but in retrospect I would have probably glued the elevators on drooping down a bit, if only for visual interest.
I looked for any stray sanding scratches on the model and removed them, restored missing panel lines with a scriber, and washed the model with warm soapy water to remove any oils and sanding dust left from all the handling during construction. The model was rinsed with clean water and allowed to air dry in preparation for the painting phase.
| COLORS & MARKINGS |
The kit decals for a Blenheim IV, Air Ministry number R3816, of No. 107 Squadron based at RAF Leuchars in Fife, Scotland in March 1941 were selected. I masked off all the clear parts in the wings and fuselage with Tamiya tape. I primed the model with Vallejo Black Surface Primer. This paint is not quite pure black and therefore does a decent job of representing underside Night. When dry, I masked off the upper camouflage demarcation lines and sprayed Vallejo BS Dark Earth. I used drafting tape to lay out the disruptive camouflage pattern and sprayed Vallejo US Forest Green FS34079, which is a reasonable approximation for RAF Dark Green. I wasn’t quite sure how the demarcation line for the nose section lined up as Airfix’s camouflage plan shows some Dark Green beginning on the upper starboard side in front of the windscreen but the side view only shows that area in Dark Earth. I had to consult Paul Lucas’ seminal reference book listed below to make the determination that Airfix’s painting guide made a mistake in this small detail. Airfix also directs the modeler to paint an unusual band of Night rising up in the middle fuselage area, incorporating the turret. I could not verify this scheme on any other Blenheim but I eventually decided to follow the kit painting guide, figuring that Airfix had some photographic evidence for this non-standard pattern.
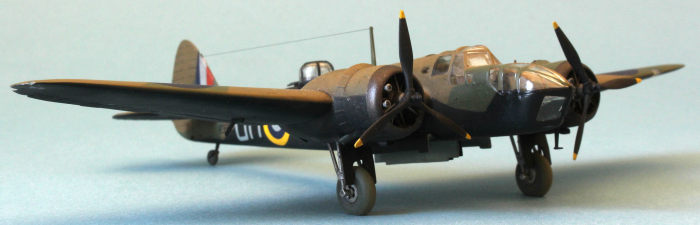 The masking was removed
and attention was given to painting the propellers with 4 scale inch yellow tips
and flat black prop blades. I masked off the exhaust collectors on the front of
the cowlings and painted them with Tamiya Bronze. This was one of the first
radial engine British aircraft that I had built at the time and later subjects
caused me to become more dubious of this ubiquitous color recommendation made in
model kit painting guides. In fact, there is a wide variety of colors that
these collectors can have, ranging from flat black to patchy red-brown to
aluminum to copper-colored. If I were to do it again, I would have most likely
used a dark aluminum based on having studied hundreds of photos of Blenheims.
The masking was removed
and attention was given to painting the propellers with 4 scale inch yellow tips
and flat black prop blades. I masked off the exhaust collectors on the front of
the cowlings and painted them with Tamiya Bronze. This was one of the first
radial engine British aircraft that I had built at the time and later subjects
caused me to become more dubious of this ubiquitous color recommendation made in
model kit painting guides. In fact, there is a wide variety of colors that
these collectors can have, ranging from flat black to patchy red-brown to
aluminum to copper-colored. If I were to do it again, I would have most likely
used a dark aluminum based on having studied hundreds of photos of Blenheims.
I then painted the extensive framing of the bomb aimer’s and cockpit glazing using my north-south/east-west method of masking and spraying all the frames in one direction before proceeding to the next direction. The turret dome frames were painted similarly.
Having exhausted my supply of Future Floor Polish, I tried Alclad’s Gloss Klear Kote as a gloss sealer in preparation for decal application. This is a lacquer paint and it disappointed me in that it was still slightly tacky to the touch three days later. I pressed on anyway. This occurred to me again on another model, so I no longer use this product and have come to use Quick Shine Multi-Surface Floor Finish as a very satisfactory replacement for the now out-of-production Future.
The kit decals went on with no fuss whatsoever, which is what I have come to expect from Cartograf products.
I applied a pre-made enamel dark wash by MIG Productions to dirty up the wheel wells, bomb bay, and in all panel lines. A final coat of Testors Acryl Flat Clear sealed in the wash.
The tires were painted with Vallejo Tire Black and sprayed around their circumference with highly-thinned Polly Scale Mud. I added areas of paint chipping in the wing root area using a silver color pencil. Exhaust stains were added to both sides of the lower nacelles with dark gray chalk pastel dust applied with a brush.
| FINAL CONSTRUCTION |
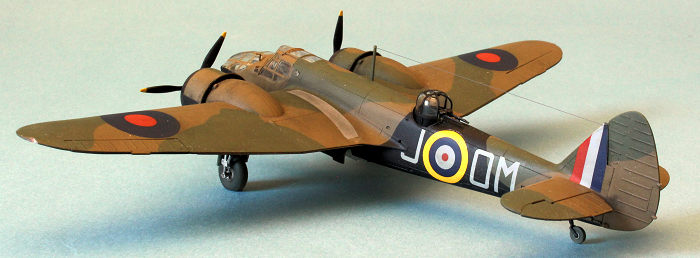 I covered
the wheels and tires with tape to prevent them from being scraped up as I
inserted them between the struts. The wheel well and bomb bay doors were glued
on with CA glue. The tail wheel was glued into its hole. The turret was
dropped into position without any glue. The aerial mast was glued on and I
added an aerial wire made from nylon “invisible” thread.
I covered
the wheels and tires with tape to prevent them from being scraped up as I
inserted them between the struts. The wheel well and bomb bay doors were glued
on with CA glue. The tail wheel was glued into its hole. The turret was
dropped into position without any glue. The aerial mast was glued on and I
added an aerial wire made from nylon “invisible” thread.
There are cylindrical air intakes of some sort inside each cowling so I painted them aluminum and carefully glued them in. The propellers were popped onto their respective shafts and the pitot tube added underneath the nose. With that final step, the model was done.
| CONCLUSIONS |
This new-tool Airfix kit was as delightful to work on as others that I have built. It provides good-enough detail, accurate dimensions, and only a few relatively minor issues need to be addressed to make for a very good model of an important aircraft.
| REFERENCES |
Lucas, Paul. The Battle for Britain – RAF May to October 1940, Camouflage and Markings #2
6 July 2026
Copyright ModelingMadness.com. All rights reserved. No reproduction in part or in whole without express permission from the editor.
If you would like your product reviewed fairly and fairly quickly, please contact the editor or see other details in the Note to Contributors.