Airfix 1/72 Hampden I
|
KIT #: |
A04011 |
|
PRICE: |
$ |
|
DECALS: |
One option |
|
REVIEWER: |
Ryan Grosswiler |
|
NOTES: |
Do a model then do it again! |
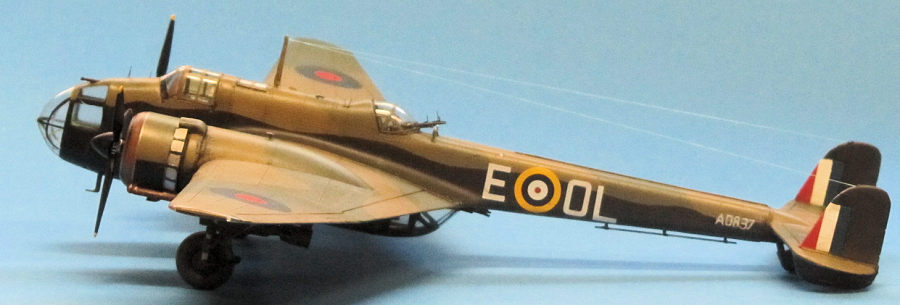
Named for the 17th-century nobleman who stood up to King Charles'
oppressive taxation policies, setting off the English Civil War, the
Handley-Page Hampden stemmed from a 1932 RAF specification (which also
produced the Wellington) for a new generation of bombers with much higher
performance than the Harts, Heyfords, and Sidestrands in service at the
time. Compared to these open-cockpit biplanes it was replacing the Hampden
must have looked like a product of science fiction when the prototype was
rolled out for its maiden flight in 1936. The first couple of aircraft
sported an angular and very ugly glazed bombardier's position, but this was
soon given over to a much more pleasing rounded nose.
Intended to be in a class of its own, able to look after itself
unescorted in daylight raids deep into the enemy heartland, the design was
given a crew of four; pilot, bombardier-nav, and two wireless
operator/gunners facing aft at the root of the tail boom--all of them
squeezed into a very narrow fuselage that earned the type a variety of
nicknames was built in halves to ease construction. Touring the Handley-Page
factory, North American's "Dutch" Kindelberger would apply many of the
techniques he observed to his own P-51 Mustang. While infamously cramped,
the cockpit did give the pilot a great view any direction he could turn his
head and the aircraft was actually quite maneuverable. As one pilot put it,
"a magnificent
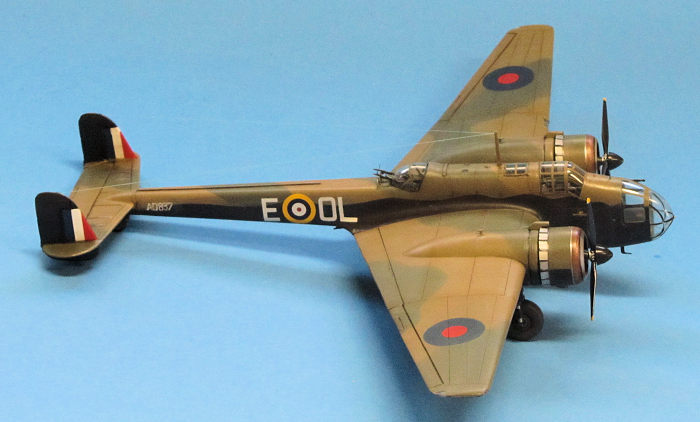 aircraft to fly, a miserable aircraft to fly in." The
manufacturer advertised it as a "fighting bomber" and gave the pilot a
forward-firing gun, implying that the bomber would actually pursue and shoot
down enemy aircraft.
When war came reality, of course, turned out quite differently.
Like all RAF twin-engined bombers its huge losses stemmed less from any flaw
in the design but in a tragic combination of fervent hope and bad tactics
that themselves originated in the very optimistic assessments of prewar
planners regarding their bombers' survivability in hostile airspace. A
maneuverable, armed bomber maneuverable relative to other bombers did not in
fact imply 'able to engage in combat with fighters'. Worse, these
assessments had been formulated in that strange, brief period of the mid-30s
that the new monoplane bombers were entering service while slower biplane
fighters were still the mainstay alongside. In a very short time afterward
fighter technology had caught up and not only were these bombers easily
caught but enemy fighters were not dissuaded in the slightest by the
defensive fire of a rifle-caliber machine gun or two. It was a rising
squadron commander and Hampden pilot named Guy Gibson who would gain his
initial experience on this platform, dropping the RAF's first 2000-lb. bomb
from the type and later flying it to win the Victoria Cross in part for his
attack on the battleship Tirpitz.
After service in Bomber Command's night raids against the Reich the
Hampden passed to other duties at the end of 1942 as the RAF began shifting
to four-engined equipment with the Lancaster and Halifax and got better at
what they were doing. Unlike the Wellington, or even the Whitley, the
extremist design did not have much adaptability and faded away quickly,
lingering for a while in training squadrons. It soldiered on for another
year or two dropping torpedoes with Coastal Command and the Soviets who were
given about a dozen. Despite being in wide service and operated by over 25
wartime squadrons, the Hampden seems to have not really distinguished itself
in any particular way or operation, except by being one of the main types
the pre-war RAF learned
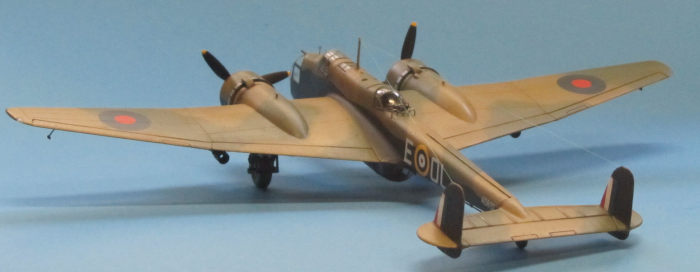 hard lessons about night flight, long-distance
navigation, and strategic aerial offensives, none of these in which the
force was highly skilled before the war.
The design's inherent inflexibility is referenced in the fact
that it only saw service in one version (aside from the abortive Napier-engined
Hereford), with no modifications worthy of note besides wedging in one more
gun at each rearward-facing station. While a fine-handling aircraft with
good bomb load, the Hampden was cursed by excessive crew size, that
human-factors nightmare fuselage width which also prevented the easy
installation of a defensive gun turret, a wing which would not fly any
faster even with a more powerful set of engines, and the fond belief that a
bomber with such pathetic defensive armament could survive in daylight raids
deep over enemy territory. For the record, the concept of a fast,
invulnerable bomber operating on its own did finally work out in the form of
the deHavilland Mosquito. And the F-117. But this work is still always best
done at night.
No Hampdens were preserved for posterity, but there are at least
three wreck-restoration projects in work including a remarkably
comprehensive one by the RAF Museum in Cosford.
Mine was an old grey box edition, molded in jet black and probably an
original 1968 issue. Typical fare for the period; lots of raised detail in
the form of rivets and panel lines--though these are all quite fine. No
interior to speak of besides some floors and four bland crew figures.
Engines are a little lame, just a set of skinny cylinders shall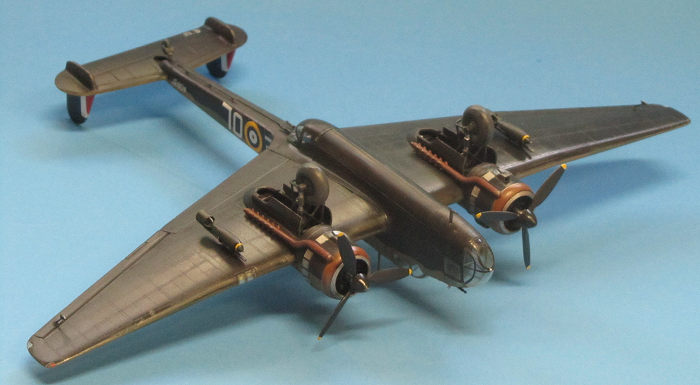 owly molded
into a backer plate. Landing gear, wheels, and guns are all by contrast very
nicely molded and detailed--even if the guns are a tad overscale. Separate
parts allow the bomb bay doors to be posed open or closed.
Clear parts are thick and full of distortion. Falcon comes to the
rescue with a comprehensive vacuform replacement in Clear-Vax Set #8. AZ
Models makes an injected correction set intended for the Valom kit which
might fit this one, too, if working with vacuform clear parts causes you
cardiac issues.
Decals were totally shot from four decades of storage and probably
not good to begin with. Though Airfix very generously replaces them free of
charge in cases like this and Print Scale offers a sheet chock-full of
interesting Hampden options, I decided to raid my decal stash instead.
A check against photos and the plans in the Warpaint title reveals
two very minor discrepancies: the wingtips are too rounded and the
propellers stick out too far forward from the cowls.
Nothing really challenging here, except what the modeler self-imposes.
The kit goes together without any issues. I built up an interior for the
visible portions under the canopies in the usual methods from bits of
styrene sheet and stretched sprue, capping each position with a Falcon
canopy. Some of these require cutting away portions of the fuselage to gain
a simpler joint line.
The exterior was treated to my usual approach towards
raised-lines-and-rivets surface detail of this vintage: I lightly wet-sanded
the exterior parts with 600 grit to tone down the raised detail until just a
hint remained, and then scribed selected panel lines over this to take a
wash later. I cut out and fitted clear plastic to represent the position
lights at the wingtips, reshaping the tips to a more c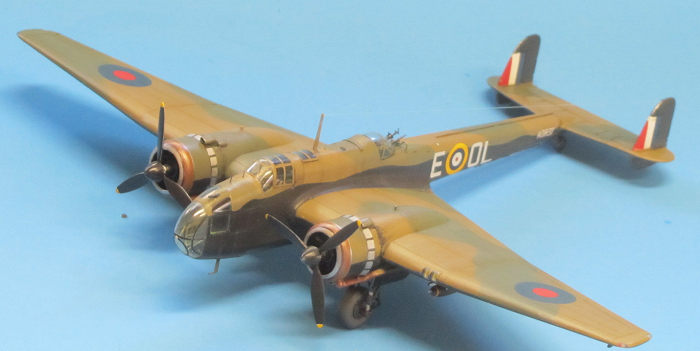 orrect squarish shape
while I was at it.
I replaced the engines from a resin pair from Engines and Things,
and set these deeper in the cowl than where the provided part was intended
to go. The prop boss was cut back to allow the spinner to sit closer to the
propeller as well. These two moves put the propeller further back in toward
the cowl where it should be.
On the real Hampden a pair of joiner strips ran fore-aft on the
tail boom, one on top and one on bottom. They're molded a bit too coarsely
for my taste, so I sliced them off and after filling and sanding the seam
replaced them with Evergreen square stock. Carburetor intakes on the cowls
were drilled out. Antennas and other stickie-outies were replaced with bits
of brass and styrene depending on their vulnerability.
The two fuel vent tubes on the upper nacelles plus the barrels
for the dorsal Vickers Ks had been crushed and lost, so I cut and soldered
new ones from brass rod and tube, adding the tail-protection limiter for the
guns while I was at it. My Junior Metalsmith work looked so appealing when I
was done that I found myself not wanting to paint it!
There are some references to repair work in the section above;
this project is actually a do-over. I originally built and painted this
model about ten years ago, but was one of those nagging completions I was
never really satisfied with and when it was damaged in a move I decided to
take the opportunity to give it another shot and test some new techniques.
 I started this process by peeling off the old decals with clear
packing tape and lightly damp-sanding the model's topside with a 600 grit
sanding pad. 'Damp sanding', because I didn't want runoff slurry seeping
into the interior. I then masked off the clear portions. The black underside
looked okay, so after a little contrasting-panel work was masked off and
spared the rest of this treatment. The gaping void of the wheel wells had
always bothered me; these were retroactively boxed in with a bit of spar
detail added, following sketchy information on the Interweb.
The topside received an overall coat of Dark Earth, my custom mix
from Xtracolor with a little Testor's Yellow and White, followed by masking
and a similar mix of RAF Dark Green. After curing a week or two this was
shielded with Future/Pledge Floor Gloss. Decals followed after a little
masking and painting to achieve the roundels on the wing topside and the fin
flashes. The white serial was hand-painted with careful work and a lot of
touching up with the surrounding camouflage colors. From a foot or two away
it looks okay. Another two coats of Future followed.
I post-shaded following the markings. You haven't tried this
simple but effective technique yet? For these hues, I used Tamiya Clear
Orange, heavily cut (something like 90/10) against thinner. With your
comp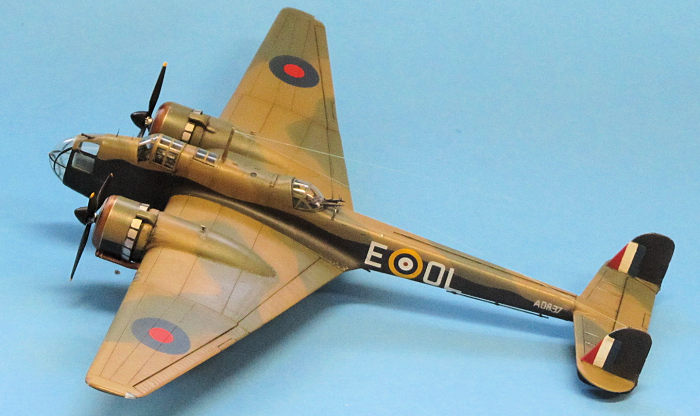 ressor pressure turned way down, repeatedly run a line of paint on the
the main panel lines. If you can't actually see the paint you're laying down
right away, you're doing it correctly. After a dozen or so passes and your
eyes just begin picking up the line of contrasting hue entering the
threshold of your perception, stop. Your model will now sport a warmer,
deeper, more interesting look.
Collector-ring type engine cowlings are not easy to depict
realistically. I tried the following approach: masked and painted the
cowling lips silver with a band of red-brown immediately aft. I then
dry-brushed both regions with a mix of bronze and silver enamel. The effect
was encouraging enough that I'm going to develop the technique further at
the next opportunity.
As usual, I closed everything with a light gloss coat to give the
model a slight sheen. While I was applying this Homicide by 999 was playing
on the radio, casting an appropriately British vibe over the conclusion to
the project, courtesy the UK's '70s punk movement. Actually, you would be
hard-pressed to find a more totally awesome tune to cap off your second go
at a "favourite" model
The Hampden has always been one of my favorite RAF types and I'm
really glad I gave this horse another run at the races. This really is a
great old kit, proof that a manufacturer needn't cut new molds if it was
done right the first time (well, maybe Airfix could grace us with fresh
transparencies!). A great first multiengine project for the beginner. Build
it stock. Or go nuts and detail it. You won't be disappointed.
Interior shots are now plentiful with all the online coverage of the Cosford
restoration.
Hall, Alan. Warpaint No. 57: Handley-Page Hampden and
Hereford.Warpaint Books, Ltd.
Gunston, Bill. Classic Aircraft Cutaways. Osprey Publishing, 1995
Benson, Walter. Into the Frying Pan and Into the Fire! Wings
Magazine February, 2002. Sentry Books, Inc.
Ryan Grosswiler
5 October 2020
Copyright ModelingMadness.com.
If you would like your product reviewed fairly and fairly quickly, please contact the editor
or see other details in the
Note to
Contributors.
Back to the Main Page
Back to the Review
Index Page
Back to the Previews Index Page


 aircraft to fly, a miserable aircraft to fly in." The
manufacturer advertised it as a "fighting bomber" and gave the pilot a
forward-firing gun, implying that the bomber would actually pursue and shoot
down enemy aircraft.
  hard lessons about night flight, long-distance
navigation, and strategic aerial offensives, none of these in which the
force was highly skilled before the war.
 owly molded
into a backer plate. Landing gear, wheels, and guns are all by contrast very
nicely molded and detailed--even if the guns are a tad overscale. Separate
parts allow the bomb bay doors to be posed open or closed.
 orrect squarish shape
while I was at it.
 I started this process by peeling off the old decals with clear
packing tape and lightly damp-sanding the model's topside with a 600 grit
sanding pad. 'Damp sanding', because I didn't want runoff slurry seeping
into the interior. I then masked off the clear portions. The black underside
looked okay, so after a little contrasting-panel work was masked off and
spared the rest of this treatment. The gaping void of the wheel wells had
always bothered me; these were retroactively boxed in with a bit of spar
detail added, following sketchy information on the Interweb.
 ressor pressure turned way down, repeatedly run a line of paint on the
the main panel lines. If you can't actually see the paint you're laying down
right away, you're doing it correctly. After a dozen or so passes and your
eyes just begin picking up the line of contrasting hue entering the
threshold of your perception, stop. Your model will now sport a warmer,
deeper, more interesting look.