| KIT #: | FR0026 |
| PRICE: | 16 Euros |
| DECALS: | Three options |
| REVIEWER: | Brian Baker |
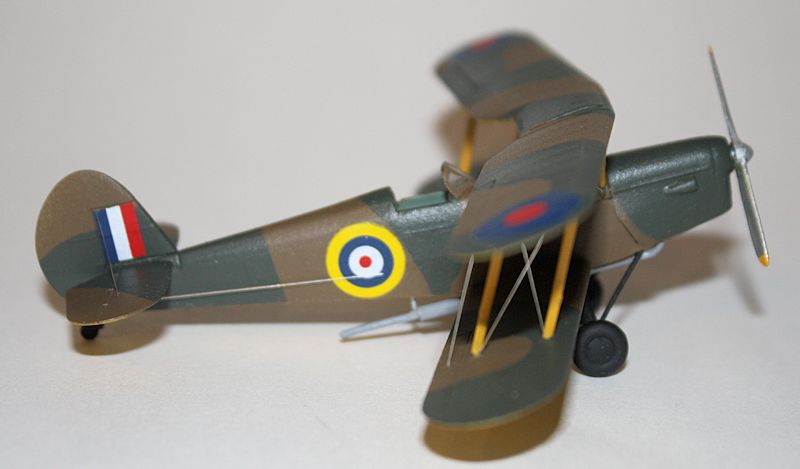
| NOTES: | Very petite little kit of a very interesting subject. |

| HISTORY |
The Stampe
SV.4 is often confused with the DeHavilland Tiger Moth, and the two
aircraft are similar in many respects.
However, the Stamp is an entirely original design, and appeared in 1939,
long after the Tiger Moth series.
It was intended for the Belgian and French military forces,
and 30 were delivered to the Belgians before the outbreak of World War
II.
Postwar, the Stampes were
placed back in production
 in both France and Belgium, and even in Algeria.
Although they were primarily intended for primary training, many were
used by aerobatic pilots, where they were quite successful in competitions.
The British obtained their first SV-4B when two Belgians absconded with one, making a cross channel flight on 4 July 1941. This aircraft, the second prototype registered OO-ATD, was repainted in standard RAF training colors, and equipped with a different exhaust-muffler arrangement for some kind of special duty mission that never transpired. Postwar, a number of Stampes began to appear on the British Civil Register, and into the fifties and sixties, a number managed to make their way to the U.S., where they are still flown by pilots who like classic biplanes. Over the years, different engines have been fitted, but they still remain one of the worldís classic biplanes.
| THE KIT |
There are
four different versions of this kit, mainly differing in decals and detail
parts.
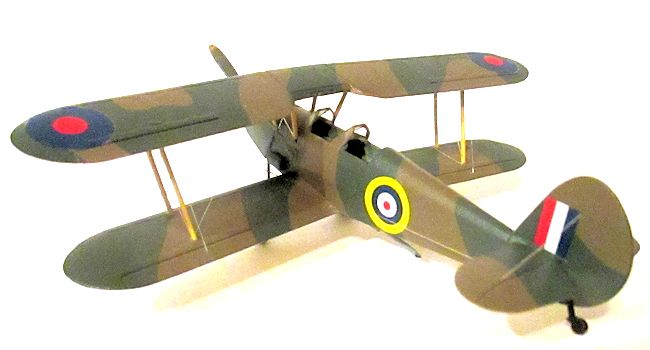
This one is the British
version. Molded in soft grey styrene, the parts are well molded with good
interior and external detail.
Numerous parts are listed as ďnot to be usedĒ (Thatís SPARE PARTS, guys!).
Detail parts, such as struts, etc., are
nicely
done, although I wish that producers of biplanes could mold struts so that the
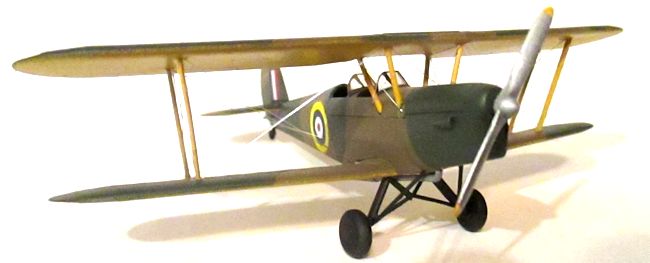 sprue attaches to the ends rather than to the surfaces which then need to be
trimmed.
Trimming these small
pieces can be very tedious, and there is really no need for it.
The
instructions consist of 8 pages of
highly detailed drawings and diagrams.
Page one gives a historical background, page 2 provides a sprue diagram
and color guide, while pages 3 through 5 show the assembly steps. This also
includes a good rigging diagram.
Pages 6 through 8 provide color four views of the three aircraft for which
decals are provided, including the ďillegal immigrantĒ in its arrival scheme and
in RAF colors, and
a very colorful
SV-4B, G-ATKC, which is yellow and red with black undersurfaces. There is enough
here for anyone who likes classic biplanes.
Decals are
provided for the three aircraft described previously.
The sheet
is printed by
AVIPRINT.cz, the register is right on,
and I didnít need to trim the decals when I installed them on the kit. They
snuggled down nicely over the surface detail, and didnít require any softening
or setting solutions.
| CONSTRUCTION |
The assembly
process begins with the cockpit interior, which includes a floor, two seats,
rudder pedals, instrument panels, and control sticks.
These are VERY small, but then, so is the airplane.
A magnifying glass is appropriate here. The interior is supposed to be
pale green, which I interpreted to be RAF Interior Green.
The instrument panels could have included decals, but didnít.
Once the cockpit interior is
 complete, it can be glued in between the
fuselage halves, and then the top portion of the cockpit can be installed.
There is a front bulkhead which approximates a firewall, and this
strengthens the structure.
The
engine is a separate unit, consisting of sides, a bottom section, and a forward
cowling.
The lower wing fits in
right below the cockpit floor, and although it took a little work, it went
together without much trouble.
The
tail unit, including horizontal and vertical surfaces, almost snaps into place,
with the gap between the lower rudder and fuselage filled up nicely by the
tailwheel unit.
The real
assembly problem with this kit is the wings.
There are drawings in the instructions telling how the wing is attached,
and where the struts go, and I was careful to make sure that the right numbered
parts went in the right places, but a front view of the aircraft would certainly
have helped in the process, as there is no indication as to the angles at which
the struts are set.
I used
superglue to install the struts and upper wing, but it was a chore.
The landing gear, on the other hand, went on without a hitch, and it is a
pretty robust little unit.
| COLORS & MARKINGS |
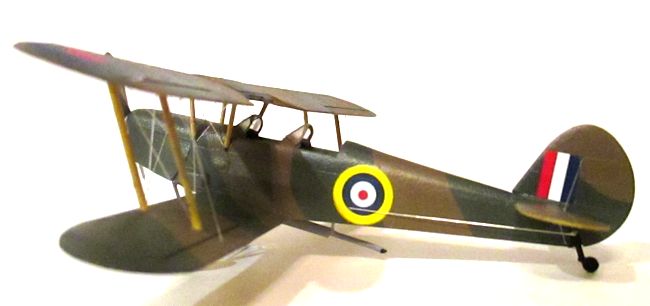
I painted
the entire airframe before attaching the upper wing. I did the Training Yellow
undersides first, and then the RAF Dark Earth on top after masking the yellow.
Masking the shadow shading was easy, as the four views provided are very
helpful here.
I did all of the
struts and landing gear parts separately, marking each part by number to make
sure that I had the right strut in the righ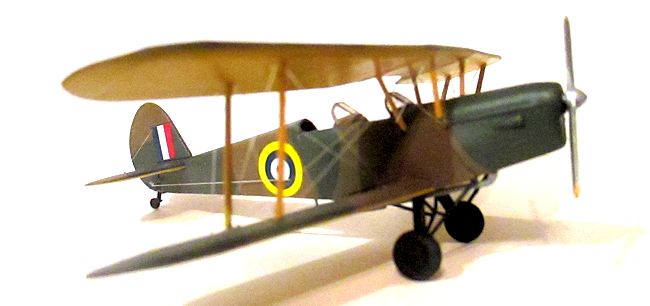 t place.
Once the airplane was assembled, I gave it a coat of Testorís Glosscote,
after which I applied the decals.
After another glossy coat for sealing, I resprayed it with Dullcote, as RAF
aircraft during this time period were in dull finish, not the glossy finish you
see today on warbirds.
The rigging diagram on Page 5 was very helpful, as this airplane is not rigged the same way that most biplanes are. There is even a rudder control horn and cable that fits along the side of the rear fuselage, although there are no elevator or aileron cables indicated in the instructions. I used my electronic wire and white glue method, and rigging took about an hour, which is good for a biplane of this size and complexity.
| CONCLUSIONS |
This is a
very nice little kit.
If you have
some experience building biplanes, it should prove an enjoyable experience, and
youíll have a model that hasnít appeared in this scale before.
It is small, and wonít take up much space on your display shelves, and it
is well worth getting at least one of these.
| REFERENCES |
July 2015
Thanks to Scott Van Aken and Azur/FRROM for the review sample.
Copyright ModelingMadness.com. All rights reserved. No reproduction in any form without express permission from the editor.
If you would like your product reviewed fairly and fairly quickly, please contact the editor or see other details in the Note to Contributors.