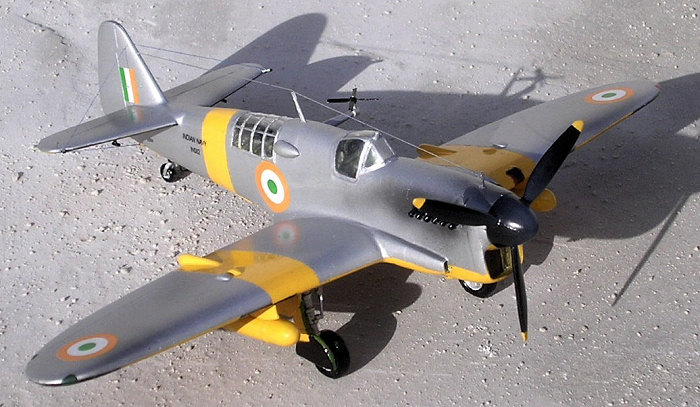
Octopus 1/72 Firefly I/II
| KIT #: | 72039 |
| PRICE: | $34.95 |
| DECALS: | Four options |
| REVIEWER: | Carmel J. Attard |
| NOTES: | Short run kit with resin parts, issued under 'Hi-Tech' label. |

| HISTORY |
The Firefly was conceived as a fighter-patrol & reconnaissance carrier deck aircraft with a crew of two (pilot and navigator) in issued specification N8/39 to the Fairey Company by the admiralty. This all metal machine, powered by a Griffon engine and having an elliptical wing design, incorporated a Fairey-Youngman airlift flap. It was armed with four 20mm guns and an order was placed for 200 aircraft by June 1940. During the development, up to date modification to the cockpit canopy and guns was continually introduced. The Royal Navy received the first Firefly Mk1 in March 1943 and these equipped the FAA 1770 Squadron during the summer. Fireflies attacked the German battleship Tirpitz in Norwegian waters. The type was soon transferred to the Indian Ocean on board HMS Indefatigable and later to the Pacific Theatre. By the end of the war the Firefly Mk 1 equipped seven first line FAA squadrons.
 In
December 1944 an air to sea radar was tested and equipped on the FR Mk1
reconnaissance and NF Mk1 fighter versions. After the war the Firefly T1 evolved
having dual control in separate cockpit, with the instructor cockpit being
raised and located behind the front pupil trainee. This version had the gun
armament removed while the T Mk2 had two guns installed. Foreign orders received
Fireflies that were modified to target tugs TT Mk1 having tow equipment fitted
at the rear cockpit. A total of 14 F1s were converted to this configuration,
mainly at the instigation of the Swedish Company Svensk Flygjanst which had a
contract with the Swedish Army for this type of work. Both glider and sleeve
targets were towed and a windmill-operated RFD winch was mounted on the port
side of the fuselage. Besides the Indian Navy, which operated five TT1s plus
Five TT4s, the TT1 also was in service with Sweden and Denmark. One of the
Swedish Fireflies was seen at Duxford in 2004 wearing an overall yellow colour
scheme.
Production of the Firefly Mk 1 ended in summer 1946 after 658 machines were produced. After the war the Firefly continued in service for a good number of years. A drone version known as the U9 was developed and this carried extra radios in wing tip pods attached to the clipped wings. The type was based at Hal Far, Malta and many a time I spotted the red and cream coloured machine flying over Maltese air space, some of which were destroyed by the Sea Slug ship to air missile during the missile development trials, ending their life in the sea bed off shore while others came to grief during landings at the Hal Far airfield. The characteristic whine of the Griffon engine could be heard from anywhere in Malta and was difficult not to spot the drone flying overhead in those days in the era of late 50s
| THE KIT |
The Firefly Mk 1 is in my opinion one of the most interesting
Kits issued by Octopus/Pavla Czech Company allowing a diversity of types that
can be built from this kit. The kit comes in a soft cardboard box with two
colour side views of the aircraft which are those of a FAA FR Mk1 Firefly of 812
Sq based on board the HMS Vengeance, circa May-July 1946 shown in sea temperate
camouflage of dark sea grey / slate grey and sky grey; the other view depicts a
two seat all yellow trainer version of No5 Sq Royal Netherlands Navy. The cover
 only represents two of the
scheme options as the kit also contains extra parts required to make a TT1 of
550 Sq of the Indian Navy 1956, and an F Mk1 of No 812 Sq based on HMS
Venerable. The 10 page double sided A5 size instruction booklet in bi-lingual
Czech and English text and as normally found in this class of kits there is plan
view of the injection moulded parts, clear parts and resin parts. The resin
parts are highly detailed and are suited for all the different versions as
appropriate while the cockpit parts are in duplicate made out of vac form
acetate.
As with standard practice whenever there are resin parts, it is best to make a dry fitting of the parts after the integral runner/filler is removed and on the whole these detail parts are well reproduced and make a good representation of the real thing. The resin parts include the radiator, exhaust stacks interior of cockpit side walls, complete wheel wells interior with proper webbing seats, guns, faired guns, bomb pylons, fuel tank pylons, TT wind mill, nose radome pylons and instrument panels. The injection moulded parts comes in grey plastic and careful parting of each item was required. These parts apart from the normal fuselage, wing parts etc there are also included an under nose radome pod and a second separate instructor pilot complete cockpit which is fitted staggered and behind the front cockpit, rocket rails but no rockets and three single blades to form the prop which is covered with an accurate spinner.
| CONSTRUCTION |
After deciding which of the versions to assembled, the short
run parts are first separated from sprue using exacto saw blade and cleaned from
flash particularly the wheel well area which is a simple task using a flat and a
half round needle file. Items like the
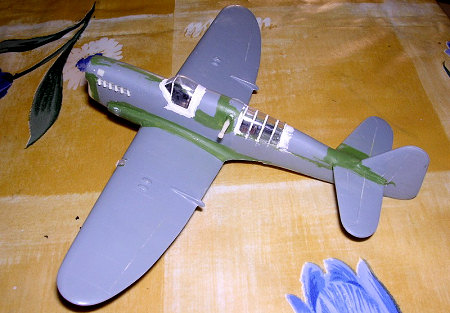 lower wing parts required
sanding at the right part of the wing in order to bring it to same thickness to
that of the left wing. The detail resin wheel well part R4 required a good
amount of sanding from the back so that it fits in place and at the same time
allows the two wing parts to close correctly. This was no big deal but it
required several dry fit tests before the right amount of sanding was made. As I
have elected to build the Target Tug version I have stepped some of the stages
that refer to the other versions and found that it was best to fit the rear
cockpit first to one of the fuselage halves. I have first fitted resin part 23
to the roof of part 37 then lowered the sub assembly at a stage after the rear
office is all in place. When it comes to the front crew cockpit I first tested
the resin parts dry fit of lower complete wing in place. The cockpit was lowered
to rest on middle of wing and which is right on top of the wheel well part. I
also found that the semi circular upper part of the back plate R10 is parted
from the lower half and fitted back at a later stage once the mid roof section
34 is inserted in place which also completes the pilot compartment. Item 21 and
22 which are fitted to the side of the nose, also contain a front small intake.
This is in fact indicated on the instruction sheet to drill and file the opening
to shape required. Prior to closing the fuselage one also required to clean the
shrouding opening as per
 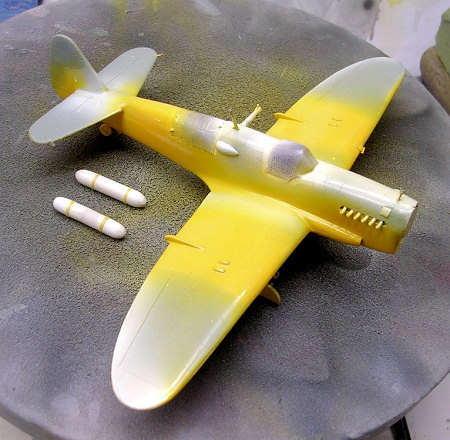 instructions
on P9 before fitting the resin exhaust stacks to each side with super glue. The
four gun barrels on the leading edge are removed and the area faired smooth. I
also replaced the rectangular flap item 16 which fits under the nose with one
made from a 1/2mm thick plastic card which is cut to same size as the kit part.
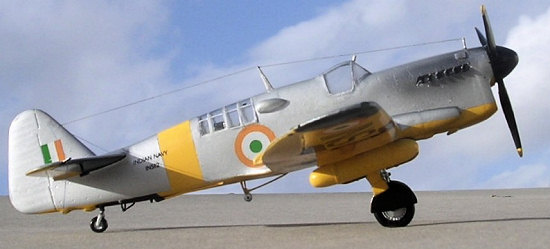
The kit contains other features such as the main wheels flattened to scale, a towing winch and wind mill, pylon to carry the under wing tanks that are not issued however the instructions suggest to borrow external fuel tanks from Hurricane upgrade set Kit No 7215-44. I made mine by joining two front halves of a 1000lb bomb from the Hasegawa set, and then wrapped a thin strip of Tamiya tape to form the two rings on each of the tanks. The wing to fuselage joint required some filler at the seams while the arrestor hook was a nice fit. There are various options to assemble the upper fuselage decking. As I built the TT version this meant that I fit the two intermediate roof mid sections 33 and 34 in place and trimming the rear cockpit to the shape and size shown in the side views. The cockpit transparency required to fit exactly using a pair of scissors. I used white glue to slot and fit the rear cockpit in place. I then added a drop of white glue to strengthen the fit of the canopy. The front canopy was fitted in same way. I have replaced all the resin aerials with metal pins in order to make them stronger and lasting and hold the wireless effectively when these were added. I also drilled holes in the tail unit to allow the tail fin and rudder wire guard that are intended to prevent the tow wire entangling with the rear control surfaces. A slot was also cut at the leading edge and fitted a clear Perspex piece to represent the landing light fitting.
| COLORS & MARKINGS |
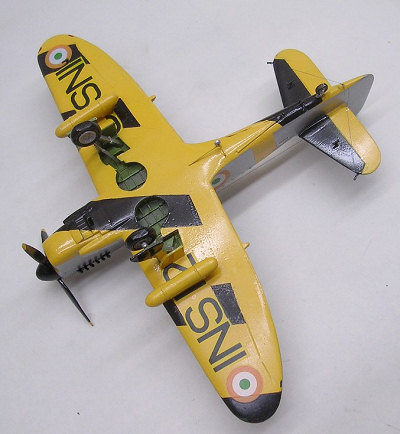 The crew
compartments were grey-green finish and the instruments black with white
detailing. Seats were also painted black and having brown padding with light tan
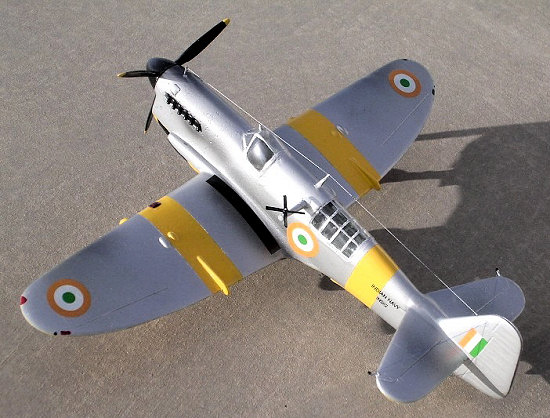
straps. The Target Tug Firefly is basically aluminium over upper surfaces and
yellow trainer bands to upper wings and rear fuselage section. The undersides of
wings and lower fuselage were first given a coat of semi matt white and when dry
this area was covered in trainer yellow using Humbrol No69. The yellow areas
were then masked and stripes were airbrushed in gloss black. The masking was
carefully removed and when the paint was nice and dry and this required some 30
hours I have masked all the lower surfaces and yellow over wing and fuselage
bands and airbrushed the upper with a mix of silver and gloss varnish. The
inside of wheel wells and doors was painted zinc chromate followed by a darker
shade of sa
me mix to create contrast. The engine exhaust pipes were black and the area was given a fine coat of a mix consisting of engine grey and semi matt varnish. The decals were of best quality and fitted nicely at all the places with no effort at all in spite that the underwing serial required to cut and fit around the tank pylons. The kit was finally given a n overall coat of clear Revell gloss varnish.
| CONCLUSIONS |
This is the kind of kit that gives a feeling of satisfaction
when complete and the extra effort required involving careful masking certainly
pays in the end. This will find a place next to other target tug aircraft in my
collection a TT Fairey Ba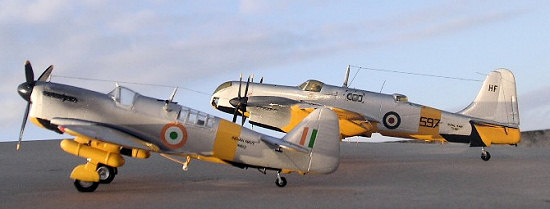 ttle, Martinet and a TT Sturgeon. It also brings to my
mind that there are other TT aircraft in line to be built like a TT Mosquito,
Beaufighter and the Meteor TT20. The Firefly was an interesting and a colourful
build and I equally well
recommend the Octopus kit to those keen on aircraft that operated during the war
years. It is interesting to note that with the surplus parts one can also build
a Firefly T5 by merging the Airfix Firefly AS6/FR4 with the resin cockpit
trainer parts. Maybe in view of the success with the Firefly kit, Octopus will
consider of issuing conversion parts for the rear bulging cockpit, a larger
squarish tail fin and rudder and wing leading edge fillet parts so that Firefly
enthusiasts can also build the T7 and U8 from the existing Firefly kit. Well
done Octopus.
| REFERENCES |
SAM Dec 1984 Vol. 7 No3
November 2007
Copyright ModelingMadness.com. All rights reserved. No reproduction in part or in whole without express permission.
If you would like your product reviewed fairly and quickly, please contact the editor or see other details in the Note to Contributors.