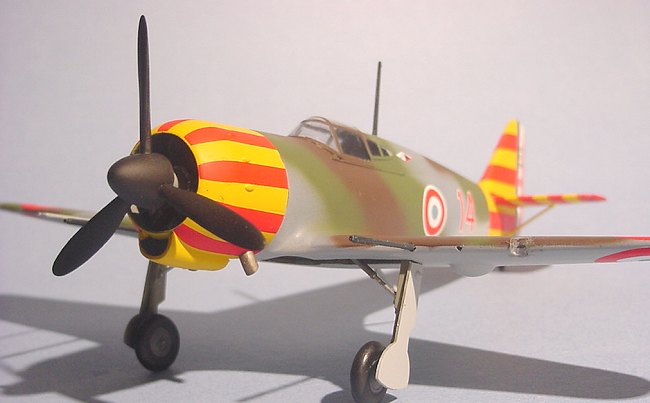
Classic Airframes 1/48 MB.155
|
KIT # |
423 |
|
PRICE: |
$29.95 |
|
DECALS: |
Two Aircraft |
|
REVIEWER: |
|
|
NOTES: |
Short run multi-media kit |

|
BACKGROUND |
Click here for a preview and some historical info.
|
CONSTRUCTION |
After all the parts were washed in soapy water, I started to put the wings together by thinning the resin wheel wells to make it fit in the wings. I used a big X-Acto blade, and the resin really went away fast. I went on until I had a reasonable fit, with just a small gap at the roots. I glued the wells with super glue and the wings with Humbrol glue. The next step was to thin the fuselage walls, and for that, nothing is better than a Campbell-Hausfld air grinder. It took a mere 5 minutes to do the job, and I used the opportunity to clean the inside of the cowl halves. I then separated the cockpit floor from the moulding stub and painted it Model Master Non-Specular Blue, along with the cockpit walls. The instrument panel was finished with Model Master Gunship Grey. All the details were picked up with Model Master Flat Black and Chrome Silver. The seat belts were painted Model Master Panzer Dunkelgelb with Chrome Silver buckles and the seat Olive Drab. There is some kind of ďpressure tankĒ that goes to the left, behind the seat, and I decided that it was a fire extinguisher and painted it Guards Red. I glued the fuselage halves together and I was really amazed by the excellent fit. The cockpit, glued together with super glue was inserted from below and secured with the same glue. Again, the fit is excellent.
 At the same time I was
putting the interior together, I attacked the engine, made up of a crankcase and
separate cylinders. It goes together very well once everything is
separated from the moulding stubs, you have a completed and very good-looking
engine. You can make it even better with Model Master Gun Metal on the
cylinders and Model Master Neutral Grey on the crankcase. I painted the
ignition wire crown (the one around the crankcase) with Chrome Silver, but the
kit lacks the full ignition kit. Super detailer will surely find a way to
replicate it. I also dry brushed some Silver on the cylinders to put some
wear on it. The effect is perfect.
I then turned my attention to the canopy, which was cut free from its sheet and test fitted on the fuselage. Some little trimming was made with a sanding stick before I put it aside in the box. I also trimmed away the landing light cover, which I lost somewhere on the floor. Oh well, Classic Airframes provides you with two copies!
I then started to mate components up: the two cowling halves, then the wings to the fuselage. Fit is good all around, except for gaps near the leading edge-fuselage joint and all along the wing roots. The aforementioned gaps are not catastrophic, and are easily dispatched by melting some left over sprue bits in a jar with some Testor Liquid Cement. This plastic goo is then applied to the seams and melts the area around, thus bonding all the parts as if they were one. I sanded the excess plastic away and finished the job with Tamiya Putty. I then glued the stabs to the fuselage; they are butt joined but are quite solid if strong glue is employed. The seams were again dispatched with Tamiya Putty. I glued the firewall to the fuselage, and after the small seams on the cowling were sanded away, I dry fitted it to the fuselage. I found out that the fuselage was a bit too wide, so I sanded some of the inside of the fuselage and reduced the diameter of the firewall. Take note when gluing the fuselage/firewall/cowling assembly, for the engine is mounted to the left, to reduce the amount of torque on take-off and it should be the same way on your model. I left the cowling off the aircraft for ease of painting.
Please note that to make a truly
accurate MB-155, you have to sand down the oil cooler under the cowl. It needs
to be more streamlined, as you are provided for a correct one for a MB-152 in
the kit. Check the Reference section for a review
 Tom Cleaver did on the
same kit and he explains how to take care of it. I decided not to bother with
it and simply glued it on and sanded the seams away. Also, there are some small
resin bumps that gave me lots of troubles when I tried to separate them from the
moulding blocks. Anyways, by looking at pictures of the MB-155, I couldnít see
them anywhere so they went flying in the trash bin.
The propeller was put together (why canít everyone make one piece propeller or at least key the blades?) and I believe I didnít mounted it all crooked up, however Iím sure that Transport Canada will never approve it! I cleaned up the landing gear legs and the retraction struts and painted them Model Master RLM 02 along with the wheel wells and the inside of the gear doors. I separated the resin wheels from their moulding stub and painted them Model Master Gunship Grey with Flat Black tyres.
I masked the canopy and glued it in place with Humbrol glue (I had intended to use non-fogging super glue, but the bottle I bought mysteriously dried up even though I had never opened it beforeÖ.) and plugged any holes with Elmer white glue. All the seams had been primed with Testor Flat Gray (small jar), but I checked them again to make sure I hadnít forgotten any.
|
CAMOUFLAGE |
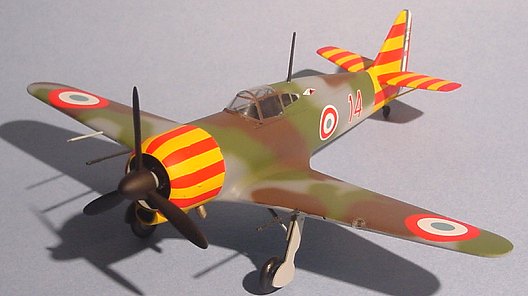
 Since I had decided to do a Vichy
aircraft, I had to paint the cowling and the tail yellow before applying the red
stripes. I first gave them an undercoat of Floquil Reefer White, then proceeded
with Gunze RLM 04 for the yellow. I really like RLM 04 since itís a dark yellow
and warmer than the straight yellow from Gunze. After that, I decided not to
use the kitís decals for the flag on the rudder and painted the blue stripe
using Gunze Blue-Grey, but I know itís too dark. Oh well, next time Iíll do it
correctly. The red band was the next step to go, and I thought that maybe I
could also paint the red stripes on the nose and the tail at the same time.
Alas, I couldnít lay my hand on masking tape narrow enough to do it, so I
settled with painting the flag, Gunze Red providing the colour.
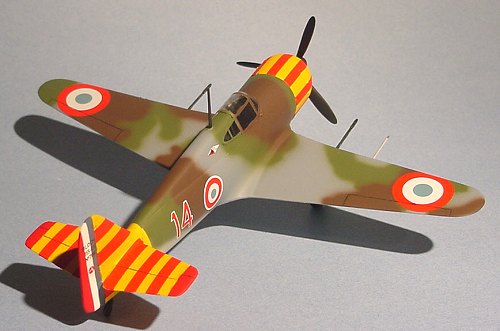
The tail was masked and the belly was painted Gunze RLM 76, because itís close to the light grey the French used and I couldnít find any French colours acrylics. The top was painted Gunze FS34097 Field Green, Mahogany and a mix of RLM 76 and Blue Grey. The colours are close to what they should be, but not spot on. The French aircrafts often had various brand of paints on them, the painting was not centralized, thus giving you some room to play with. The propeller was airbrushed Model Master Flat Black like the tail wheel.
|
FINAL CONSTRUCTION |
I assembled the struts to the aircraft using super glue, and to speak frankly, Iím not too enthusiast about gluing styrene to resin. It makes for a fragile landing gear thatís easy to knock off. I left the tail wheel off for after decaling and glued the wheels to the axles, making sure that the flat spots were on the ground. The wheel doors where added and the aircraft was ready for the next step.
|
MARKINGS |
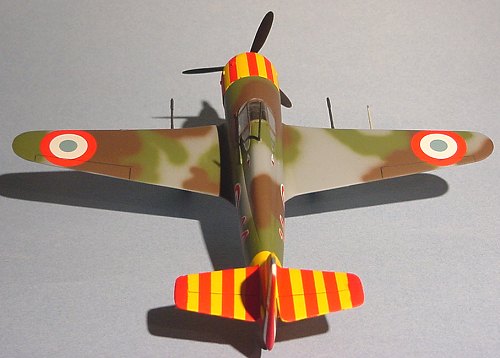 I sprayed Future on the whole aircraft
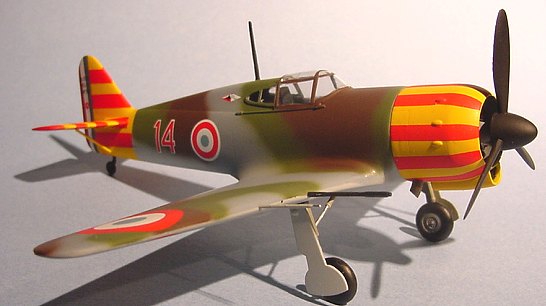
and proceeded to decaling. The cowling was the first to go and the stripes went
on beautifully, with only a small tab to cut at the end of the cowl (once they
are dry, a sharp X-Acto blade shows no mercy to them!), and I used Micro Sol to
make the decals conform to the curves and bumps of the cowling. I then
proceeded with the tail stripes, and they again gave me no problems (with small
tabs to cut at the elevatorsí trailing edges and rudder hinge), however, I
couldnít make all of them fit the vertical tail/stabilizer joint, so I trimmed
it as best as I could once they were dry. Thatís why I would have preferred to
paint them, no troubles trying to make them fit. The aircraftís markings go on
very well, being from Microscale and I was able to apply them in one session.
I painted the various antennas and glued them in place, along with the Pitot tube. I glued the engine in place with super glue and slid the cowling over, fastening it with Humbrol Glue. The exhausts, which had previously been painted Model Master Jet Exhaust, were glued in place and the aircraft was coated with Poly Scale Flat. The masking was removed from the windows and I fashioned a new landing light cover using acetate and glued it with super glue.
|
CONCLUSIONS |
This Classic Airframes MB-155 really was an interesting build. It offered multiple challenges, none of which out of the reach of the average modeller. Although I do not recommend this kit as an introduction to short run products (for that, find a LTD Models IAR-80, itís perfect!), itís a good way to deepen ones technique or tackle a multimedia subject. Furthermore, the striking Vichy paint scheme brings colours to my collection!
Thanks to my wallet, I was able to buy this kit.
Copyright ModelingMadness.com. All rights reserved. No reproduction in part or
in whole without express permission from the editor.
If you would like your product reviewed fairly and fairly quickly, please
contact the editor or see other details in the Note to
Contributors.