Halberd 1/48 SC-1 Seahawk
| KIT #: | |
| PRICE: | $100.00 |
| DECALS: | Four options |
| REVIEWER: | Tom Cleaver |
| NOTES: | Resin kit |
| HISTORY |
The Curtiss SC-1 Seahawk, was the largest, fastest, most heavily-armed single-engine scouting-observation seaplane ever used by the U.S. Navy, with a top speed of 313mph and armment of two .50 caliber machine guns in the wings. It was also the last of the catapult-launched scout-observation seaplanes that began naval aviation, replace by 1949 by the now-ubiquitous helicopter.
Following the failure of he SO3C-1 Seamew, Curtiss submitted the Seahawk design in response to a Navy Bureau of Aeronautics request for observation seaplane proposals on August 1, 1942. A contract for two prototypes and five service test aircraft was awarded on August 25. A production order for 500 SC-1s followed in June 1943, prior to the first flight of the prototypes.
 While the SC-1
only had a crew of one, the pilot, a bunk was provided in the aft fuselage for
rescue or personnel transfer. To use this, the pilot was forced to get out of
the cockpit and stand on the wing while he pulled the seat and rear cockpit
bulkhead forward to open the rear fuselage. He had no way to pull a survivor out
of the water onto the wing and a person in that compartment could not get out in
an emergency unless the pilot stayed with the airplane to open the rear of the
cockpit. This rescue passenger capability was never used operationally.
While the SC-1
only had a crew of one, the pilot, a bunk was provided in the aft fuselage for
rescue or personnel transfer. To use this, the pilot was forced to get out of
the cockpit and stand on the wing while he pulled the seat and rear cockpit
bulkhead forward to open the rear fuselage. He had no way to pull a survivor out
of the water onto the wing and a person in that compartment could not get out in
an emergency unless the pilot stayed with the airplane to open the rear of the
cockpit. This rescue passenger capability was never used operationally.
The aircraft had a turbo-superchaged engine, which was unnecessary due to the fact it was never intended to be flown at altitudes above 2,000 feet. The turbo-supercharger was responsible for several engine problems. The aircraft was equipped with an autopilot that was later found to cause crashes on landing when it engaged accidentally. With the autopilot turned off, it was very difficult for the pilot to fly the airplane while consulting navigational maps or operating the radio, which took his attention away from flying the airplane.
 Of the 500
Seahawks produced by the fall of 1944, only some 79 saw fleet operation aboard
ships. The Seahawk first went aboard the new battlecruisers USS Alaska and USS
Guam in October 1944. These airplanes were removed from ships in 1947-48 as
helicopters were entering service.
Of the 500
Seahawks produced by the fall of 1944, only some 79 saw fleet operation aboard
ships. The Seahawk first went aboard the new battlecruisers USS Alaska and USS
Guam in October 1944. These airplanes were removed from ships in 1947-48 as
helicopters were entering service.
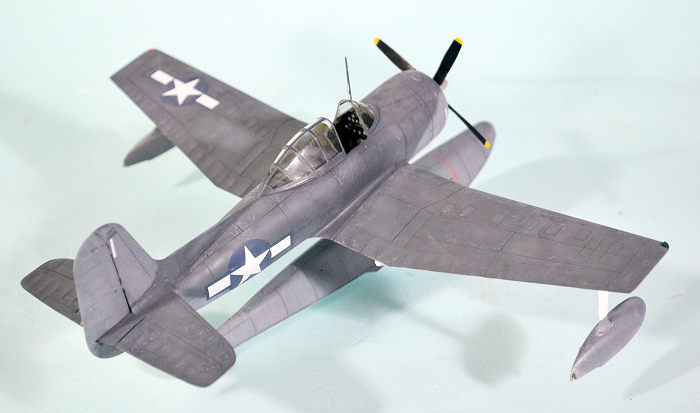
The Seahawk was extremely maneuverable in the air and were known as “Quarterdeck Messerschmitts” aboard the cruisers and battleships on which they served.
The kit was produced in a run of 350 offered through Halberd’s facebook page. Limited production continues, if you order a kit from their website; each time they get ten orders, they cast the kits and send them on.
| THE KIT |
 Sinifer
produced a resin 1/48 SC-1 in the early 2000s that was fairly basic. Several
1/72 SC-1s of varying quality have been produced as limited-run kits.
Sinifer
produced a resin 1/48 SC-1 in the early 2000s that was fairly basic. Several
1/72 SC-1s of varying quality have been produced as limited-run kits.
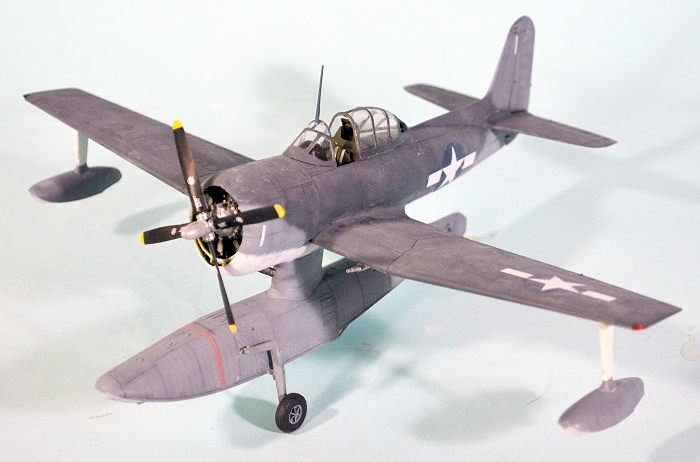
This all-resin kit by the Ukrainian company Halberd Models is the best all-resin kit I have ever seen. Surface detail is competitive with what Eduard does in injection plastic. All parts are clean the production design is simple and construction is easy. The fuselage and min float are hollow-cast, while the wings and tail surfaces are one-piece.
Decals are provided for four different aircraft in tricolor or post war glossy sea blue finish.
| CONSTRUCTION |
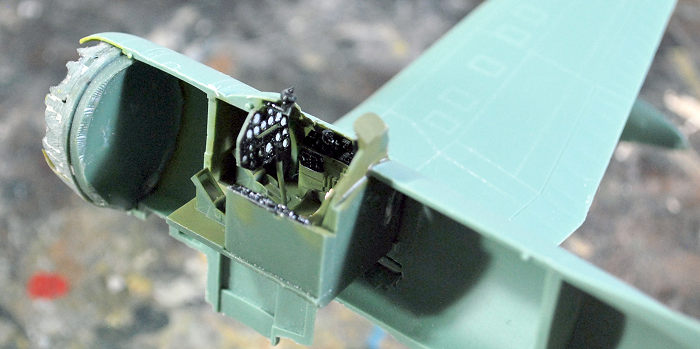
You will need to insure that the slots the wing and stabilizer parts are fitted in are completely clear of any excess resin, to insure good fit.
The cockpit is painted Interior Green with black instrument panels and I used Eduard photoetch seatbelts rather than the kit photoetch belts.
 Once the engine
is assembled, you will need to sand it down around the outer edge in order for
it to fit inside the fuselage halves. Do not worry about losing detail; you
can’t see anything in that area of the cowling where the engine fits.
Once the engine
is assembled, you will need to sand it down around the outer edge in order for
it to fit inside the fuselage halves. Do not worry about losing detail; you
can’t see anything in that area of the cowling where the engine fits.
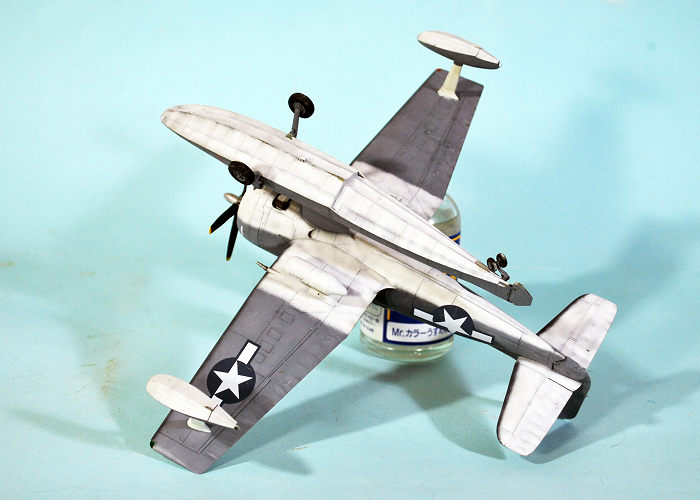
When you attach the wings, be sure you have cleaned up the attachment tab to get a good close fit of wing to fuselage. You want to fill the seam that runs through the wing flap on the lower side; if you are careful with assembly, this will be the only place you use any filler.
DO NOT attach the wingtip floats until you have painted the model and decaled it. These are one-piece items, and the pylons the floats hang from are brittle and once assembled in place will be easily broken with handling during construction. Yes, I learned this the hard way.
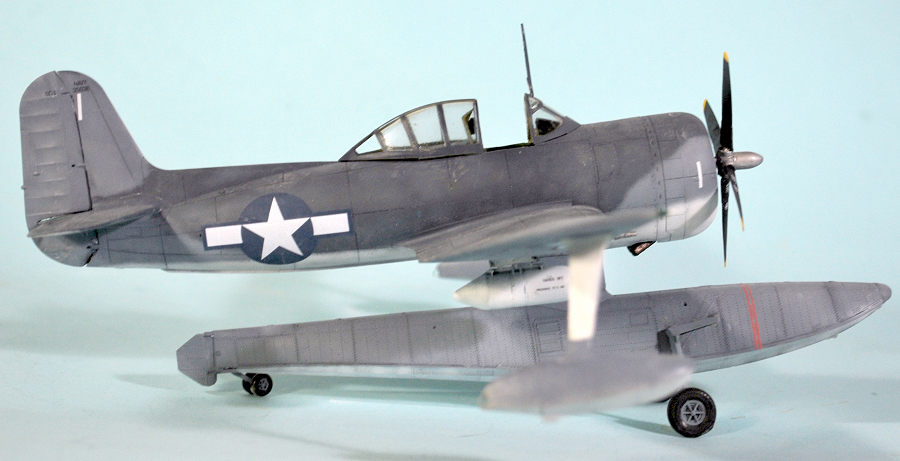
The rear clear panels of the canopy were removed in service to reduce vibration of the canopy when open in-flight. I usd a razor saw to cut out both, then replaced the centerline structure with Evergreen plastic.
| COLORS & MARKINGS |
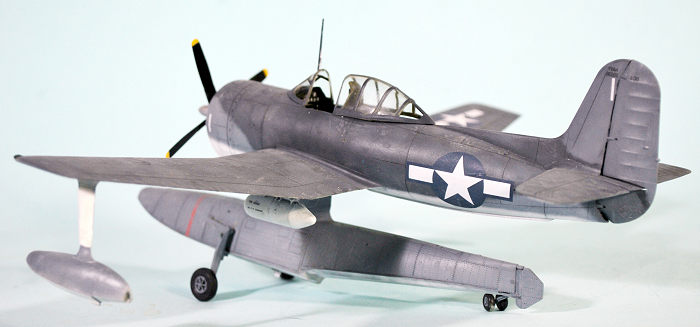 I airbrushed
the model freehand, using Gunze-Sangyo Mr. Color lacquer-base acrylics. After
applying the decals (I did the model as one of the early ones assigned to USS
Alaska (CB-2). I applied clear flat finish to give the look of an airplane
lightly covered in saltspray, which was the normal condition of these aircraft
that were carried on their catapults at sea.
I airbrushed
the model freehand, using Gunze-Sangyo Mr. Color lacquer-base acrylics. After
applying the decals (I did the model as one of the early ones assigned to USS
Alaska (CB-2). I applied clear flat finish to give the look of an airplane
lightly covered in saltspray, which was the normal condition of these aircraft
that were carried on their catapults at sea.
I finished off by ataching the canopy in the open position. The casting of this part is sufficiently “off” that you cannot successfully attach it closed; it isn’t really right in the open position either, due to this mistake, but when open the problem is less apparent.
| CONCLUSIONS |
This is the best all-resin kit I have ever done (and I have done several all-resin kits). It is easy to assemble and the final result will look good sitting next to the highest-quality injection-molded plastic model in your collection. While this kit is expensive, “every penny is on the screen” as we say in Hollywood. Highly recommended.
18 May 2023
Review kit courtesy of all you book buyers.
Copyright ModelingMadness.com. All rights reserved. No reproduction in part or in whole without express permission.
If you would like your product reviewed fairly and fairly quickly, please contact the editor or see other details in the Note to Contributors.