Dora Wings 1/48 AT-9 'Jeep'
| KIT #: | DW48043 |
| PRICE: | $35.00 or so plus shipping |
| DECALS: | Four options |
| REVIEWER: | Tom Cleaver |
| NOTES: | Short Run |
| HISTORY |
In 1940, with the Martin B-26 bomber and Lockheed P-38 fighter on order, the US Army Air Corps knew that it was essential to begin preparations for training pilots so that when they “stepped up” to these “hot” types, they would be able to handle them. The AAF had evaluated the Cessna T-50 as an “off-the-shelf” twin-engined trainer which was ordered as the AT-8, some 4,000 “Bobcats” were built during the war; however, the airplane’s pedestrian performance was not what was wanted for transition to more demanding aircraft.
 For the more
demanding transition to a “high-performance” twin- engine bomber or fighter, it
was considered that something less stable than the T-50 was needed.
Curtiss-Wright had anticipated this requirement with the design of the
Curtiss-Wright CW-25, a twin-engined pilot transition trainer which had the
take-off and landing characteristics of a light bomber or fighter. The CW-25 was
a low-wing cantilever monoplane configuration, with retractable tail-wheel
landing gear and powered by two Lycoming R-680-9 radial engines. The single
prototype acquired for evaluation had a welded steel-tube fuselage structure
with the wings, fuselage and tail unit fabric-covered.
For the more
demanding transition to a “high-performance” twin- engine bomber or fighter, it
was considered that something less stable than the T-50 was needed.
Curtiss-Wright had anticipated this requirement with the design of the
Curtiss-Wright CW-25, a twin-engined pilot transition trainer which had the
take-off and landing characteristics of a light bomber or fighter. The CW-25 was
a low-wing cantilever monoplane configuration, with retractable tail-wheel
landing gear and powered by two Lycoming R-680-9 radial engines. The single
prototype acquired for evaluation had a welded steel-tube fuselage structure
with the wings, fuselage and tail unit fabric-covered.
Evaluation was completed and the type was ordered into production under the designation AT-9, with the name “Fledgling,” though it became well known as the “Jeep.” Production AT-9s were all- metal construction. A total of 491 AT-9s were produced, followed by 300 generally similar AT-9A. They remained in use, though from 1943 on they were progressively replaced by the superior Beech AT-10.
The AT-9 was such a “handful” that a former Marauder pilot I knew told me that after mastering the AT-9, the B-26 came as something of a relief. Pilots becoming proficient at recovering from losing an engine on takeoff in training with the AT-9 ended the “one a day in Tampa Bay” reputation of the Marauder. The airplane was considered so difficult to fly that none were sold on the civilian surplus market after the war.
Pilot attitudes toward the airplane varied. Those who found it difficult hated it, while those with more skill found it exhilarating. The AT-9 was fully aerobatic. My aerobatics instructor, the late Tom Bell, did his multi-engine transition training in the AT-9 and said “it made a pilot of you.”
 The AT-9 had
a high landing speed. One pilot who trained on it recalled “Maintain approach
speed of 110-120, bring power off as you flare and it sits on the runway
promptly. If your airspeed dropped to around 90, it would sink fast and sit on
the runway very promptly. As long as you paid attention, it was a lot of fun to
fly.”
The AT-9 had
a high landing speed. One pilot who trained on it recalled “Maintain approach
speed of 110-120, bring power off as you flare and it sits on the runway
promptly. If your airspeed dropped to around 90, it would sink fast and sit on
the runway very promptly. As long as you paid attention, it was a lot of fun to
fly.”
Among the instructor pilots on AT-9s was Captain George Gobel, who made a name for himself after the war in early television as a comedian. Asked about his experience with the airplane, he said “It was a lot of fun if you paid attention and a lot of trouble if you didn’t.”
| THE KIT |
The AT-9 was kitted in 1/72 as a limited run plastic kit by Pavla. A resin kit was released in 1/48 by Colletaire. Both of these were billed by reviewers as “for the expert.”
 Dora Wings
from Kyiv has been producing out-of-the-ordinary subject matter since they went
into business. The AT-9 was announced this past spring, and was released at the
beginning of August. While this is a “high-end/limited-run” kit, it is the
closest to a “mainstream” injection-molded kit that an AT-9 will likely ever
get.
Dora Wings
from Kyiv has been producing out-of-the-ordinary subject matter since they went
into business. The AT-9 was announced this past spring, and was released at the
beginning of August. While this is a “high-end/limited-run” kit, it is the
closest to a “mainstream” injection-molded kit that an AT-9 will likely ever
get.
As is typical of Dora Wings, the flying surfaces have very sharp trailing edges because the entire trailing edge is molded with the upper part; the lower part fits into that. Thus, a modeler has to fill gaps and sand the surface smooth. None of the parts have locating pins, and there is a modest amount of flash on some smaller parts. The upper cockpit roof and doors are molded in very clear plastic and a good mask set it provided. Parts quality is excellent. Decals are provided for four aircraft, one of which is in Olive Drab/Neutral Grey for the NMF-challenged.
| CONSTRUCTION |
Overall, this model is not difficult for a modeler who is experienced in constructing high-end/limited-run kits. Just remember that if you do not treat it as a limited-run kit, you will not get a high-end result.
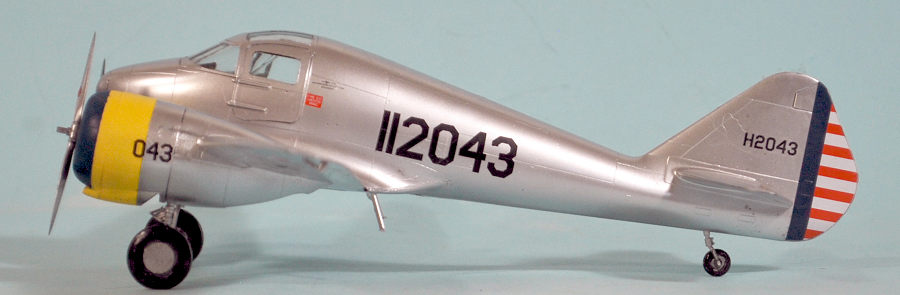
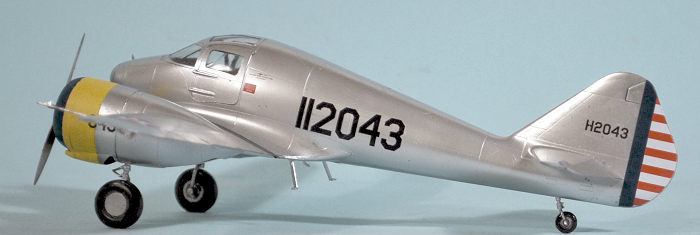
I started by assembling the wings and horizontal stabilizers. I sanded the interior of the lower parts, test-fitting them with the upper part until I got the two to match with a flat surface (the lower part is a bit thicker than the area for it to fit to the upper part). Getting these joints as close to perfect as I could meant I only needed to run a bead of CA glue down the seam, then sand it smooth. Since I was going to do the polished-aluminum option on the boxart, this meant sanding down with several increasingly-fine grits, finishing off with a couple different polishing pads.
I then assembled the fuselage, intending to fit the cockpit at the end of the process, since the roof of the cockpit was separate. I then test-fitted the wing sub-assembly to the fuselage and worked on the fore and aft lower joins and the upper sing/fuselage joins till they fit very close, without effort. I glued the wing to the fuselage, then filled the joints with CA glue and gave them the same treatment I had given the trailing edges of the wing. I ended up spending several hours getting these joins right, chasing “phantom seams”, then getting a glass-smooth surface with polishing pads. The horizontal stabilizers fit without problem.
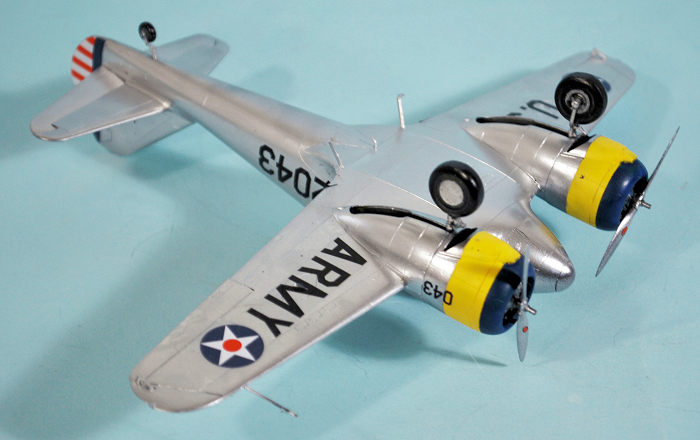
 I assembled
the main landing gear and attached it to the wing, then glued the lower nacelle
to the wing over the gear.
I assembled
the main landing gear and attached it to the wing, then glued the lower nacelle
to the wing over the gear.
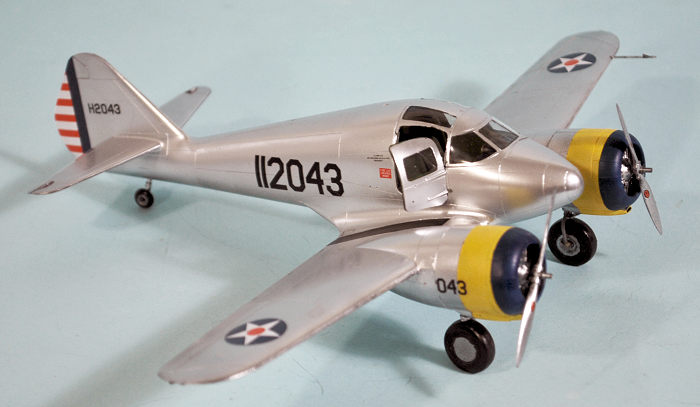
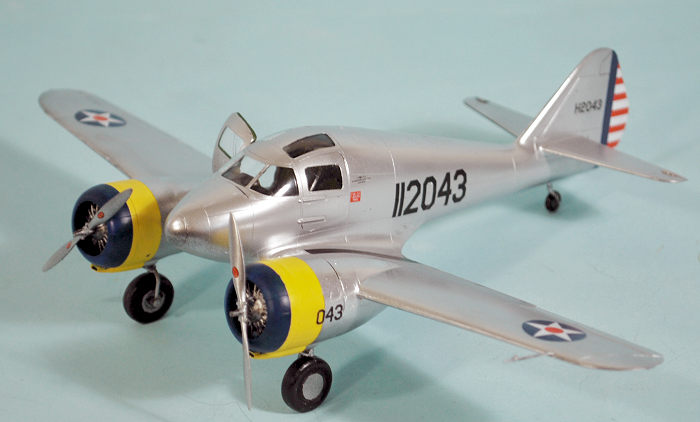
The engines are nicely detailed, with full exhaust and such, and are to be mounted on scale-thickness engine bearers. DO NOT DO THIS unless you plan to display the engine with the cowling off. I assembled and painted the front half of the engines, then inserted them into the cowlings after gluing the three-part assembly, and glued the engines in position inside the cowlings. This makes further assembly much easier. I then attached the cowlings to the nacelles, after test-fitting the attachment area.
With the airframe now complete, I next test fitted the canopy and doors, sanding the edges until they all fit smoothly into place.
The cockpit assembly was easy: the p-e instrument panel and coaming, throttle quadrant, p-e rudder pedals, control yokes and seats with p-e seatbelts. I painted the interior US medium green (Tamiya XF-5 “Flat Green”), the color used for other Curtiss types like the P-40.
| COLORS & MARKINGS |
First, I painted the cowlings with flat white, followed by Tamiya XF-3 “Flat Yellow,” which was masked off and the front of the cowlings were painted XF-5 “Flat Blue”
 With that
done, the model was painted with an overall coat of Tamiya X-1 “Gloss Black,”
thinned 50-50 and “misted on” to the opacity I wanted. After that dried, I
painted the model with Vallejo Aluminum. The Vallejo paint will take on the
finish of the underlying primer coat, which gave me a nice polished-aluminum
look. I painted the props similarly.
With that
done, the model was painted with an overall coat of Tamiya X-1 “Gloss Black,”
thinned 50-50 and “misted on” to the opacity I wanted. After that dried, I
painted the model with Vallejo Aluminum. The Vallejo paint will take on the
finish of the underlying primer coat, which gave me a nice polished-aluminum
look. I painted the props similarly.
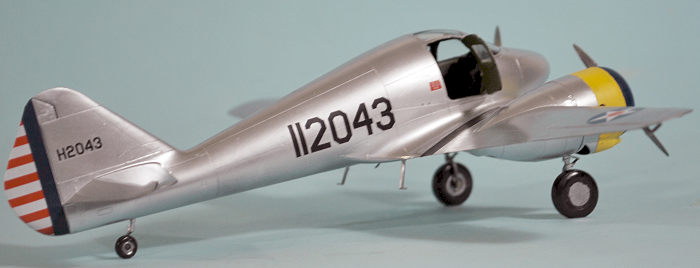
At that point, I realized the right cockpit door had slipped out of alignment during all this. Getting it out of the doorway was easy, but getting it back in held a good possibility of wrecking a pristine finish. So I decided the door would be posed open. I then painted the wheels with Tamiya XF-86 “Tire Black” and attached them to the gear. The Dora Wings decals went on without problem under an application of Micro-Sol.
I unmasked the cockpit glass, attached the door open, attached the props, and called it done before I did anything that might mar the look.
| CONCLUSIONS |
I have liked the look of the AT-9 since the first time I ever saw a photo of one. It has that 1930s “art deco look” that I really like in airplanes, and the result here was just what I wanted. The Dora Wings kit is fully up to the quality level of their other releases, and presents no problem for a modeler who is willing to take the time to test fit five times before gluing once. Recommended for modelers with experience constructing limited-run kits.
12 August 2021
Copyright ModelingMadness.com. All rights reserved. No reproduction in part or in whole without express permission.
Review kit courtesy of Dora Wings.
If you would like your product reviewed fairly and fairly quickly, please contact the editor or see other details in the Note to Contributors.