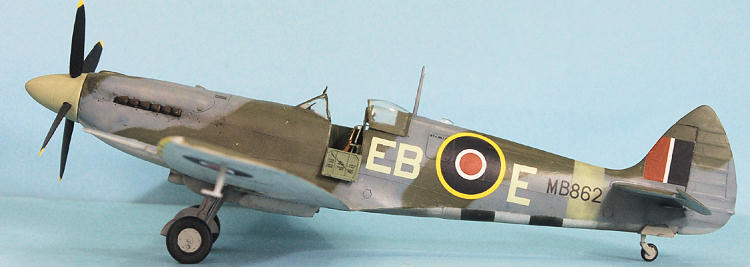
Hasegawa 1/32 Spitfire XII (Conversion)
| KIT #: | 08052 |
| PRICE: | $42.00 MSRP |
| DECALS: | Three options |
| REVIEWER: | Tom Cleaver |
| NOTES: |
Greymatter GMAA3202 Spitfire seat, GMAA3211 Universal “C” wing, GMAA3221
Spitfire XII conversion set |

| HISTORY |
Almost all of the developmental history of the Spitfire during
the Second World War revolved around attempts to outperform the
Focke‑Wulf Fw‑190. In addition to the development of the Spitfire IX,
the need to combat the German fighter in its low‑level fighter‑bomber
version led directly to the creation of the Spitfire XII, the first of
the Griffon‑powered Spitfires.
In
1942, with the Luftwaffe’s bomber force largely engaged on the Eastern
Front, and most of the other bomber units not on the Eastern Front
committed to the Mediterranean, there was almost no offensive capability
left among the units stationed on the Channel Front. The arrival of the
Fw‑190A‑4/U4 Jagdbomber “Jabos” gave JG‑26 and JG‑2 the
capability of mounting low‑level raids on southern
 Given the short response time between spotting the raiders
inbound and their retreat to
The Rolls‑Royce Griffon II engine with single‑stage two-speed
supercharger had become available in late 1940, offering a considerable
increase in power over the Merlin at low altitudes. The Spitfire IV
(Type 337) ‑ later renumbered the Spitfire XX after the arrival of the
photo‑recon P.R.IV series ‑ had been developed to use this power plant,
with first flight of the prototype DP485 in 1941. Further development
was desultory until the arrival of the German Jabos. With the focus on a
low‑altitude fighter capable of chasing and catching the Focke‑Wulf, the
Type 366 Spitfire XII quickly appeared, this being a Mark Vc airframe
powered by a Griffon II. The airplane’s top speed at 5,000 feet was 393
m.p.h., which was fast enough to catch the Fw‑190s. One hundred Spitfire
XIIs were eventually built, based on the Mk.V and Mk.VIII airframes.
Originally, these were visually distinguished by having either a
fixed (Mk. V) or retractable (Mk.VIII) tail wheel, though all were
modified to have the retractable unit during the course of 1943.
The wings were clipped to improve the rate of roll at lower
altitude.
In
February 1943, 41 Squadron exchanged its Spitfire Vbs for Spitfire XIIs.
For the pilots, the primary difference was that the Griffon rotated in
the opposite direction to the Merlin, giving a strong swing to the right
on takeoff rather than the previous left swing. The unit was declared
operational in April 1943 and moved to Hawkinge in southeastern
The worst problem the pilots faced at the outset was convincing the
Typhoon pilots that the Spitfire XII, which had clipped wingtips, was
not a Bf‑109. If the Spitfire pilot spotted the diving Typhoon in time,
they could just outrun the big Hawker fighter.
On
 The Wing fought its most successful action on
The Mk. XII remained in service with 41 Squadron through the summer of 1944, when it was used against the V‑1 "buzz bombs," where the fact it was the RAF’s fastest low-altitude fighter gave it an edge over the newer Spitfire XIV. The unit began conversion to the Spitfire XIV in late August/early September before moving to the Continent that fall, but engaged in one final combat on September 11 that saw three Luftwaffe experten of JG 26 shot down by future aces flying Spitfire XIIs. The last Spitfire XII lost on operations was DB-E/MB862, which crash landed after being damaged by friendly anti-aircraft fire two days after being used to shoot down the next-to-last victory for the now-elderly Spitfire XII.
| THE KIT |
Over the years, there have been several conversion sets made to allow
a modeler to put a Spitfire XII in the collection.
This being one of my favorite marks of Spitfire, I have done them
all: the hack-and-glue conversion using a Hobbycraft Seafire XV and the
Classic Airframes set with replacement nose and outer wings in resin - both
used with the Tamiya Spitfire Vb - and the Aeroclub full-fuselage conversion
for use with the Hasegawa Spitfire IX kit. All of these are for 1/48 kits,
which have now been replaced by the excellent Airfix 1/48 Spitfire XII.
 Greymatter Figures markets several resin conversion sets that allow a
modeler to create a 1/32 Spitfire XII from the Hasegawa Spitfire Vb kit.
The Hasegawa kit has recently been given a limited release with new
decals of current quality, which provide accurate national insignia and
stencils. The Greymatter
Spitfire XII conversion includes the complete cowling, fishtail exhausts,
4-bladed prop and correct spinner, retractable tail wheel, radiator housing,
carb intake, cannon fairings and wing ammo bulges, and pointed rudder.
Greymatter also provides a “C” wing conversion that is necessary for
this project. The resin seat is
also a vast improvement over that provided in the Hasegawa kit.
The elusive shapes of Griffon prop spinners have frequently eluded
manufacturers, but Greymatter has this one right, and also got the even more
elusive shape of the Spitfire XII prop blades right.
The cowling is the proper length with the correct bulges for the
early Griffon engine.
| CONSTRUCTION |
First, the outer wings must be cut off the lower center section.
After this is shaped so it fits the resin wings, the wings should be
attached at this point so that a strong joint can be created.
The oil cooler has to be cut off the Hasegawa kit and used on this
wing, and the radiator housing can be attached at this point.
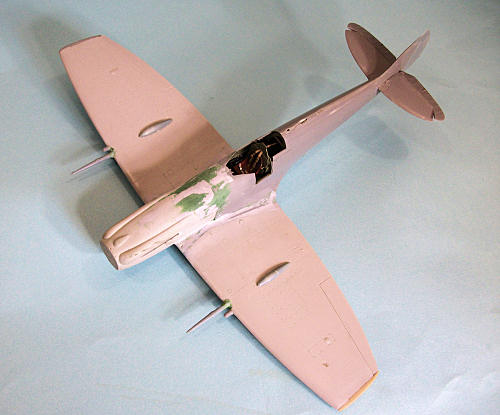 The cannon fairings look good, but they are the later version
associated with the Spitfire XIVe.
I used the plastic cannon barrels left over from the PCM Spitfire IX
kit used in the Spitfire XVIII conversion project, and used sprue tree for
the outer cannon stubs.
Once the wing is set up, I fitted the cowling in position, then took
measurements with one fuselage half to get the right point for cutting off
the kit nose. After cutting off
the nose sections of each fuselage half, I proceeded to assemble the
cockpit. I used the Eduard
photo-etch detail set for the Tamiya Spitfire IX to add detail to this
cockpit, and also used Eduard photoetch RAF seatbelts.
Before gluing the fuselage halves together I cut out the area for the
retractable tail wheel.
With the kit fuselage glued together, I test fitted the fuselage to
the wing, trimming where necessary to get a good fit.
I then glued the cowling into position on the wing, then attached the
fuselage to that complete sub-assembly.
The fit was close enough, but a solid application of Squadron green
putty was needed for all the joints.
When that had set up overnight, the model was sanded down smooth, and
the panel lines were rescribed along with all the raised detail on the
Hasegawa kit. I then attached
the carb intake, which fit easily in the right position.
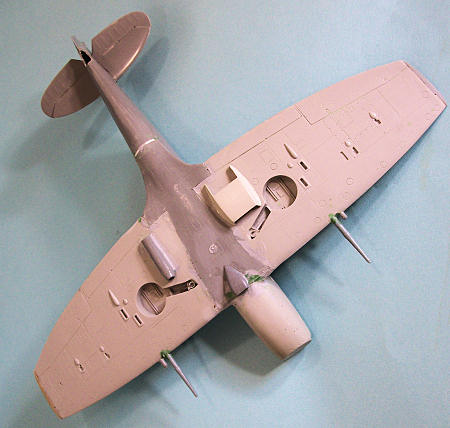 I found that the plastic rudder left over from the PCM kit fit just a
bit better than the Greymatter resin rudder, and so used that; had this not
been available, the resin rudder would have been just fine.
I cut off the elevators from the horizontal stabilizers, assembled
the stabilizers and attached the elevators in the drooped position, then
attached these to the model.
With all that, assembly was complete and it was time to proceed to
the paint shop.
| COLORS & MARKINGS |
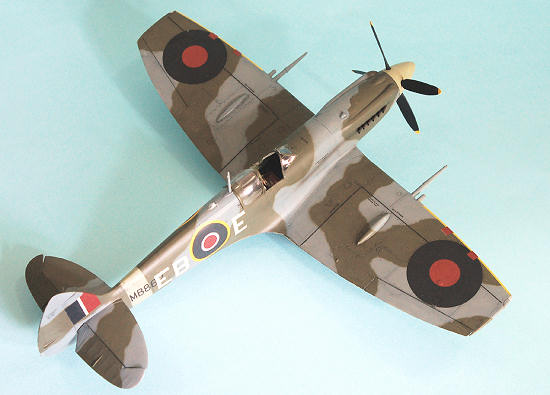
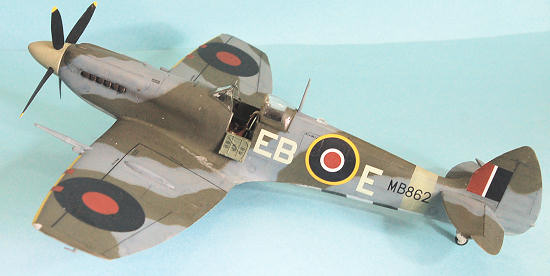
After reading about 41 Squadron in the Osprey “Griffon Spitfire Aces”
book, I thought it would be interesting to do EB-E as she looked at the end
of her time on operations, when she scored the final victories for the type
against the Luftwaffe that September, 1944, with D-Day stripes on the lower
rear fuselage, and a “dinged” paint scheme, which I proceeded to do.
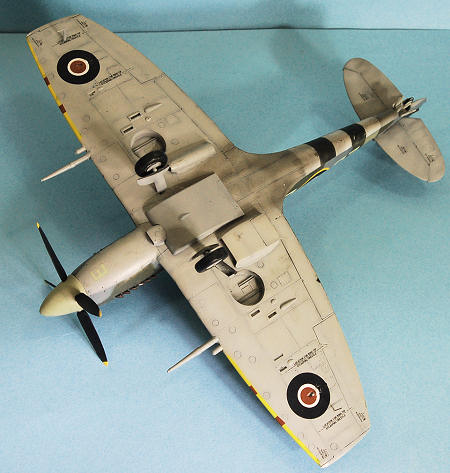 I first “pre-shaded” the model with Tamiya flat black airbrushed on
the panel lines, then painted the fuselage ID strip and the prop spinner
using Tamiya “Japanese Army Grey” which is a close match to the ID letter
decals I planned to use. I
masked off the fuselage stripe then painted a thinned flat white on the
lower fuselage, masked that and shot the black D-Day stripes.
While that was setting up, I painted the yellow wing leading edges.
When these areas were dry, I masked them off.
I painted the Temperate Land Scheme using Tamiya’s new “Sea Grey
Medium” (“RAF Light Grey” on the bottle) XF-80, “Ocean Grey” (Ocean Grey 2 -
RAF” on the bottle) XF-82, and “Dark Green” (“Dark Green 2 - RAF” on the
bottle) XF81, which are excellent accurate colors.
Each color was lightened with Flat White and the area gone over to
varying degrees to give the impression of wear on the paint, the airplane
being “ancient” by Second World War standards, having been in existence and
used operationally for 16-18 months.
When all was dry I unmasked the model and applied a coat of
Xtracrylix Gloss Varnish.
I used the kit decals for the stencils and national insignia, which
went on easily with Micro-Sol.
I used Xtradecal X32021 “RAF serial letters and numbers” for the serial, and
letters taken from the Victory Productions Spitfire sheet for the squadron
codes. When set and dry, I
washed off the model and applied a coat of Xtracrylix Flat Varnish.
| FINAL CONSTRUCTION |
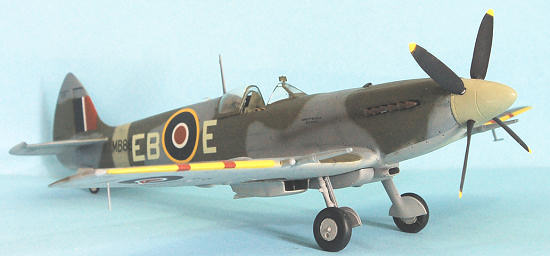
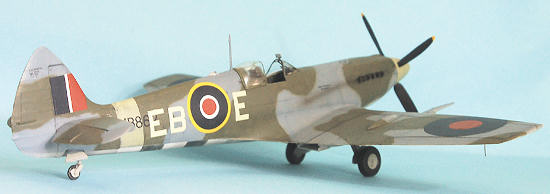 I “dinged” the airframe with Tamiya “Flat Aluminum” along panel lines
and walk ways, then used Tamiya “Smoke” for the exhaust stains on the
fuselage side and the oil stains on the wing underside.
I then gave the model an overall coat of Xtracrylix Flat Varnish.
I used left-over gear doors from the Tamiya Spitfire kit and the 30-gallon “slipper tank” from that kit for greater detail on this model.
| CONCLUSIONS |
Like the other Greymatter Spitfire conversions, this project demands
“some modeling skill required,” and the more experience one has with conversions
the better. That said, if you know
what you are doing, it is not difficult if you take your time and think through
the modifications and assembly. The
Spitfire XII is still my favorite Griffon Spitfire and looks great sitting next
to the Spitfire F. Mk. XVIII and the Spitfire 24 conversions.
Highly recommended for those who like Spitfires and a modeling challenge.
Review Kit courtesy of my wallet; Greymatter conversion sets courtesy Greymatter Figures - get yours atwww.greymatterfigures.com
Copyright ModelingMadness.com. All rights reserved. No reprodution in any form without express permission from the editor.
If you would like your product reviewed fairly and fairly quickly, please contact the editor or see other details in the Note to Contributors.