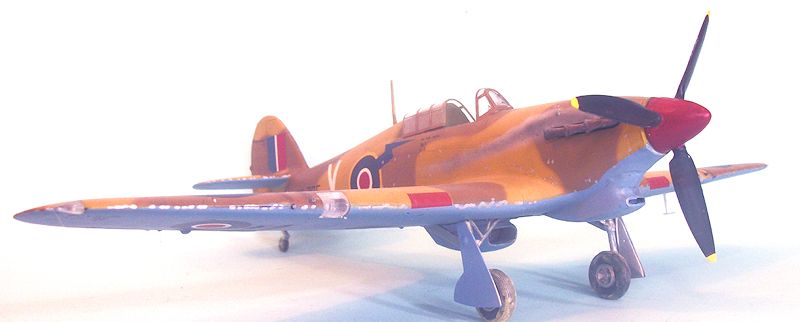
PCM 1/32 Hurricane II
| KIT #: | 32012 |
| PRICE: |
$72.00 SRP |
| DECALS: | Five options |
| REVIEWER: | Tom Cleaver |
| NOTES: |
Greymatter Hurricane II conversion sets
used. |

| HISTORY |
The Hurricane II with the
uprated Merlin XX engine appeared in the fall of 1940, just in time for a few
Mk.IIa aircraft to participate in the closing events of the Battle of Britain.
The uprated engine, which was
equipped with a two-stage supercharger that increased performance above 18,000
feet, increase power to 1,280 h.p. and provided a useful increase in power at
both lower and higher altitudes.
The new engine required a modified cowling with extended overall length by four
inches. A new, larger radiator with
a different housing that was deeper and wider than that of the Mk.I was also
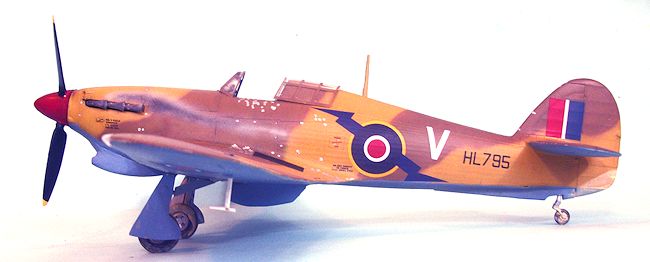 necessary.
A new Rotol propeller with a more streamlined spinner was also
introduced, creating what pilots and crew called the “long nose Hurricane.”
The Mk.IIa carried the standard
armament of eight .303 machine guns.
In October 1940, the “Mk.II Series II” appeared with armament increased
to twelve machine guns, with two additional weapons in each wing outboard of the
landing lights. In April 1941, this
version was re-designated the Mk.IIb.
The Mk.IIb also introduced a different tailwheel, with a
levered-suspension leg with a torque link, to cater to the increased weight.
A limited number of Mk.IIb
airframes were also modified to Sea Hurricane configuration and saw service
aboard RN carriers with the Fleet Air Arm in 1942 in the Mediterranean, most
prominently during the Anglo-American invasion of North Africa.
| THE KIT |
Pacific Coast Models first
released their Hurricane I kits, with both the earlier “rag wing” and later
“metal wing” versions as separate kits, in 2010.
While the kits are “fiddly” and not for the neophyte, in the hands of an
experienced modeler they make up into excellent models.
Greymatter Figures had
previously released resin conversion sets (formerly done by Wolfpack), to allow
conversion of the ancient Revell Hurricane I to a Hurricane II.
Fortunately, these parts also fit the newer and far superior PCM kit, and
allow a modeler to create a Hurricane IIa, IIb and IIc, depending on which sets
are used. Set GMA3212 _”Mk. IIa/b/c
Conversion,” has the different nose cowling in a piece of solid resin, a resin
cockpit that is better-detailed than the PCM kit, a resin seat, the different
fishtail exhausts, the
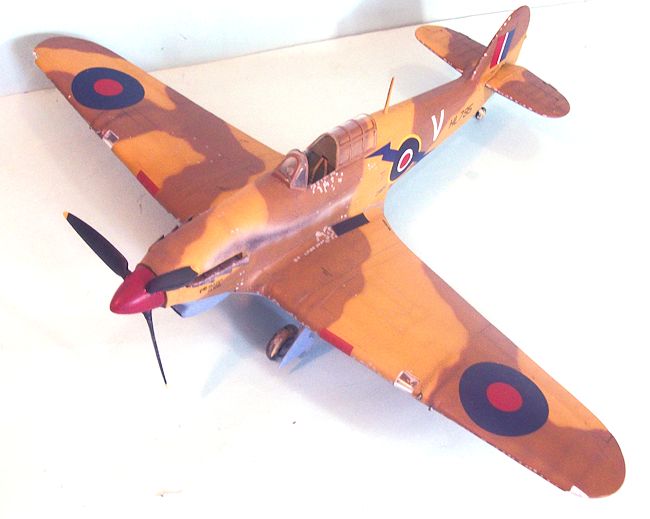 different
radiator and housing, and the different tail wheel, and the later Rotol
propeller, as well as the 4 20mm cannon barrels for the “c” version.
GMA3203 is a resin wheel well set, which is not really necessary with the
PCM kit, since that kit has a resin wheel well that is sufficient, though the
Grey Matter set has finer detail.
A modeler who is making the Mk.
IIc conversion with the PCM kit will have to fill in the surface detail for the
four-gun wing bay, and source the cannon fairing bulges and the cannon fairings.
If you have the Revell kit that was “modified” to a Mk.IIc, you can cut
those parts off the wing. The
recent re-release of the Revell kit also has good decals, which add to the
possible markings options that can be produced with the PCM decal sheet.
I opted for a Mk.IIb primarily
because I did not want to go to the effort of converting the wing for the
cannons of the Mk.IIc. I also used
the tropic filter from the old Revell kit, which is accurate in shape and fit
the resin nose. Greymatter also has
a resin filter if you need it.
| CONSTRUCTION |
I started by cutting off the
forward cowling of the fuselage halves.
I then assembled the fuselage halves and the lower rear part.
After cutting the resin nose off its molding block, I attached it to the
fuselage. I then took the lower
one-piece wing and modified its forward center section so it would attach
cleanly with the different nose part.
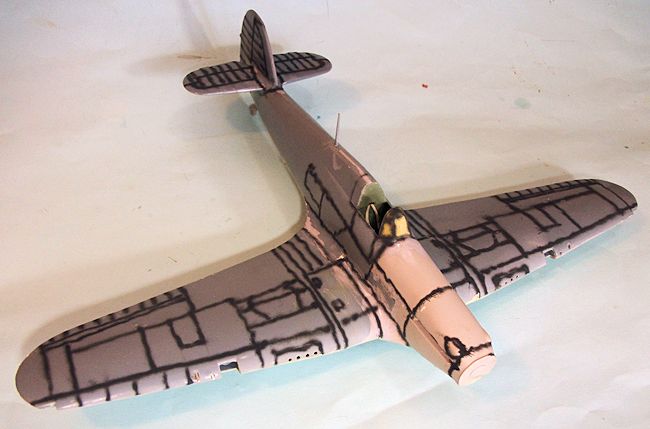 I painted and
assembled the Greymatter cockpit, and installed it in the fuselage.
I used the PCM photoetch instrument panel, though the resin panel in the
Greymatter set would also look good if AirScale instrument decals were used.
Having learned the secret of
assembling the PCM kit wing and fuselage, I attached the upper wing halves to
the fuselage, so I could work the wing-fuselage joint to get it as clean as
possible with a minimum of filling and sanding, which loses the surface detail.
I then attached the PCM resin wheel well to the lower wing, and the
landing lights in the upper wings, and attached the lower wing to the fuselage
and upper wings. There is some
difference in the cutouts for the four machine guns in the leading edge, as well
as the landing lights. I cut and
trimmed these so they were aligned, and installed the machine gun ports.
I had to sand down the wingtips to align properly, and smooth the wing
leading edge.
I then attached the horizontal
stabilizers, filling and sanding smooth the gaps in the joints.
| COLORS & MARKINGS |
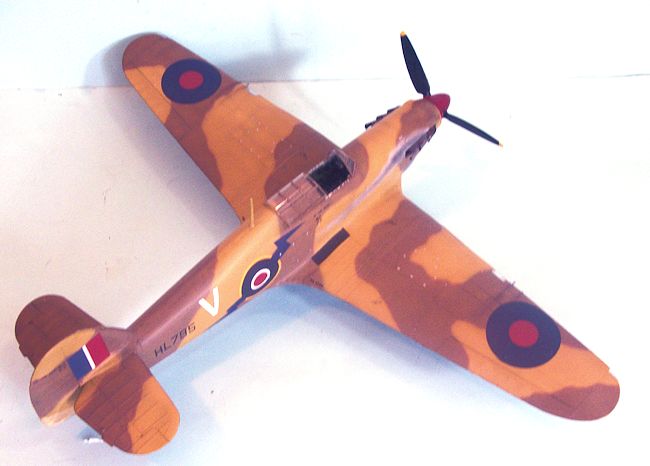
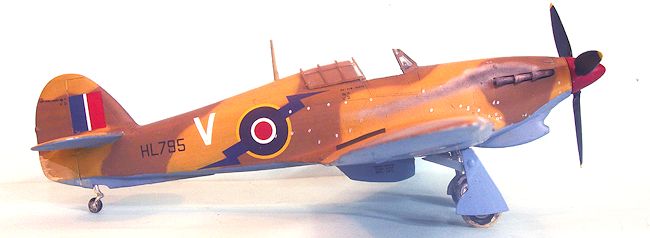
The model was painted with
Xtracrylix RAF Dark Earth, Middle Stone and Azure Blue, applied freehand.
I used the later C underwing
decals, C.1 fuselage decals and fin flash from a 1/32 Spitfire decal sheet, then
used the stencils from the PCM kit and the Revell decal sheet.
I “dinged” the model with a
silver Sharpie and a silver Prismacolor pencil, then applied heavy exhaust
staining with Tamiya Sky Grey, German Grey and NATO black to simulate the
staining that resulted from the lean engine mixtures used in the desert.
I attached the landing light covers and canopy.
| CONCLUSIONS |
 It would
really be nice if Pacific Coast Models were to extend their series of Hurricanes
to the Mk.IIs, but in the absence of that option a modeler with experience doing
resin conversions and assembling limited-run plastic kits should be able to use
the Greymatter sets to create a late-model Hurricane without any insurmountable
difficulty.
If you would like your product reviewed fairly and fairly quickly, please contact the editor or see other details in the Note to Contributors.