Eduard 1/48 Spitfire I
| KIT #: | 11148 |
| PRICE: | $89.00 |
| DECALS: | Eight options |
| REVIEWER: | Tom Cleaver |
| NOTES: | 2020 Dual Combo |
| HISTORY |
By the spring of 1940, Spitfires equipped approximately one-third of the squadrons in Fighter Command. Over that summer, the pilots of the Spitfires and their more numerous comrades in the cockpits of Hawker Hurricanes successfully stopped the Luftwaffe offensive in the Battle of Britain.
The Supermarine Type 300 prototype K5054 first flew on March 5, 1936. Upon landing, Vickers Chief Test Pilot “Mutt” Summers famously declared, “Don’t change a thing!” At that point, 310 Spitfire I fighters were already on order. It was officially named “Spitfire” (rather than “Shrew”) on June 10.
 Production
initially lagged due to the fact Supermarine had never mass-produced an airplane
in its entire existence. The problem was finally solved by creating an extensive
network of sub-contractors, who eventually produced four-fifths of all the parts
and sub-assemblies of the airplane, though Supermarine’s management initially
resisted the idea of giving potential competitors the blueprints. The biggest
obstacle was production of the difficult-to-produce elliptical wing, with
hand-fabricated and finished fuselages sitting on the production line awaiting
wings. As a result of the delays in getting the Spitfire into full production,
the Air Ministry put forward a plan that its production be stopped after the
initial order for 310, after which Supermarine would build Bristol Beaufighters.
The managements of Supermarine and Vickers were able to convince the Air
Ministry that production problems could be overcome, and a further order was
placed for 200 Spitfires on March 24, 1938.The first production Spitfire, K9787,
was flown by production test pilot Jeffrey Quill on May 15, 1938.
Production
initially lagged due to the fact Supermarine had never mass-produced an airplane
in its entire existence. The problem was finally solved by creating an extensive
network of sub-contractors, who eventually produced four-fifths of all the parts
and sub-assemblies of the airplane, though Supermarine’s management initially
resisted the idea of giving potential competitors the blueprints. The biggest
obstacle was production of the difficult-to-produce elliptical wing, with
hand-fabricated and finished fuselages sitting on the production line awaiting
wings. As a result of the delays in getting the Spitfire into full production,
the Air Ministry put forward a plan that its production be stopped after the
initial order for 310, after which Supermarine would build Bristol Beaufighters.
The managements of Supermarine and Vickers were able to convince the Air
Ministry that production problems could be overcome, and a further order was
placed for 200 Spitfires on March 24, 1938.The first production Spitfire, K9787,
was flown by production test pilot Jeffrey Quill on May 15, 1938.
These first Spitfires were equipped with a Merlin II engine equipped with a single-stage/single-speed supercharger giving 1,030 h.p. on 87-octane avgas. The first 78 used a Watts two-blade wooden propeller, later replaced by a deHavilland 2-speed adjustable three-blade metal prop. The Merlins, which were hand-built by Rolls-Royce (Merlins were still hand-built till Packard got their hands on the engine and showed the British what mass-production means). They were leaky and subject to power loss initially.
19
Squadron at Duxford, commanded by Squadron Leader Henry Cozens and flying
Gloster Gauntlets was the first RAF squadron to convert to the new fighter, with
the first Spitfires arriving on September 11, Cozens having flown one a month
previous. The fact that Cozens was a qualified aircraft engineer who cou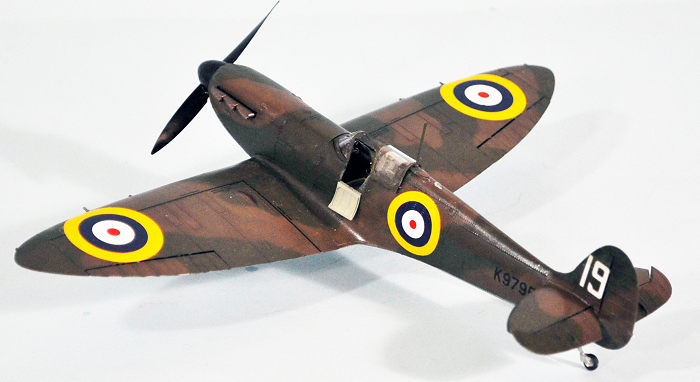 ld
work with Supermarine personnel in developing refinements to the airplane was a
primary reason for 19 being first. The squadron’s fighters were first
photographed from a Blenheim by the great Charles Brown, Aeroplane’s legendary
photographer and the inventor of air-to-air photography (he did it using a
hand-held Speed Grafix shooting on glass plates, usually sitting in the breezy
back seat of an open-cockpit airplane and estimating his settings - a far cry
from we aspirants shooting a full-auto Nikon D500 digital camera capable of
2,000 shots), on October 31, 1938.
ld
work with Supermarine personnel in developing refinements to the airplane was a
primary reason for 19 being first. The squadron’s fighters were first
photographed from a Blenheim by the great Charles Brown, Aeroplane’s legendary
photographer and the inventor of air-to-air photography (he did it using a
hand-held Speed Grafix shooting on glass plates, usually sitting in the breezy
back seat of an open-cockpit airplane and estimating his settings - a far cry
from we aspirants shooting a full-auto Nikon D500 digital camera capable of
2,000 shots), on October 31, 1938.
Learning to use retractable landing gear, and remembering to extend it before touchdown, was the most difficult part of getting used to the Spitfire. The first loss happened on November 3, when Pilot Officer Sinclaur destroyed K9792 when he forgot to lower the gear.
Supermarine managed to find answers to the problems of the Spitfire between 19 Squadron first taking it on operations and the outbreak of war a year later, by which time eleven RAF Squadrons were operating the fighter.
| THE KIT |
The first “acceptable” Spitfire I 1/48 model was created by Tamiya in 1994. Like many of the Tamiya kits in that period of frantic competition with Hasegawa, the fact it was “buildable” did not mean it was “accurate.” Airfix came out with another Spitfire I, largely based on its 30-year old Spitfire V kit, in 2013, with a far superior tooling released in 2015. Tamiya then updated their kit in 2019 and created what many thought was the “ultimate” Spitfire I. (See my review to learn why that is not necessarily the case)
When Eduard announced a couple years ago that they were going to add all Merlin-powered Spitfire sub-types to their line of Merlin-60 series kits, the usual question “Why can’t they do the second-series Fairleigh Fruitbat Mk. Vd with the visible relief tube?” was raised (The answer being, “Someone else’s Spitfire I doesn’t put money in Eduard’s corporate account.”)
 This “double
combo” issue of the Spitfire I was likely going to be released at the IPMS-USA
Nats, the way the P-51D was last year, but the best-laid plans of mice and men
on many things have been tossed overboard in this, The Plague Year.
This “double
combo” issue of the Spitfire I was likely going to be released at the IPMS-USA
Nats, the way the P-51D was last year, but the best-laid plans of mice and men
on many things have been tossed overboard in this, The Plague Year.
Opening the box and looking at the parts on their sprue trees answers the question why Eduard did it. The kit has the magnificent surface detail Eduard is now known for, on steroids. This is the first Spitfire kit ever made with scale-size raised rivets on the rear fuselage. Not only that, but all of the rivet detail is so petite that it becomes invisible at a distance of about 8 inches (a scale 30-odd feet), only seen if the light plays on it at the right angle, just like the 1:1 Spitfires I’ve been fortunate to be around.
The various physical differences between the various production versions are catered to with the correct parts. Thus, you need to decide at the outset what option you are going to build, and then pay attention to the instructions where different parts are noted for different options. Decals are provided for eight different airplanes, ranging from the first-production K8785, to a final-production series X4382.
A word
here about the decals: Eduard began producing their own decals with the release
of the P-51D-5 kits last year. As I noted in my review of that kit, the decals
are very thin and they are not completely opaq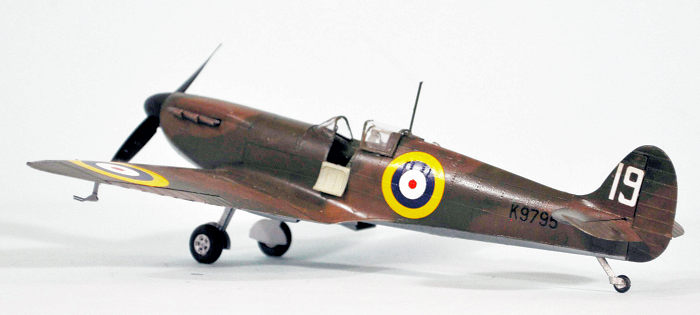 ue,
with colors like yellow not retaining their “yellow-ness” against a dark
surface. That problem still exists here. Not to mention that the shade of yellow
for the national markings is not the correct shade, but rather some sickly semi-chartreusy
color that looks like vomit once it’s on a Dark Earth/Dark Green background.
Fortunately, most modelers have an extensive collection of Spitfire decals in
their stash, so the problem of replacing the national insignias is not hard. The
Red/blue markings should be OK, as well as the serials and squadron codes.
ue,
with colors like yellow not retaining their “yellow-ness” against a dark
surface. That problem still exists here. Not to mention that the shade of yellow
for the national markings is not the correct shade, but rather some sickly semi-chartreusy
color that looks like vomit once it’s on a Dark Earth/Dark Green background.
Fortunately, most modelers have an extensive collection of Spitfire decals in
their stash, so the problem of replacing the national insignias is not hard. The
Red/blue markings should be OK, as well as the serials and squadron codes.
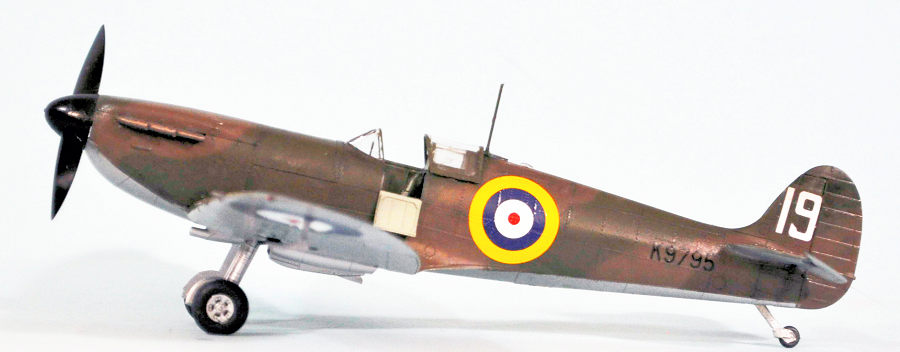
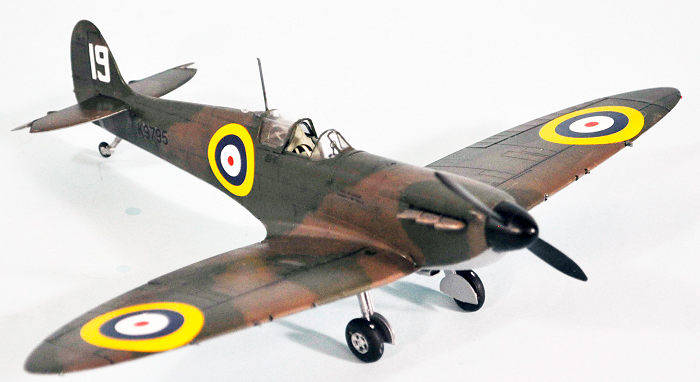
However, if you want to do K9795, you can only do it if you happen to have the Airfix 2015 release Spitfire I kit, which has the markings for this aircraft, with not only a proper yellow color, but the correct shades of pre-war dark blue and red, and also in the proper sizes of marking. (And yes, I discovered this the hard way, coming within an ace of starting over again before remembering I had that Airfix sheet in the stash.)
Of course, there is also the option of getting the great Fundekals Spitfire I sheets, which really are DEFINITIVE, and also provide information no one else has about the markings of the Spitfire I, which is a much different airplane paint and markings-wise that those that followed.
| CONSTRUCTION |
 If you have
built the other Eduard Spitfires, this kit will offer few surprises. One thing
you should watch out for is the placement of the machine gun barrels in the
wings. DO NOT use liquid glue on these, or capillary action will wreck them by
melting the barrel into the wing half. Be sure to ONLY put glue on the rear end,
and CA is likely the best to go with. Also, be sure to read which gun barrel
parts go where, since there are two different lengths and they go to specific
guns.
If you have
built the other Eduard Spitfires, this kit will offer few surprises. One thing
you should watch out for is the placement of the machine gun barrels in the
wings. DO NOT use liquid glue on these, or capillary action will wreck them by
melting the barrel into the wing half. Be sure to ONLY put glue on the rear end,
and CA is likely the best to go with. Also, be sure to read which gun barrel
parts go where, since there are two different lengths and they go to specific
guns.
Past that, consider this “another Eduard Spitfire” and act accordingly. Be sure to clean off all sprue nubs when you take parts off the trees and do not paint surfaces that will be glued, since the fit of this kit is VERY PRECISE and failing to do those things will create snowballing problems as you proceed with assembly.
Something unexpected is the fact that the hole in the face of the part to which you attach the prop is a tight fit - too tight. Open it up a bit with your #11 blade, and test fit before committing to attaching the prop.
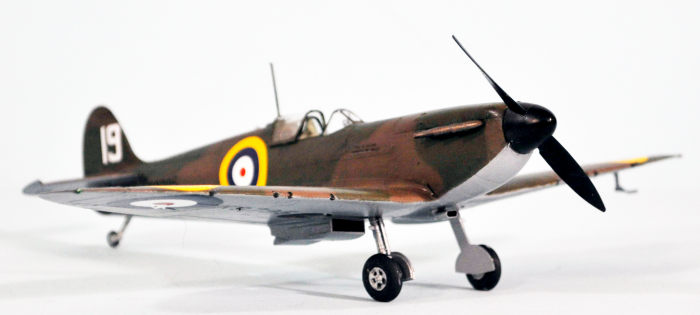
| COLORS & MARKINGS |
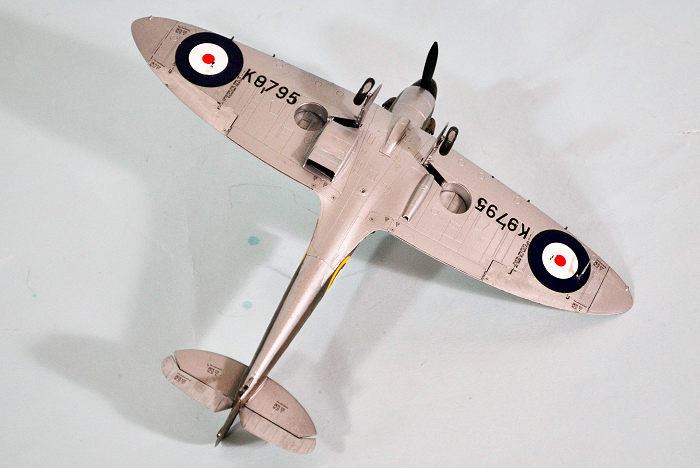
I
masked off the upper surfaces and then painted the lower surface with Tamiya
AS-12 natural metal from the rattlecan, which will look like aluminum lacquer
under a coat of Satin clear finish. I painted the elevators and the ailerons
Vallejo White Aluminum, which does a good job for aluminum dope for the fabric
surface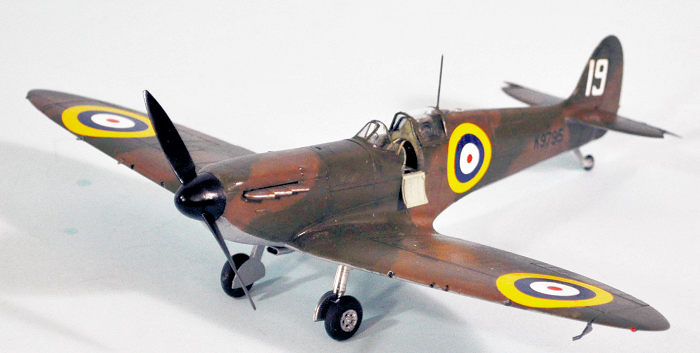 s. I
then painted the upper surface with Gunze Mr. Color “Dark Earth” and Tamiya
XF-81 Dark Green. The myth that early Spitfires were painted using matts to get
a “hard edge” is busted by the fact that no two Spitfires have exactly the same
camouflage pattern in period photos, and this is also true of the early 19
Squadron Spitfires. Having done Spitfire camouflage since the early Jurassic, I
freehanded the A scheme pattern on this airplane over black preshading,
following the color profile provided in the instructions.
s. I
then painted the upper surface with Gunze Mr. Color “Dark Earth” and Tamiya
XF-81 Dark Green. The myth that early Spitfires were painted using matts to get
a “hard edge” is busted by the fact that no two Spitfires have exactly the same
camouflage pattern in period photos, and this is also true of the early 19
Squadron Spitfires. Having done Spitfire camouflage since the early Jurassic, I
freehanded the A scheme pattern on this airplane over black preshading,
following the color profile provided in the instructions.
The Eduard decals go on well. It’s afterwards that you find out the problem with the yellow color. Fortunately, the Airfix Decals went down over these under a coat of Solvaset without losing any of the petite surface detail.
I gave the model a coat of Satin Gloss finish. Spitfire Is had a “nonspecular” finish, not a flat finish. I then attached the landing gear, the cockpit door, the exhausts, the canopy and the prop. Since the airplane was brand new and super well-maintained, I did not do any weathering or “dings.”
| CONCLUSIONS |
Eduard has stolen Tamiya’s lunch money and tossed them in their locker, then closed the door on them. The difference in detail quality between this kit and that kit are night and day. You don’t need to throw away your Airfix or Tamiya kits, but after you build one of these, you won’t be buying more of those, if you are any sort of serious Spitfire Boffin. The kit is easily the best they have yet done, and considering how high they have set the bar, that is quite an achievement. Highly recommended for modelers prepared to take their time and follow the instructions and pay attention to detail. I. Love. It.
You’d best grab the kit where you can, because it is out of stock at Eduard and most of the major internet shops, though I did see some still on offer at Hannant’s the other day. They don’t call it “limited edition” for nothing. (Or you can wait for the standard boxing. Ed)
13 August 2020
Copyright ModelingMadness.com
Review kit courtesy of my wallet
If you would like your product reviewed fairly and fairly quickly, please contact the editor or see other details in the Note to Contributors.
Back to the Main Page Back to the Previews Index Page Back to the Review Index Page