Airfix 1/48 Spitfire F.XIV
| KIT #: | A05135 |
| PRICE: | $29.95 |
| DECALS: | Two Options |
| REVIEWER: | Tom Cleaver |
| NOTES: |
| HISTORY |
It's a strange but interesting fact that the only "built for that specific powerplant" Spitfire to achieve a large production run was the Mk.I; while there were several other Marks specifically designed to make maximum benefit of the additional power of the later Merlins and then the Griffons, in each case the "interim" type cobbled together to bring the additional performance operational as soon as possible was the version that saw the most widespread production. This began with the Mk.V, which was essentially a beefed-up Mk.I airframe to take advantage of the Merlin 45's additional 400 h.p. This was followed by the Mk.IX, a beefed-up Mk.V to take advantage of the Merlin 60 series while the Mk.VIII was being designed to take maximum advantage of this engine. The last was the Mk.XIV, a beefed-up Mk.VIII airframe to use the Griffon.
 The Type 394 Spitfire Mk. XVIII bears the same relationship to the
Spitfire XIV that the Spitfire VIII bore to the Spitfire IX: designed to use
the particular engine to best advantage, yet not produced in numbers
approaching the "interim" type. This type introduced a new wing which was
specific for the "E" type armament, rather than the "universal" wing used
since the Spitfire Vc. Originally, the aircraft used the same Griffon 65 as
the Spitfire XIV, but the Griffon 67 - which offered an additional 300 h.p.
- was quickly introduced.
The Type 394 Spitfire Mk. XVIII bears the same relationship to the
Spitfire XIV that the Spitfire VIII bore to the Spitfire IX: designed to use
the particular engine to best advantage, yet not produced in numbers
approaching the "interim" type. This type introduced a new wing which was
specific for the "E" type armament, rather than the "universal" wing used
since the Spitfire Vc. Originally, the aircraft used the same Griffon 65 as
the Spitfire XIV, but the Griffon 67 - which offered an additional 300 h.p.
- was quickly introduced.
Wing Commander George C. Keefer, RCAF:
George Clinton Keefer was born on July 11, 1921 in New York City and was raised by an aunt in Charlottetown, Prince Edward Island. At age 19, he left Yale University, New Haven, Connecticut, to enlist in the RCAF on October 15, 1940, and graduated from flight training on April 1, 1941.
Posted to 274 Squadron in the Desert Air Force, he flew Tomahawks and Hurricanes and destroyed four enemy planes. In March 1943, Keefer arrived back in the UK where he was posted to 412 Squadron RCAF in the all-Canadian Kenley Wing led by Johnny Johnson.
On one mission, his aircraft was severely damaged, He bailed out over the English Channel, landing within a mile of the French coast. He inflated his dinghy and spent the next six hours frantically paddling away from France. He was eventually picked up and arrived safely in Britain.
 In April 1944, Keefer became wing commander of 126 Wing, and awarded
a second DFC. On D-Day, June 6, 1944, he led the wing on low and medium
cover for the Allied landings. On D-Day plus one he shot down a Fw-190. From
then until July 9, 1944, the wing under his leadership shot down 56 planes
and destroyed over 400 vehicles.
In April 1944, Keefer became wing commander of 126 Wing, and awarded
a second DFC. On D-Day, June 6, 1944, he led the wing on low and medium
cover for the Allied landings. On D-Day plus one he shot down a Fw-190. From
then until July 9, 1944, the wing under his leadership shot down 56 planes
and destroyed over 400 vehicles.
In November 1944, he was given command of 125 RAF Wing at Eindhoven in Holland, flying the Spitfire XIV. Between March 9 and April 2, 1945, he destroyed five enemy aircraft in the air and another nine on the ground. His second DSO, awarded in June 1945, noted that under his command, the wing was credited with 191 victories.
During the Battle of the Bulge, Keefer strafed a German road convoy; firing at an ammunition truck, his aircraft was hit and forced down in the ensuing explosion. Fortunately he landed behind the Allied lines and hitched a ride home to his own unit.
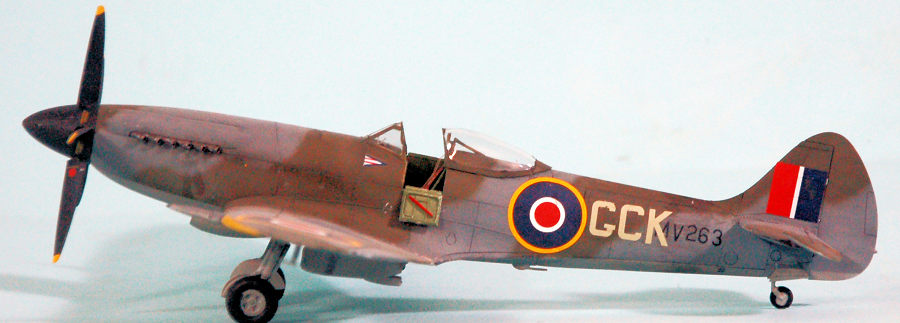
Keefer picked Spitfire F. XIVe MV263 in early April 1945 and flew it till the end of the war, scoring two air victories and making what Johnny Johnson described in his book “Wing Leader” as “the bravest strafing attack I ever saw” against Parchim airfield, where he destroyed 11 Me-262s on the field despite flying through massive light AA fire.
At the end of the war, Keefer was credited with a total of 12 enemy aircraft destroyed, 9 damaged and 2 probables.
| THE KIT |
| CONSTRUCTION |
 Several modelers have complained about the difficulty of building
the kit without use of putty and with loss of detail.
Several modelers have complained about the difficulty of building
the kit without use of putty and with loss of detail.
There is a very easy way to assemble this kit, such that one will have perfect fit and will use no putty or other filler in the process. Here it is:
1. Before assembling the fuselage, glue some Evergreen strip inside along the lower join line for the gas tank. Assemble the fuselage without attaching the cockpit. This allows you to work the fit of the gas tank to the fuselage from inside and out to get a perfect fit. If you take care in attaching the fuselage halves, you will only have to scrape down the centerline joint to have a smooth result. Before attaching the fuselage halves, cut open the side hatch if you want to pose it open on the finished model.
2. Assemble the cockpit. Cut off the ferschlugginah “gun sight” and make a Mk.14 sight, which is easy since it’s a cube with an adjusting wheel on either side. All Spitfire XIVs used it and it solves the one “mistake” in the kit. (There are photos of the gunsight to be found on the net, google “photos of Mark 14 gyro gunsight”) I only used Eduard photo-etch seatbelts, the rest of the cockpit looks fine when it’s viewed inside the fuselage.
3. Insert the cockpit into the fuselage, it will “click” into position, then glue it in place.
4. Assemble the main gear wells to the lower wing part, then glue the lower wing to the fuselage.
 5. Carefully make sure that the inner edge of the upper wing part will
fit perfectly to the fuselage, smoothing off the sprue nubs. Attach the upper
wing by starting with the wing-fuselage joint, then glue the upper part to the
lower.
5. Carefully make sure that the inner edge of the upper wing part will
fit perfectly to the fuselage, smoothing off the sprue nubs. Attach the upper
wing by starting with the wing-fuselage joint, then glue the upper part to the
lower.
6. Attach the horizontal stabilizer. Cut the elevators apart. Attach the plug in the vertical fin, then attach the elevators as you wish them posed.
7. Assemble and attach the radiators and housings and the carburetor intake. If you flood the area where these parts will be attached with liquid glue, it will fill any gaps and you will not need putty anywhere.
You now have a perfectly-assembled model, ready for paint.
If you choose to do the fighter version rather than the fighter-reconnaissance version, merely cover the camera covers with Mr. Surfacer or the putty of your choice and sand smooth, then rescribe the panel lines as necessary.
| COLORS & MARKINGS |
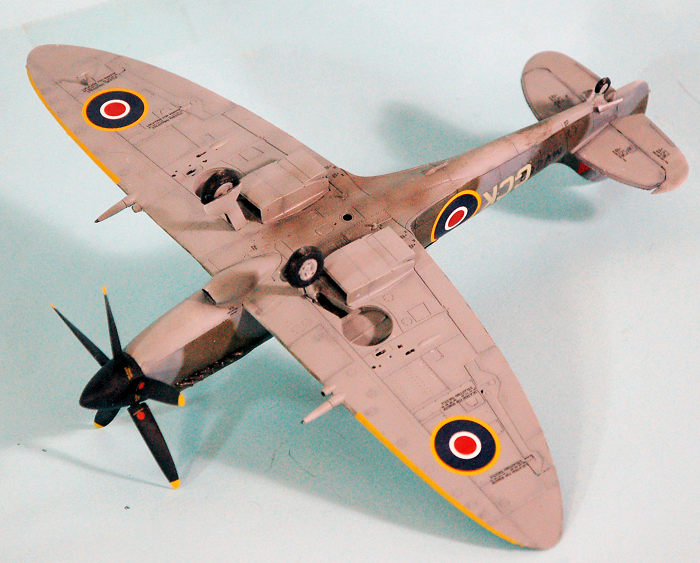
I painted the yellow wing leading edge, then masked it off. I then
pre-shaded the model with flat black, “painting” the band around the rear
fuselage black, so that when I painted the camouflage over, that area would be
darker, to simulate painting over the Sky-colored band as was done on RAF
fighters in Europe in 1945. I freehanded the camouflage pattern
 using Tamiya RAF
Ocean Grey, Dark Green and Sea Grey Medium.
using Tamiya RAF
Ocean Grey, Dark Green and Sea Grey Medium.
I used the kit decals for the stencils and late-war national insignia with the yellow surround on all six positions, then sourced the serial numbers and the ID letters from decal sheets in the dungeon.
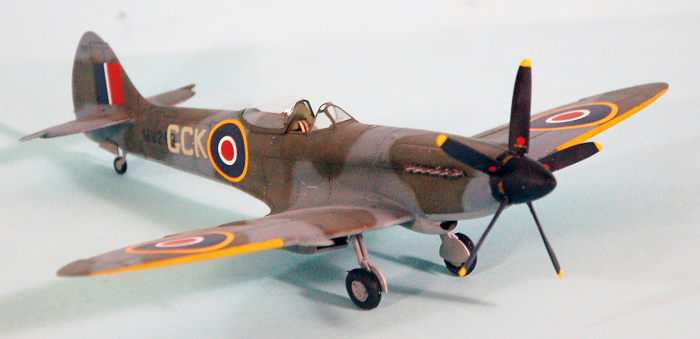
When finished, I gave the model a coat of clear matte, then applied very limited ‘dings” with Vallejo Aluminum and a 0000 brush (it was an airplane only used on ops for around a month) and gave it exhaust and oil stains with airbrushed Tamiya “Smoke.”
I then attached the exhausts after drilling them out at the end using a new #11 blade, attached the landing gear and prop, unmasked the canopy and placed it in the open position.
| CONCLUSIONS |
This is a very nice kit and makes up into the most accurate 1/48 injection-molded kit of the Griffon-powered Spitfire. Everything is there in the box to turn it into any particular sub-type of the “bubble-top” Griffon Spitfire. Xtradecals has released 48-127 and 48-130, which have some very interesting schemes for the Spitfire XIV, FR XIV and F 18.
Review kit courtesy Hornby USA.
Back to the Main Page Back to the Previews Index Page
Back to the Previews Index Page