Special Hobby 1/48 Barracuda Mk.5
| KIT #: | SH 48069 |
| PRICE: | $ |
| DECALS: | Two options |
| REVIEWER: | Tom Cleaver |
| NOTES: |
| HISTORY |
As the premier provider of aircraft for the Fleet Air Arm since the introduction of the Flycatcher and the IIIF in the 1920s, Fairey Aviation tried twice to produce a replacement for their Swordfish torpedo/strike/reconnaissance aircraft which entered service with the FAA in 1935. The first, the Albacore, never replaced the Swordfish and in fact only served alongside the earlier design before being replaced by the airplane it had been designed to replace.
 The second
attempt was more successful. Responding to Air Ministry Specification S.24/37 in
1937 for a three-seat torpedo and dive bomber aircraft, Fairey submitted the
design later that year. Two prototypes were ordered in July 1938, and the first
prototype Mk.I flew on December 7, 1940.
The second
attempt was more successful. Responding to Air Ministry Specification S.24/37 in
1937 for a three-seat torpedo and dive bomber aircraft, Fairey submitted the
design later that year. Two prototypes were ordered in July 1938, and the first
prototype Mk.I flew on December 7, 1940.
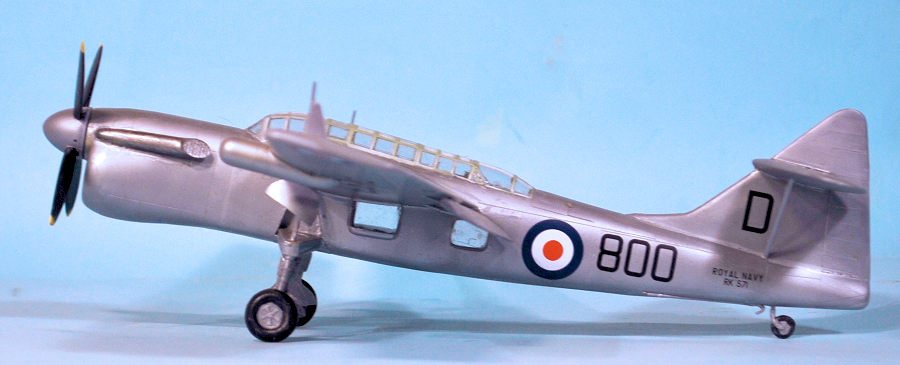
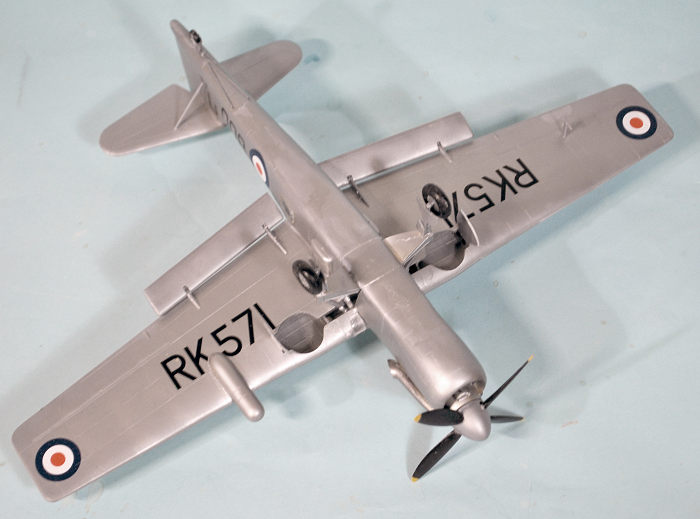
Named Barracuda, the airplane was a large shoulder-wing monoplane of all-metal construction, which utilized Fairey-Youngman trailing-edge flaps that gave the it an improved performance over the preceding Swordfish and Albacore. The three-man crew sat in tandem cockpits enclosed by a long “greenhouse” canopy. Use of the large flaps at a negative angle to slow the airplane in a dive-bombing attack disturbed the airflow over the rear of the airplane, dictating the high-set tailplane.
Due to the high priority for new RAF fighters and bombers, the prototype did not begin service flight test until June 29, 1941, and service trials and evaluation were not completed until February 1942. Flight tests revealed a need to strengthen the airframe. With the addition of equipment not included in the original specification, the result of these changes was that the Barracuda suffered from a weight problem that was never resolved, which seriously reduced take-off and climb performance.
The Barracuda Mk.I was seriously underpowered by the 1,300 h.p. Merlin 30. After 30 Mk.Is were delivered, the 1,640 h.p. Merlin 32 was introduced, with the specification changing to Barracuda Mk.II. This was the most important version of the Barracuda, with 1,688 produced between 1942-45 by Fairey, Blackburn, Boulton-Paul and Westland.
 The Barracuda
T.R.III was developed to carry a new centimetric ASV radar in a blister radome
under the rear fuselage. The first Mk.III, converted from a Boulton-Paul built
Mk.II, appeared in 1943, with production commencing in early 1944. Built
alongside the Mk.II, 852 T.R.IIIs were manufactured by Boulton-Paul and Fairey.
The Barracuda
T.R.III was developed to carry a new centimetric ASV radar in a blister radome
under the rear fuselage. The first Mk.III, converted from a Boulton-Paul built
Mk.II, appeared in 1943, with production commencing in early 1944. Built
alongside the Mk.II, 852 T.R.IIIs were manufactured by Boulton-Paul and Fairey.
The final version was the Mk V, which flew with a 2,030 h.p. Rolls Royce Griffon 37, which would have finally solved the problem of being under-powered, except their Lordships of the Admiralty determined it would carry even more electronic equipment. As with the T.R.III, earlier versions were converted to prototypes. Only 30 production Barracuda Vs were built, and none saw operational service; ten were used as COD aircraft aboard British aircraft carriers until the last was removed from service in 1957. A total of 2,572 Barracudas of all marks were delivered to the FAA.
| THE KIT |
 This kit
differes from the Barracuda II kit in having two different trees, one of which
has the larger wings and horizontal stabilizer, and the other with the new
engine cowling, vertical fin and prop. Resin parts are includedfor the frolnt of
the engine cowling,. The different exhausts, and cockpit interior parts.
This kit
differes from the Barracuda II kit in having two different trees, one of which
has the larger wings and horizontal stabilizer, and the other with the new
engine cowling, vertical fin and prop. Resin parts are includedfor the frolnt of
the engine cowling,. The different exhausts, and cockpit interior parts.
Decals are provided for an early production airplane operated by 783 Squadron from Lee-on-Solent in the late 1940s, and a COD airplane operating aboard HMS Illustrious in the early 1950s.
| CONSTRUCTION |
I first began building this kit in 2006 when it wass first released. It ended up in a “Box O’ Doom” six months later and somehow managed to get put in a box of unbuilt kits and survive the move to my current house ten years ago, where that box disappeared into the garage, to be rediscovered this past Spring during the major house renovation I’ve done this past 18 months. When I discovered it, I realized it was 90% complete, and decided to finish it off.
The fuselage parts in this kit are the same as the Barracuda II. The modeler has to cut off the Barracuda II engine cowling and replace that with the extra partsfor the Mk. 5 cowling. I did this before proceeding with further work with the fuselage. I also dut off the Barracuda II vertical fin and rudder.
Having
learned my lessons in building the Barracuda II kit, I knew that the “secret” to
building the Barracuda was to get the cockpit interior bulkheads to fit. I first
cut off all the mold-release plugs inside the fuselage halves, then started
fitting the cockpit floors and bulkheads. The big problem is to get the floor of
the rear cockpits to fit properly. This part is about 1/16" too wide on each
side to allow fit. I cut it, sanded it, test-fitted it, and r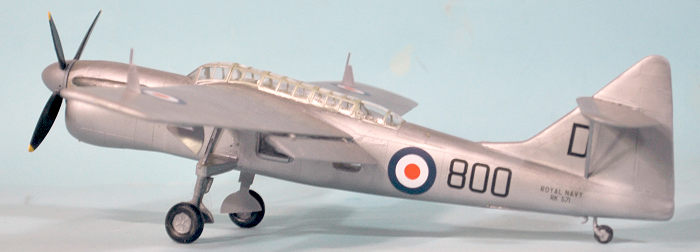 epeated
the process several times until I had it down to a proper fit. The rearmost
bulkhead was the one that was too wide by the most, with the problem becoming
less as I moved forward, until the fore and aft bulkheads of the pilot’s cockpit
required only a bit of sanding down to fit. Once these parts were corrected and
good fit was established, the rest of the parts - instrument panels, seats, etc.
- fit with no problems. Once the cockpit frame was assembled, I painted the
interior parts in British Interior Green, with semi-gloss black instrument
panels and other boxes, which were dry-brushed with aluminum to bring up detail.
epeated
the process several times until I had it down to a proper fit. The rearmost
bulkhead was the one that was too wide by the most, with the problem becoming
less as I moved forward, until the fore and aft bulkheads of the pilot’s cockpit
required only a bit of sanding down to fit. Once these parts were corrected and
good fit was established, the rest of the parts - instrument panels, seats, etc.
- fit with no problems. Once the cockpit frame was assembled, I painted the
interior parts in British Interior Green, with semi-gloss black instrument
panels and other boxes, which were dry-brushed with aluminum to bring up detail.
I then assembled the wings, which presented no difficulty not usually associated with limited-run kits, i.e., sanding down the wheel well bulkheads to fit, etc. I attached the wings to the fuselage halves before further assembly of the fuselage, so that I could work the joint from both sides and get a good solid fit, given that the wing is only butt-joined to the fuselage.
I assembled and attached the enlarged vertical fin and the horizontal stabilizer. I finished off major airframe assembly by cutting the resin cowling face from its casting block and attaching it. All joins and seams were filled with Mr. Surfacer 500 and sanded smooth. This was the point that model went into 16 years of storage.
Once I got back to it, I cleaned up and attached the main landing gear, and the flaps that I set in the lowered position. Attaching the cockpit canopy presented difficulties because it is not wide enough to cover the cockpit openings other than the pilot’s cockpit. I used some Evergreen sheet to narrow the openings and then attached the canopy. Since it’s not really to see what cockpit detail is there, I closed up the canopies. Masking the canopy took an evening, with breaks.
| COLORS & MARKINGS |
I painted the model overall with Tamiya “Aluminum,” LP-11. The kit decals went on without difficulty. I painted the wheels and attached them, attached the prop, and unmasked the canopy.
| CONCLUSIONS |
I have found one other assembled model from this kit, over at BritModeller. I’m not sure why Special Hobby made this, other than it’s obscure and saw limited production. I’m not all that certain why I completed it, other than it’s Big, British, and Butt-ugly. For some of us, that’s a feature, not a bug.
October 2014
Copyright ModelingMadness.com. All rights reserved. No reproduction in part or in whole without express permission.
If you would like your product reviewed fairly and fairly quickly, please contact the editor or see other details in the Note to Contributors.