Special Hobby 1/72 CAC-12 Boomerang
| KIT #: | 72044 |
| PRICE: | $20.00 |
| DECALS: | Four options |
| REVIEWER: | Torben Plesberg |
| NOTES: | Short run kit |
| HISTORY |
The Commonwealth Aircraft Corporation designed and built the CAC-12 Boomerang between 1942 and 1945 as the first Australian combat aircraft. The background was the threat from the Empire of Japan, and there was an urgent need for fighter aircraft to equip the RAAF.
The CAC was established in 1936 with the aim of creating an aircraft industry in Australia. It was no longer safe to rely on deliveries of aircraft from abroad, i.e. the UK. After the purchase of tooling and equipment in both the UK and the USA, the first design to enter production was the “Wirraway”, an armed license built version of the North American NA-16 Texan.
 After
the outbreak of the war in Europe, when the UK was fighting alone against
Germany, it became obvious that the UK was unable to supply Australia with
any aircraft or equipment. And when the war broke out in the Pacific area
December 7 1941, the CAC had to concentrate on creating a fighter plane of
its own for the defense of Australia against possible Japanese aggression.
After
the outbreak of the war in Europe, when the UK was fighting alone against
Germany, it became obvious that the UK was unable to supply Australia with
any aircraft or equipment. And when the war broke out in the Pacific area
December 7 1941, the CAC had to concentrate on creating a fighter plane of
its own for the defense of Australia against possible Japanese aggression.
To speed up the project it was decided to use components from the Wirraway - the wing, tail assembly and center section of the fuselage. The engine available was the Pratt & Whitney R-1830 Twin Wasp, which was license built for the Australian license built Beaufort twin engine bomber.
The Boomerang was in fact a panic fighter – much like the Swedish J 22 fighter. The smallest possible airframe married to the largest engine available. That was the Boomerang. The prototype made its maiden flight less than three months after the green light was given to go on with the project. That was an achievement in these days, considering the CAC had no experience building fighter planes.
The Boomerang was tested against a modified Brewster Buffalo. The Buffalo was lightened and re-weighted to simulate a Japanese Zero in flight. The Boomerang was faster than the Buffalo, better armed, and the pilot was better protected. In return the Buffalo could out-maneuver the Boomerang. Above 15.000 feet the performance of the Boomerang fell rapidly away, and the maximum speed of 490 km/h was not sufficient against Japanese fighters. The best allied fighters did 650 km/h. The Boomerang was in fact under-powered and not clean enough from an aerodynamic point of view.
 To
improve the speed of the basic Boomerang, more powerful engines of 1700 hp
and later raised to 1830 hp were built in. These variants were called CA13,
CA 14, CA 14 A and CA 19. The CA 14 A had a top speed of more than 600 km/h,
and that was sufficient for dealing with Japanese fighters. However, at that
time supplies of Spitfires and license production of Mustangs stopped the CA
14 A project.
To
improve the speed of the basic Boomerang, more powerful engines of 1700 hp
and later raised to 1830 hp were built in. These variants were called CA13,
CA 14, CA 14 A and CA 19. The CA 14 A had a top speed of more than 600 km/h,
and that was sufficient for dealing with Japanese fighters. However, at that
time supplies of Spitfires and license production of Mustangs stopped the CA
14 A project.
Five squadrons of the RAAF flew the Boomerang, replacing Buffaloes and Airacobras. The Boomerang never recorded destroying an enemy aircraft in the air. The role as a light ground attack aircraft was far more useful. The Boomerang did almost the same as the Skyraider did in the Vietnam War. It was very popular by its pilots, and that is probably why there are nine surviving Boomerangs, and six of these are even airworthy. The production of the Boomerang amounted to 250 aircraft. A seventh airworthy aircraft is not a 100 % original plane, and may be described as a flying replica with “many original parts”. This plane is registered in the USA as NX32CS and is owned by a Dutch pilot, who has demonstrated his Boomerang several times at Danish airshows. The aircraft has the serial A46-139, a camouflage pattern looking like the original Australian – and British national markings! On the port side of the cowling is the word “Phooey” and a little further to the rear a Donald Duck cartoon.
| THE KIT |
The kit comes in a small box with a painting of a Boomerang on the lid, flying up-side down over a landscape. On the bottom, there are four side views of the options of the kit. The instructions is an A5 leaflet of twelve pages. Page one is a history of the Boomerang – in Czech and English. Page two shows the sprues with numbers of the parts, and the symbols of the construction steps are explained. Pages three to five show how to put the model together in 8 steps. Pages six to nine show four 4-plane drawings in full color the color schemes and decaling of the four options, with color references in Gunze Sangyo. Page ten shows the stencils, and page eleven and twelve are commercials for further SH kits.
The decal sheet is not first class, because some of the roundels are not in register. They have a thin white moon outside the dark blue area. The plastic parts are well done and fit well together. The interior of the cockpit is impressive, however, not much can be seen on a finished model with a closed canopy. A nice little kit of a very special WW II fighter plane.
| CONSTRUCTION |
 If you
follow the instructions you will end up with an authentic model of an Australian
Boomerang fighter. During the construction I came across some problems, and I
made some shortcuts. When looking at the assembled cockpit section, step 3, I
wondered if it was possible to assemble the fuselage halves without problems! In
my experience, larger sub-assemblies never fit properly, where they should. And
this was also the case here: I decided to solve the problem by omitting parts 16
and 32, and now the cockpit section caused no problems during the assembling of
the fuselage halves. This change will hardly be noticed in the finished model,
when the canopy is in place and the frames painted. I probably also “forgot”
some smaller items in the cockpit – they would be invisible anyway.
If you
follow the instructions you will end up with an authentic model of an Australian
Boomerang fighter. During the construction I came across some problems, and I
made some shortcuts. When looking at the assembled cockpit section, step 3, I
wondered if it was possible to assemble the fuselage halves without problems! In
my experience, larger sub-assemblies never fit properly, where they should. And
this was also the case here: I decided to solve the problem by omitting parts 16
and 32, and now the cockpit section caused no problems during the assembling of
the fuselage halves. This change will hardly be noticed in the finished model,
when the canopy is in place and the frames painted. I probably also “forgot”
some smaller items in the cockpit – they would be invisible anyway.
Step 2: I did not take the trouble to make the 14 small pushing rods between the cylinder tops and the crankcase. In return, I made a shaft for the propeller to make it workable. For some reason I find it important, that a propeller can turn. The propeller does not need to be in the same position on photos, and it may even rotate, if it is blowing, when the photos are shot.
Step 4:
It is important that part 39 is glued properly in place before the assembly of
the wing. The transparent landing lights – CP2 – are rather difficult to handle
and make fit properly to the recesses of the leading edge of the wing. A glue
Stix is the right tool to handle tiny parts.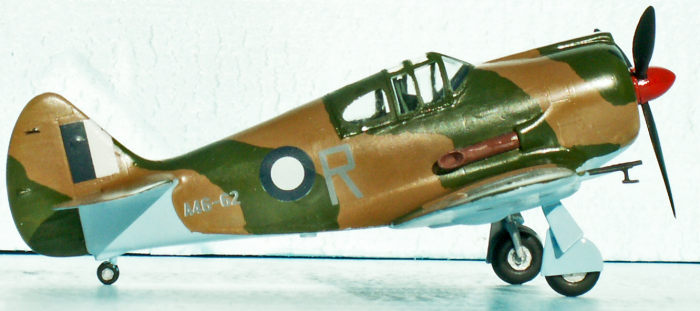
Step 7: The optional extra tank – part 3 – destroys the clean look of this sturdy fighter. No belly tank, thanks! I did not understand the note: “Part CP3 fill with putty and paint”. Why not just glue part CP3 in place – and paint it over?
Step 8: The applying of the propeller and spinner was already done – step 2 – if you prefer a turning propeller. The two 20 mm cannons are glued in place on the leading edge of the wing. For the pitot tube there should be a hole to fit the gauge of the tube. The canopy fits well – unless you have painted the base. The thickness of the paint is sufficient to make a bad fit!
It was a rather simple and uncomplicated build. The parts fit very well – with the exception of a complete cockpit section!
| COLORS & MARKINGS |
The
standard color scheme of a Boomerang is sky blue – HB 47 – on the under sides
and the fuselage under the tail planes. The upper sides have a camouflage
pattern of earth brown –HB 29 – and foliage green – HB 149. There are color
references for Gunze Sangyo colors, however I found the approximate equivalents
in Humbrol,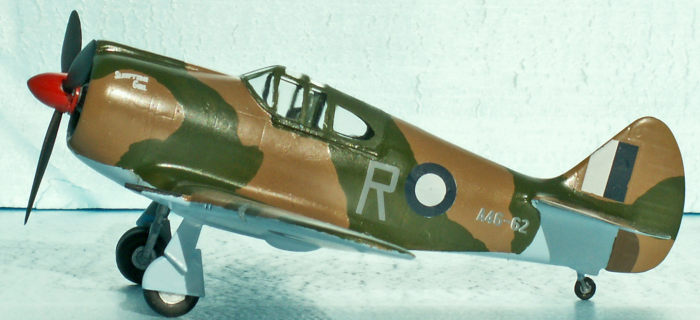 because I have most of the Humbrol range in my stock. Wheel wells and interior
were painted interior green – HB 78.
because I have most of the Humbrol range in my stock. Wheel wells and interior
were painted interior green – HB 78.
When painting models in the summer time, I use enamel colors in my workshop in the shed. Mrs. Plesberg doesn’t like the smell of enamel colors in the house! In the winter season, I use aqua colors in the house, the smell of which is acceptable to Mrs. Plesberg.
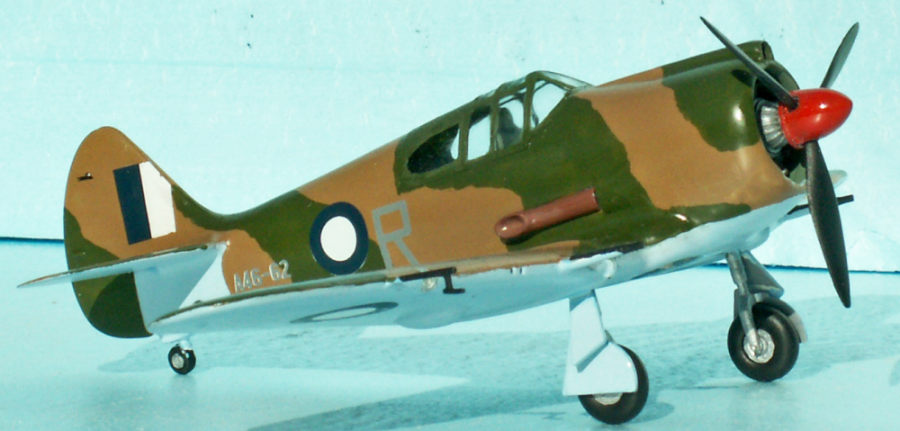
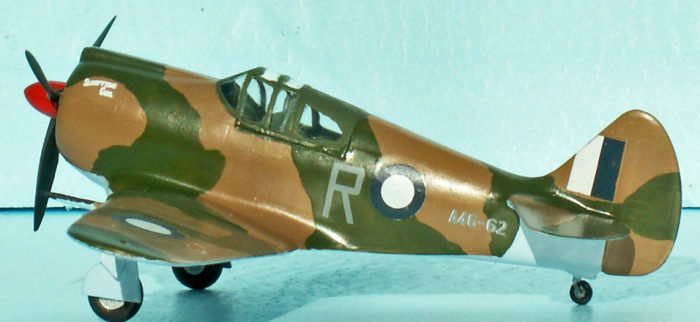
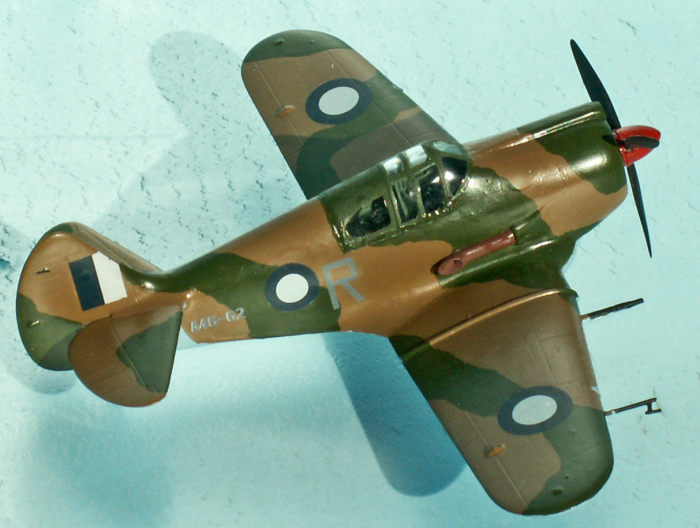
The camouflaged areas got two layers of gloss varnish to facilitate the decaling. The HB 47 on the undersides is a gloss color. I choose the A46-62 as my individual aircraft. The national markings were not all entirely in register, all other markings were OK and easy to apply.
I found the model too small for adding the aerials.
| CONCLUSIONS |
The Special Hobby Boomerang is a nice little kit, which produces an authentic model of an unusual fighter plane of the WWII era. It is recommendable to all modelers, except novices. I simply had to add this aircraft to my collection, because I enjoyed watching the replica Boomerang in the air at a couple of airshows in Denmark. However, I did not want a replica model with Australian colors and British markings!
| REFERENCES |
Wikipedia article on the CAC Boomerang and my own photos of the “Phooey”!
3 March 2020
Copyright ModelingMadness.com
If you would like your product reviewed fairly and fairly quickly, please
contact
the editor
or see other details in the
Note to
Contributors. Back to the Main Page
Back to the Review
Index Page
Back to the Previews Index Page