Polishing clearplastic:
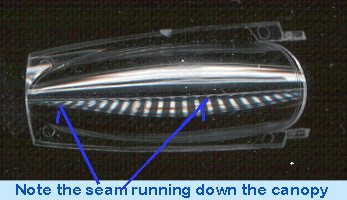 There comes a time in most modeling, when one comes to the clearplastic parts. Often times, these parts are scratched due to poor packaging orthey are molded in such a way that there is a mold seam in them. The Hasegawa1/48 F-16 is such a case. In order to mold the very complex canopy curves, it isnecessary for there to be a mold seam.
Often, the new builder willignore such things, but as one improves, there is a need to remove such things.Fortunately, it is very easy to do.
 First one needs several grades of sandpaper. I use the Flexi-fileFlex-pads. They come in a set from very rough to very fine and they are all thatis needed to accomplish this task. Cost is around $11.00 retail for the set.
Starting with the 320 grit stick,gently sand away the seam. Once that is done, use 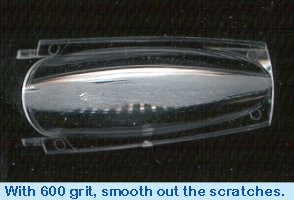 the 600 grit stick. It is a good idea to wet sandwith these as to lighten up on the pressure as one sands. Now you can gostraight to the polishing stick (which you don't want to wet sand with), but Ihave a sheet of 1200 grit that I use.
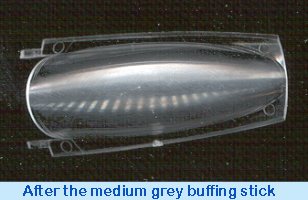
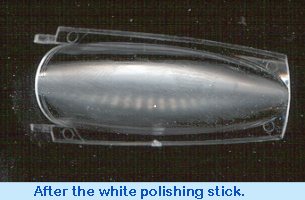 When using the polishing stick, there are three grades. Thecoarsest is dark grey, which you can use instead of the 1200 grit. Next, go tothe white and finally use the medium grey side. Always start off with somepressure and lighten up as it becomes clearer. Again, no water with thepolishing stick.
 Finally, you can buff it with an old shirt. If you have a piece ofnylon stocking, that will help buff it even more. The canopy can then be dippedin Future should you wish, but I'd wait until after painting to do so as theFuture may come off on your masking material.
Using the images, you can see howthe canopy becomes more and more clear as we go through the extra steps ofsanding and polishing. Total time; about 5 minutes.
See how easy that was? Thisworks just as well if you spill glue or paint on the part. Now you no longerhave to put up with scratched or marred canopies.
ScottVan Aken