| KIT #: | 013 |
| PRICE: | $4.00 in a bag with no instructions or decals |
| DECALS: | Two options in a complete kit |
| REVIEWER: | Scott Van Aken |
| NOTES: | Tooling from the late 1960s/early 1970s |
| HISTORY |
 The Corsair II was designed as a lightweight attack aircraft to supplement and
later replace the Douglas A-4 Skyhawk. In addition to service in our Navy,
Corsair II's were flown by our Air Force, Air National Guard, and several other
nations. The Ling-Temco-Vought (LTV) A-7 production line started on 19 March 1964 and
continued until September 1984; 1,545 were built. Its first flight, powered by a
Pratt & Whitney TF30-P-6 turbofan engine, was on 27 September 1965. Navy
Preliminary Evaluations were underway in January 1966. Test programs were
accomplished with wartime urgency, and the first fleet delivery (VA-174, the RAG
squadron) was on
14 October 1966. Retirement of the last two Navy A-7 aircraft fleet operational
squadrons (VA-46 and VA-72) was in May 1991 after their service in Desert Storm.
The Corsair II was designed as a lightweight attack aircraft to supplement and
later replace the Douglas A-4 Skyhawk. In addition to service in our Navy,
Corsair II's were flown by our Air Force, Air National Guard, and several other
nations. The Ling-Temco-Vought (LTV) A-7 production line started on 19 March 1964 and
continued until September 1984; 1,545 were built. Its first flight, powered by a
Pratt & Whitney TF30-P-6 turbofan engine, was on 27 September 1965. Navy
Preliminary Evaluations were underway in January 1966. Test programs were
accomplished with wartime urgency, and the first fleet delivery (VA-174, the RAG
squadron) was on
14 October 1966. Retirement of the last two Navy A-7 aircraft fleet operational
squadrons (VA-46 and VA-72) was in May 1991 after their service in Desert Storm.
| THE KIT |
Well, this is one of Hasegawa's first generation kits. By that, I mean that it is raised panel lines, rivets where needed, minimal interior and wheel well detail and if it carries stores, they are somewhat crude. However, back when it was produced, it was gobbled up along with Hasegawa's other US Navy aircraft as they were generally a TON better than what was being produced by the other guys (assuming the other guys produced it at all).
You might expect this one to have a rather short intake and you'd be correct.
Equally correct is the short, but not bad exhaust. The wing pylons are fitted
for the appropriate things under wings, in this case, drop tanks inboard, MER on
the center pylon and TER on the outer one. While the drop tanks are usable once
you remove the redundant fin, the racks are a joke as are the myriad of bombs
included, so grab those from a weapons set if you want to show yours loaded.
Two rather crude Sidewinders are provided for the forward fuselage. Hasegawa thoughtfully predrilled these holes so if you don't want them, break out the
filler. Unusually, it has a separate speed brake, which you can droop a bit on
the ground if you want to, though this was not deployed on the ground.
thoughtfully predrilled these holes so if you don't want them, break out the
filler. Unusually, it has a separate speed brake, which you can droop a bit on
the ground if you want to, though this was not deployed on the ground.
Wheels are a joke and the landing gear is quite basic with little additional detail. You'll also note that in this kit, Hasegawa did not include the very small upper main gear doors, molding them with the larger one. You also have to deal with ejector pin marks on most everything. There is a two piece canopy/windscreen combo to show off your generic seat and pilot figure as there are no other interior parts around. The canopy does not fit well into the surrounding fuselage in a closed position. On a complete kit, a decal is provided for an instrument panel. This kit was also developed very early in A-7 history and does not have the fin RWR antenna or fairing.
As mentioned, this kit had no instructions or decals, but if you have a complete kit, you'll find markings are for two aircraft, both in light gull grey over white. The box art plane is the CAG bird from VA-153 aboard the USS Oriskany. Next is another CAG bird from VA-87 aboard the FDR. Fortunately for those of us who will actually build the kit, there are a goodly number of aftermarket decals that have been built over the years.
Those really wanting an accurate and more detailed A-7A/B will go for the Fujimi kit. Even the Italeri/ESCI kit is preferable to this one. The newer Hobby Boss offering suffers from the same misshapen intake and clear bits as their 1/48 brethern. While this kit will require work to meet acceptable standards, it can often be found on the cheap so is perfect for a frugal modeler or one who simply wants an A-7 from all the major makers of the type.
| CONSTRUCTION |
 Often times I wonder why I bother building these old relics. This is
especially true when there are newer and often better kits available out there.
Perhaps it is a masochistic streak or perhaps it is the feeling of satisfaction
when able to make something fairly nice out of what is admittedly a kit that
many would shun. Regardless of the reason, this one hit the top of the pile
before many other, perhaps more deserving and definitely newer offerings.
Often times I wonder why I bother building these old relics. This is
especially true when there are newer and often better kits available out there.
Perhaps it is a masochistic streak or perhaps it is the feeling of satisfaction
when able to make something fairly nice out of what is admittedly a kit that
many would shun. Regardless of the reason, this one hit the top of the pile
before many other, perhaps more deserving and definitely newer offerings.
The first step was to look to see if there were any upgrade bits I could use. Aires makes a set of main wheels for the HB kit that should work and while no one seems to make a bang seat, Quickboost does one for an A-4 that should be close enought as both the A-4 and A-7 used Escapac seats. I also performed one of my favorite tasks and that is picking out a set of markings.
I then began by painting the inside of the cockpit is dark gull grey. Then
the drop tanks were assembled and the lower wing inserts installed. I should
mention that my kit had a lot of flash, so this was obviously not one of the
initial boxings. Since the interior on this is pretty much non-existant, I went
to an old magazine, Modelaid International's first issue,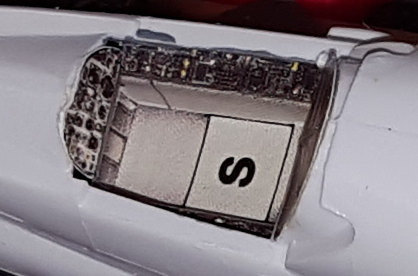 and in that and some
later editions, was a paper cockpit. In this case, it was for the A-7 so I
dutifully cut it out and installed it, using clear paint to hold it in place. It
is pretty convincing and tons better than nothing at all. I added five grams of
nose weight just in case and closed up the fuselage. All of the seams needed
major work with filler, a situation that pretty well defines old kits like this.
and in that and some
later editions, was a paper cockpit. In this case, it was for the A-7 so I
dutifully cut it out and installed it, using clear paint to hold it in place. It
is pretty convincing and tons better than nothing at all. I added five grams of
nose weight just in case and closed up the fuselage. All of the seams needed
major work with filler, a situation that pretty well defines old kits like this.
I then glued on the wings. Fit is not the best. After it was all dry, I realized they were perhaps a bit too straight and should have a bit more anhedral. I glued on the speed brake and the nose gear. This part is missing the catapult bar found on all USN A-7s. About this time, I grabbed an A-4 Skyhawk seat to use in the cockpit. It may not be exactly the same as that used on the A-7, but both planes used Escapac seats so this one seemed about right. I had to cut away some of the bottom of the resin seat to get it to fit into the shallower cockpit.
Once the seat was installed the transparencies were masked and attached. Fit is actually quite good. I then glued on the main landing gear. These are quite bereft of detail, but typical of the time with Hasegawa. The gear doors have large attachment areas so are easy to install and I did so as these would be painted the same color as the underside of the aircraft. The tailplanes were then glued in as was the refueling probe. Seemed like a good time to paint as gluing on the wing pylons would make lower wing masking difficult.
| COLORS & MARKINGS |
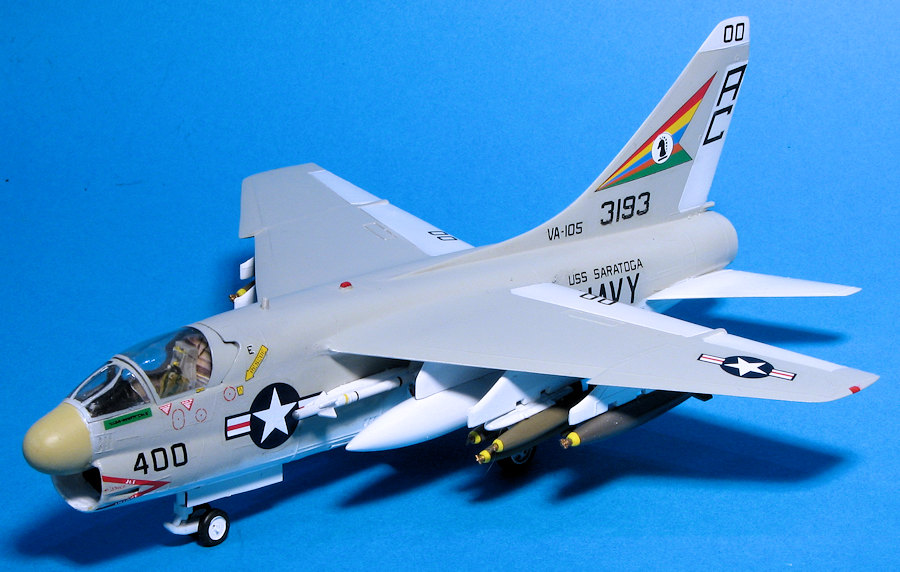
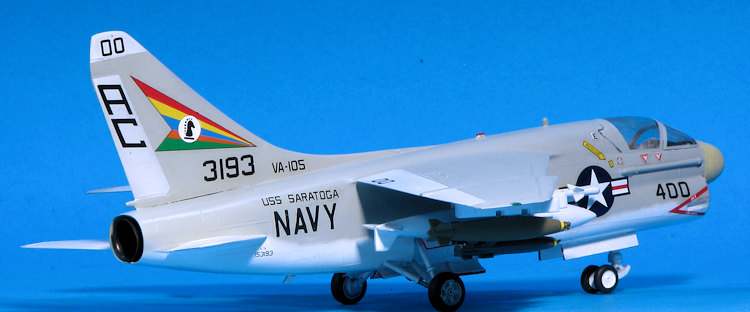
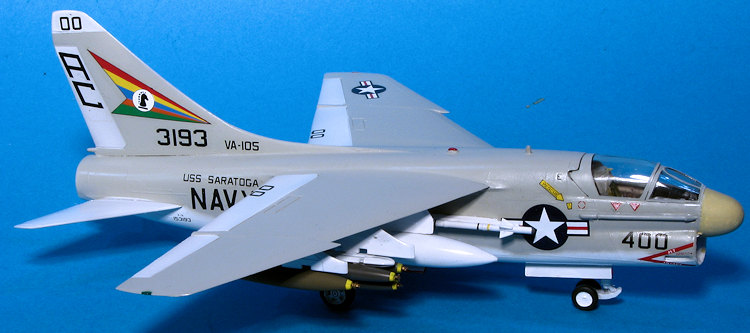
No early USN A-7s were around long enough to get the Tactical Paint Scheme (TPS), though some did participate in early low viz experiments. Anyway, this meant light gull grey over white. Depending on the time frame, the LGG could be matte as it wasn't until 1972 than the upper LGG was painted in gloss. For this one, I painted the lower surfaces and the upper control surfaces with Tamiya gloss white. For the rest, I used Model Master FS 16440. By using gloss LGG, it saved the need to gloss coat prior to applying decals.
 For markings I chose a VA-105 option from an old Superscale sheet, # 72-299
for planes from Air Wing 3 aboard the USS Saratoga. This option is the CAG bird
so has some color in the tail markings. I'm not sure how old the sheet might be,
but at least 30 years would be a good guess. These markings came off without any
issues other than the excessive amount of clear carrier that was typical of the
time. Also typical was a nearly illegible stencil placement guide. I think I got
most of the important ones, but the rest I simply left off.
For markings I chose a VA-105 option from an old Superscale sheet, # 72-299
for planes from Air Wing 3 aboard the USS Saratoga. This option is the CAG bird
so has some color in the tail markings. I'm not sure how old the sheet might be,
but at least 30 years would be a good guess. These markings came off without any
issues other than the excessive amount of clear carrier that was typical of the
time. Also typical was a nearly illegible stencil placement guide. I think I got
most of the important ones, but the rest I simply left off.
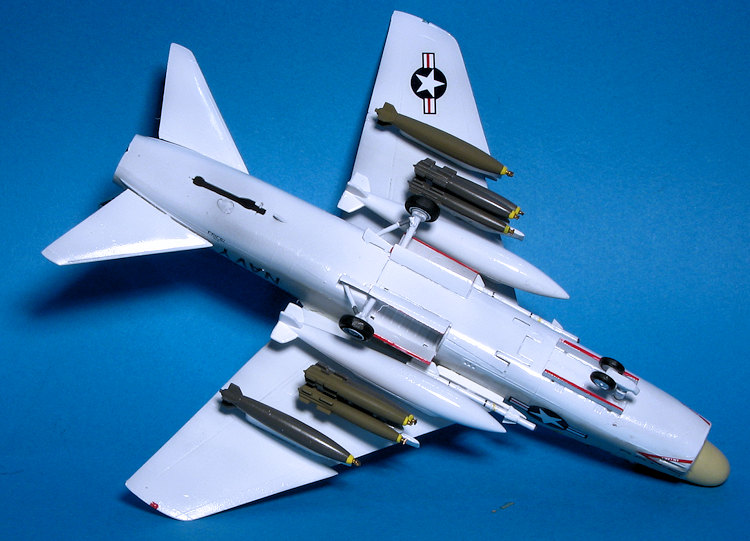
During this time, I worked on ordnance. The kit pylons are salvageable as I had no alternatives. For weapons and racks I went to the Hasegawa Weapons sets. From this I picked two early Sidewinders, two TERs (Triple Ejector Rack), six Snakeyes, and a pair of Mk83 iron bombs. To more easily mount the missiles and Mk83s, I drilled a hole in these and the pylon for a short length of wire. On the TER, I only did this for the center bomb as the placement of the outer ones was such that this was not easily feasible.
Once all the ordnance was painted, it was attached to
the racks and once dry, these racks were placed under the wings. This evolution
was somewhat time consuming and went to prove that I suck at putting ordnance on
racks. The outer racks are also missing the anti-sway braces so you have
holes in the lower pylons. The gear door
edges and formation lights were painted with a Sharpie, a bit more detail work
was done and the nose wheels were painted and installed. I h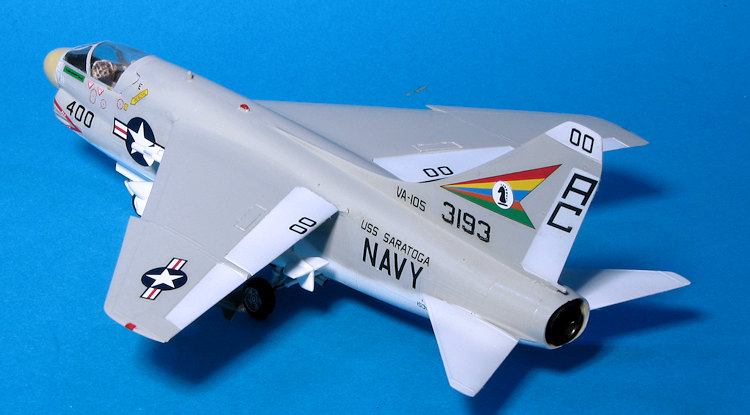 eld off on the mains
for a bit as I'd ordered some replacements that had not yet arrived. Once they
showed up, I installed them after painting. These were Aires wheels and came
with masks. I've never used wheel masks so this was a first for me. I followed
instructions by first painting the tires, then when dry, those were covered with
circular masks. Then the open areas were filled with liquid mask and the wheels
were painted white. When removing the liquid mask, quite a bit of the tire paint
pulled up so I ended up having to brush paint the tires anyway.
eld off on the mains
for a bit as I'd ordered some replacements that had not yet arrived. Once they
showed up, I installed them after painting. These were Aires wheels and came
with masks. I've never used wheel masks so this was a first for me. I followed
instructions by first painting the tires, then when dry, those were covered with
circular masks. Then the open areas were filled with liquid mask and the wheels
were painted white. When removing the liquid mask, quite a bit of the tire paint
pulled up so I ended up having to brush paint the tires anyway.
I then painted all the LGG areas with clear matte. This showed that I was unable to take care of all the silvering! A bit of touch up was done and the masking removed from the cockpit. Since the openings for the tail hook were short shot, this was the last thing to add. I used Microscale stripes for the striped area as my ability to paint stripes is as poor as that of aligning ordnance. Actually, I forgot to add the tail hook until after I took the pictures!
| CONCLUSIONS |
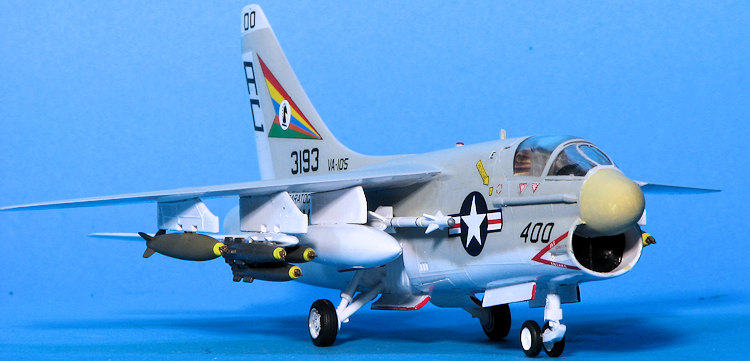 Now that this one is done, I really need to tell folks to stay away from it
unless they are seeking a flashback. Pretty much every other A-7A kit out
there in this scale (other than perhaps the equally ancient old Revell kit), is an easier
build. The Fujimi kit from the late 1980s is still the most accurate in this
scale and should be sought out.
Now that this one is done, I really need to tell folks to stay away from it
unless they are seeking a flashback. Pretty much every other A-7A kit out
there in this scale (other than perhaps the equally ancient old Revell kit), is an easier
build. The Fujimi kit from the late 1980s is still the most accurate in this
scale and should be sought out. 17 June 2016
Copyright ModelingMadness.com
Thanks to the 'dead kit table' where I got the review kit.
If you would like your product reviewed fairly and fairly quickly, please contact the editor or see other details in the Note to Contributors.