Airfix 1/72 A-4B Skyhawk
| KIT #: | A03029 |
| PRICE: | $10.99 SRP |
| DECALS: | Two options |
| REVIEWER: | Scott Van Aken |
| NOTES: | New tool kit. |
| HISTORY |
The Douglas A-4 Skyhawk is a carrier-capable ground-attack aircraft developed for the United States Navy and United States Marine Corps. The delta winged, single-engined Skyhawk was designed and produced by Douglas Aircraft Company, and later McDonnell Douglas. It was originally designated the A4D under the U.S. Navy's pre-1962 designation system.
 The Skyhawk is a light-weight aircraft with a maximum takeoff weight of 24,500 pounds (11,100 kg) and has a top speed of more than 600 miles per hour (970 km/h). The aircraft's five hardpoints support a variety of missiles, bombs and other munitions and was capable of delivering nuclear weapons using a low altitude bombing system and a "loft" delivery technique. Prior to the A-4E, power was supplied by the Wright J65 engine; on the A-4E, the J65 was replaced by the 9,300-pound-force (41 kN) Pratt & Whitney J52.
Skyhawks played key roles in the Vietnam War, the Yom Kippur War, and the Falklands War. Fifty years after the aircraft's first flight, some of the nearly 3,000 produced remain in service with several air arms around the world, including the Brazilian Navy's aircraft carrier,São Paulo.
A4D-2 (A-4B): Strengthened aircraft and added air-to-air refueling capabilities, improved navigation and flight control systems, provision for AGM-12 Bullpup missile, 542 built.
A-4P: Remanufactured A-4Bs sold to Argentine Air Force known as A-4B by the Argentines.
| THE KIT |
Airfix is continuing to replace kits in its old catalogue with new tool kits. In this case their ancient series 1 A-4A is being replaced by a series 3 A-4B. Now this is not the only Injected A-4B as Fujimi did a very nice one in the late 1980s that is probably superior in detail to this one, but not by much. A close look at the kit shows that there is a good possibility of later models of this aircraft as the wing has holes started in the wing for the outer pylons of later versions of the Skyhawk. All of the really common bits such as landing gear and cockpit bits are on the same sprue as the wings.
 A few things of note on this kit is the excellent panel line detail and especially the crisply molded vortex generators on the wing upper surface. Wheel well detail is also nicely done. The kit includes a nose wheel molded in with the main gear which helps to make it sturdy. A full intake to the initial compressor stage is provided as is a full exhaust pipe from the last stage. The kit includes two types of Mk. 82 bomb; a slick and a snake-eye. Though the retarded bomb is shown as an option with the USN version. I am not sure how prevalent these were in the time period mentioned. The Argentine version may well have used the British design bomb on the centerline as is provided. There are drop tanks for all three pylon positions on the kit so you can use what combination you wish.
Other things of note are a pilot figure, the option to do the canopy open, the option to do the speed brakes open or closed, the Argentine ADF pack for the upper fuselage, and separate slats that can be positioned open or closed. While the slats are deployed on the ground, if building the kit in flight, they would be closed.
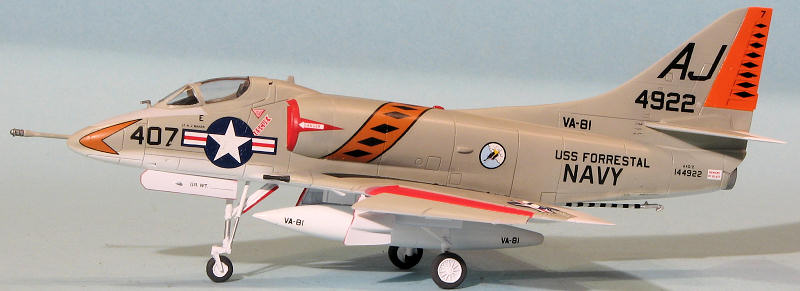
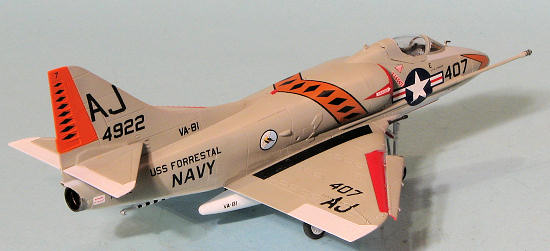
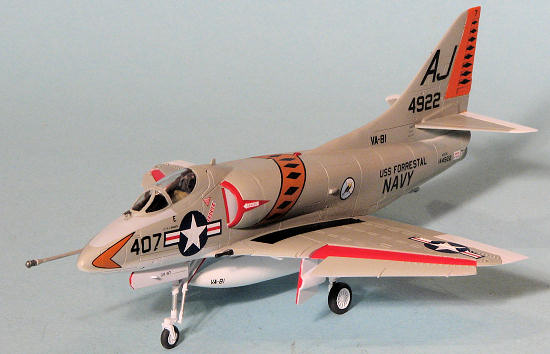
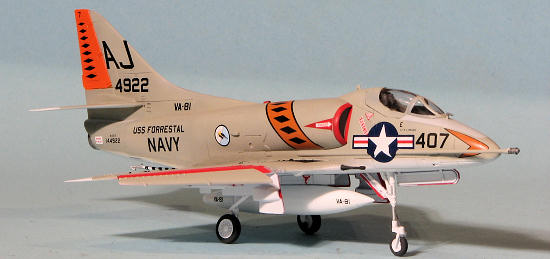
Markings are for two planes. One is the boxart plane of VA-95 'Green Lizards' that operated from the USS Intrepid in 1966 when it was an ASW carrier. Not unusual is that these markings are the same as the A-4B displayed today at the Intrepid Museum in New York City. The other is C-240 from 5 Gruppo in April 1982. This plane is in two browns over light blue and without the 'Malvinas bands' worn by some aircraft at the time. The decal sheet includes full instrument decals and a complete stencil suite. Color placement and painting instructions are provided in the instruction sheet.
| CONSTRUCTION |
 I was looking forward to building this as I have enjoyed all the new tool Airfix kits I have so far constructed. One thing I did note on this one is that for many of the parts, the sprue gate is quite large. Cutting these flush with the part using flush cutters resulted in divots in the plastic. Instead, I either used a razor saw (for the delicate bits) or cut far away from the part and sanded away the gate remnants. Thanks to the softish plastic, this is not a chore, but beware as it is easy to sand too much.
 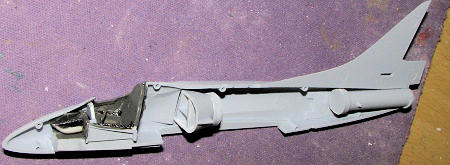 Anyway, I attached the upper wing sections to the lower wing piece. Fit is very tight here and with almost all the other parts. The ends of the lower wing are not the same shape as the area into which they need to fit, being a bit smaller so you will need to use filler here to take care of the gap. I also opened up the attachment holes for the inner pylons and centerline. Do not open the outer pylon holes as the A-4B did not have them, neither did the A-4C. This was an A-4E trait, though rebuilt A-4Cs (A-4Ls) did have them. The cockpit tub includes the nose gear well and there are recesses inside the fuselage into which the cockpit fits making for a super tight fit, something I like. The rear armor plate does stand a bit proud of the rear cockpit bulkhead so do not think you have done something wrong when you install the cockpit.
 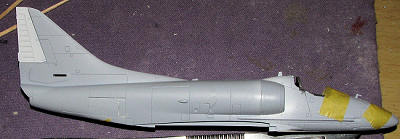 Then I glued the other fuselage half. As is always the case, I needed filler on the joins. I then glued the speedbrakes in the closed position. While these have been photographed fully open, normally they would be either closed or just barely open. It is easier to apply decals with them closed so that is how I generally model Skyhawks. The intakes slot into the openings and are very tight. In fact one side was so tight that it pushed the compressor assembly back a bit. Might want to keep that in mind for yours. Also note that Airfix has them being installed on the wrong side. You'll see when you get to building yours.
 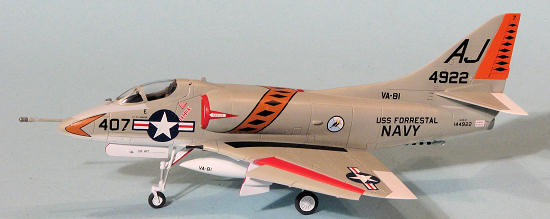 Next step was to install the wings. Again, a very tight fit which means minimal filler on the joins. The tailplanes were also installed at this time. Airfix wants you to install the landing gear and struts and gear doors at this time. Instead, I installed the small fairings behind the wheel well bulges and the inserts for the guns. With the gear and doors installed, any filling and sanding would be a real hassle. I have always felt that the airframe should be done before attaching things that hang down. Just makes sense and greatly reduces the chances of breaking off anything.
| COLORS & MARKINGS |
 the airframe painted with Testors Light Gull Grey enamels.
 | FINAL CONSTRUCTION |
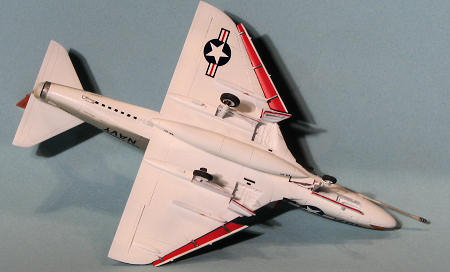
 toed out stance that I do not think is right. The legs are vertical enough, but when gluing on the wheels, that was the only way they'd fit. The centerline tank was glued on as were the wing cannon. I did not use either of the bombs provided as they were not around in 1961 and would have looked odd. I had thought of using the wing tanks as well, but for some reason, I just think the Skyhawk looks weird with three large fuel tanks. One of these days I will find some proper 1961 era bombs for it.
| CONCLUSIONS |
| REFERENCES |
http://en.wikipedia.org/wiki/A-4_Skyhawk
September 2012
If you would like your product reviewed fairly and fairly quickly, please contact the editor or see other details in the