| KIT #: | 02852 |
| PRICE: | $35.00 SRP |
| DECALS: | Two options |
| REVIEWER: | Scott Van Aken |
| NOTES: | New tool kit |
| HISTORY |
The Northrop T-38 Talon is a two-seat, twin-engine supersonic jet trainer. It was the world's first supersonic trainer and is also the most produced. The T-38 remains in service as of 2013 in air forces throughout the world.
 The United States Air Force (USAF) is the largest operator of
the T-38. In addition to training USAF pilots, the T-38 is used by NASA. The US
Naval Test Pilot School is the principal US Navy operator (other T-38s were
previously used as USN aggressor aircraft until replaced by the similar Northrop
F-5 Tiger II). Pilots of other NATO nations fly the T-38 in joint training
programs with USAF pilots.
The United States Air Force (USAF) is the largest operator of
the T-38. In addition to training USAF pilots, the T-38 is used by NASA. The US
Naval Test Pilot School is the principal US Navy operator (other T-38s were
previously used as USN aggressor aircraft until replaced by the similar Northrop
F-5 Tiger II). Pilots of other NATO nations fly the T-38 in joint training
programs with USAF pilots.
As of 2012, the T-38 has been in service for over 50 years with its original operator (the USAF). Other current and previous operators of the T-38 include Portugal, South Korea, Taiwan, Turkey and Germany. All German T-38s are kept in the US and used to train German pilots.
| THE KIT |
After the initial sell out of the Sword kit, we had to wait several years for another T-38 from Wolfpack, and now we have a second within a few months. To be fair, I think many will consider the Wolfpack kit to be short run and this one to be more mainstream. In many ways they are quite similar, though the Trumpeter kit does not have the molding errors (mainly sink areas) I found on the Wolfpack kit.
The cockpit comes with two nicely done ejection seats, and
this time there are photo etch belts included. Instrument panels have raised detailing
with no face detail, relying on decals for that. Side consoles are the same way.
I should point out that these are not the 'glass' instruments of the T-38C so
you cannot do that
 version and remain true to the prototype. Rudder pedals,
control sticks and such are provided for the but. There is also detail behind
the seats. One has to decide when building the cockpit whether they want the
canopies open or closed as the mechanisms are installed at this time. Side
panels are also included to fill out the tub assembly. Under the cockpit tub fits the one piece wheel well.
There is room in the nose for weight if you feel the kit needs it. None is shown
in the instructions.
version and remain true to the prototype. Rudder pedals,
control sticks and such are provided for the but. There is also detail behind
the seats. One has to decide when building the cockpit whether they want the
canopies open or closed as the mechanisms are installed at this time. Side
panels are also included to fill out the tub assembly. Under the cockpit tub fits the one piece wheel well.
There is room in the nose for weight if you feel the kit needs it. None is shown
in the instructions.
Intakes are a left and right side with a separate lip piece. On this kit, the intakes are not see-through. There are main gear well inserts and no lower fuselage insert, which I know will please most builders. The kit has single piece wings, and horizontal stab. The fin is two pieces with the small flat piece atop the fin is molded in place. Trumpeter has provided a single piece exhaust so no need to fiddle with separate exhaust. It also includes a bracing plate between the two. Landing gear is well done and are the appropriate thin tire version that is typical for a T-38.
Gear doors have separate actuators as do the speed brakes. The one thing I don't like about the kit is that Trumpeter has already opened the holes for the travel pod that is included. These planes did not always carry this so one will have to fill holes if not using it. I do with Trumpeter would get with the program on things like this and leave the holes flashed over so the builder can decide if they want to open them. The only other bit included is a travel pod.
 Instructions are well done and include color information using
Gunze paint references. Markings are provided for two planes. One is the box art
aircraft from the 7FS/49FW at Holloman AFB. The other is a Portuguese T-38,
Portugal being one of the few to buy new build T-38s, most other nations getting
them second hand. I should mention that both aircraft are gloss and despite
Trumpeter's color markings and painting guide showing them with 'Spanish school'
panel lines, the black aircraft were a uniform color. Markings are well done and
those who want something different have several aftermarket sheets to choose
from including some recent ones from Caracal Models.
Instructions are well done and include color information using
Gunze paint references. Markings are provided for two planes. One is the box art
aircraft from the 7FS/49FW at Holloman AFB. The other is a Portuguese T-38,
Portugal being one of the few to buy new build T-38s, most other nations getting
them second hand. I should mention that both aircraft are gloss and despite
Trumpeter's color markings and painting guide showing them with 'Spanish school'
panel lines, the black aircraft were a uniform color. Markings are well done and
those who want something different have several aftermarket sheets to choose
from including some recent ones from Caracal Models.
| CONSTRUCTION |
Once I cut off all the large bits so I could easily fit things into the box, I began painting. This meant dark gull grey for interior bits, dark sea grey for the bang seats and white for the landing gear, wheels, and wells in addition to the inside of gear doors. I also painted the inside of the intakes silver as photos I have of these planes did not show them to be white, but a somewhat darker shade, which I interpreted to mean an aged aluminum.
I then started assembling the interior. I found that the
decals fit over the instruments and console bits quite well. In fact, Trumpeter
gives you more decal for the front seat consoles than you'll need as the
installation of the front seat's rear bulkhead will cover much of them. Though
it is a bit fiddly, the installation of the canopy hinges were made in the
lowered position and fit quite well. When I went to put in the rear seat
assembly, it was almost a snap fit it was so snug. The front seat was put in
place, followed by the side
 panels.
Next step was to glue in the wheel wells. These had been painted white and I found the installation to be excellent. Trumpeter has put in guides such that it provides a very positive and tight fit. The cockpit installation guides were nearly as good and helped keep everything properly aligned when the fuselage halves were mated together. It was nice to not have separate lower fuselage bits to install, the benefit of main-line injection molding.
I then glued together the intake halves and the fin halves. Once these had the seams treated, they were installed. I did not put the forward intake pieces on as these are painted inside and out with the exterior color and I had not made up my mind as to what that would yet be. I next glued on the wings. These fit quite well, but still needed a bit of filler. The anti-glare panel was installed and it is a rather tenuous fit. The clear bits were masked and then installed. I had trouble getting the canopies to fit flush. I think this is because the interior stuck up a tad too much. It is obvious that next time I'll need to take more care in that area and suggest that you make sure this is down low enough as well or you'll have the same difficulties. Of course, doing it with the canopies up will pretty well eliminate the need to be careful. I installed the rear scoops and the exhaust bits. Time for some paint.
| COLORS & MARKINGS |
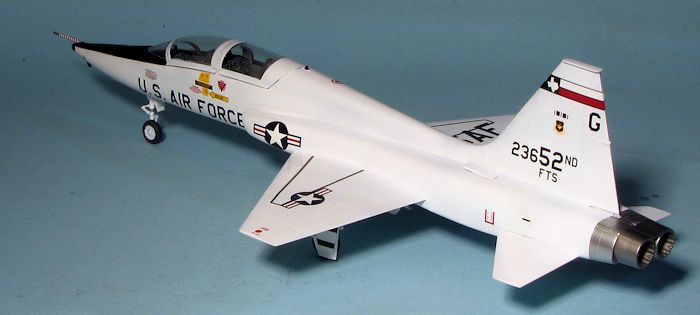
This was a tough call. There are so many nice schemes for the
T-38, but I ended up choosing the one in which they have spent most of their
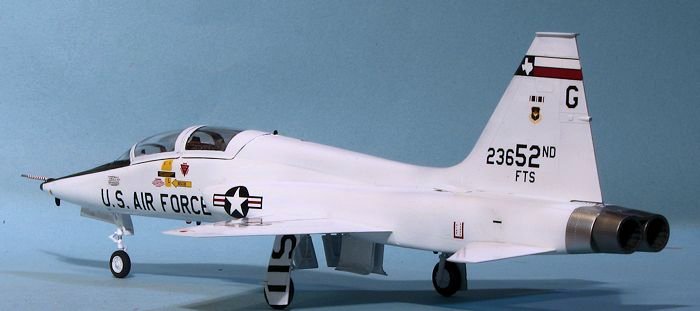
life, overall white. I would have liked to have done a white one with tail
codes, but I decided to pick one of the schemes from Caracal's recent T-38
sheet, # 48057, T-38 Talon part 2. But first it had to be painted. I used two
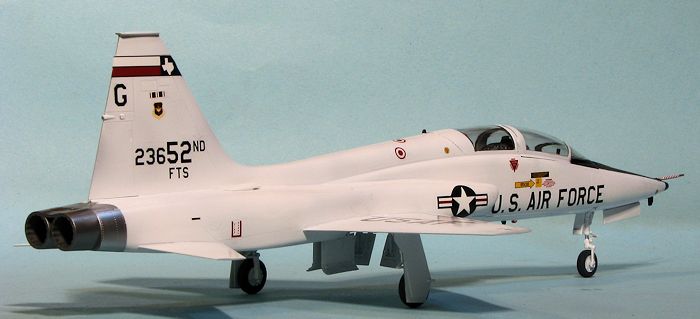
metallic shades for the tail cone and Tamiya X-1 for the rest of the airframe.
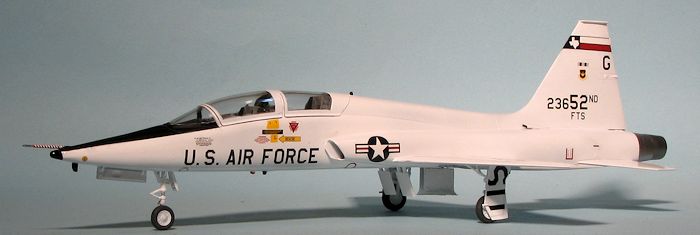
The nose anti-glare panel was painted black using a Pactra lacquer color. With
the paint on, I 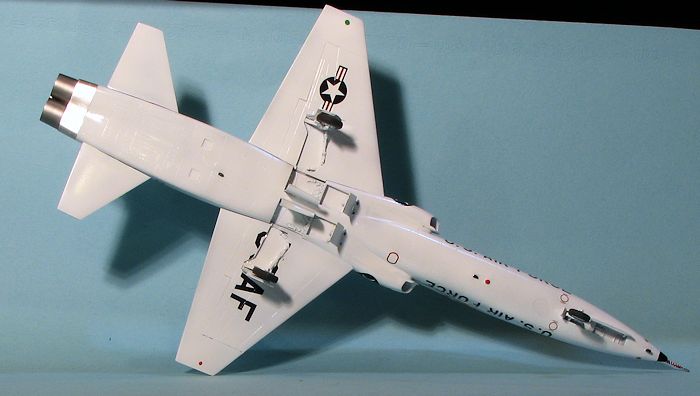 installed the landing gear and all but the outer main gear
doors. I also glued on the intake lips and had to sand these down and use filler
for a smooth finish. This was later painted as were any areas I'd missed
earlier.
installed the landing gear and all but the outer main gear
doors. I also glued on the intake lips and had to sand these down and use filler
for a smooth finish. This was later painted as were any areas I'd missed
earlier.
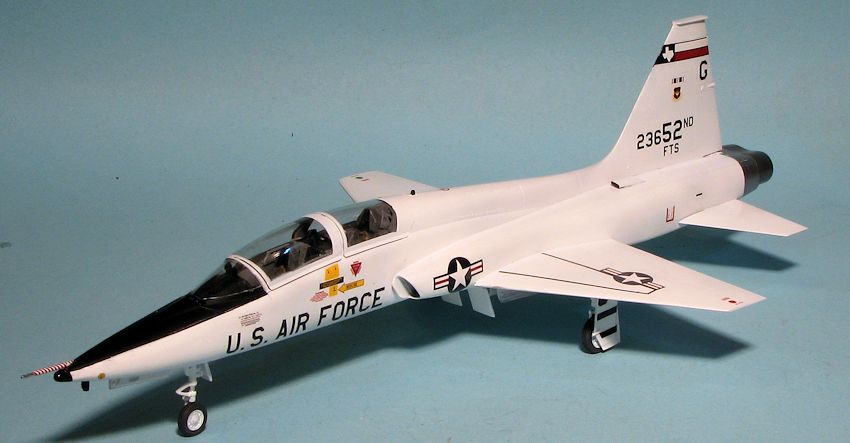
Back at the decal sheet I chose the boss bird of the 52nd Flight Training Squadron. Now I'm sure most of you know by now that the Trumpeter kit is about a half inch longer than those by Sword or Wolfpack (basically the length of the nose pitot tube). So I was somewhat concerned that the decals might be too small. This was not an issue at all. The tail band fit quite well as did the cut out underwing USAF. I suggest to you that you trim the outline part of this marking very close on the inside where it meets the rim of the wheel well, and cut off the AF portion and apply it separately. This is also why you want to leave the main gear doors off until after decaling. The fuselage insignia look a bit large compared to the drawing in the instructions, but seem to be the right size. I used the kit wing walk markings provided for the Portuguese option. They are not the right shape for a USAF plane, but you can cut them into sections to get them pretty close. Hobby Boss decals are off the sheet in less than a minute so you need to be quite quick when using them.
| FINAL CONSTRUCTION |
 Once the decals were on, the kit was given a gloss clear coat
and the anti-glare panel was given a matte clear. Then it was time to add on the
rest of the parts. I started with the main wheels. These are a very positive fit
with no slop, something one does not always get with model kits. Then I
installed the speed brakes in the down position. This was followed by the outer
main gear doors. These have a slot for a tab on the gear door so no worries
about butt joins. The last bits to be glued in place were the stabs. These are a
bit loose, but nothing major and I'd recommend super glue for attaching them.
With that done the masks were removed from the clear bits, some touch up
painting was performed and it was done.
Once the decals were on, the kit was given a gloss clear coat
and the anti-glare panel was given a matte clear. Then it was time to add on the
rest of the parts. I started with the main wheels. These are a very positive fit
with no slop, something one does not always get with model kits. Then I
installed the speed brakes in the down position. This was followed by the outer
main gear doors. These have a slot for a tab on the gear door so no worries
about butt joins. The last bits to be glued in place were the stabs. These are a
bit loose, but nothing major and I'd recommend super glue for attaching them.
With that done the masks were removed from the clear bits, some touch up
painting was performed and it was done.
| CONCLUSIONS |
Despite having started the Sword kit several years ago, this
one was the one finished first. I have to say that I'm pretty pleased with the
result. The issue with the canopies is my fault for not getting the interior
down low enough when I installed it. Now there will be a lot made of this kit
being a half inch longer than the Sword kit (and apparently the Wolfpack kit as
well). I'll let the micrometer crowed work that one out, but I can tell you that
this one is nicely engineered, fits rather well, and any aftermarket decals for
the other kits fit this one without any real issues. It is a kit that I have no
problem recommending for you unless you are antsy about the length difference.
If that is the case, spend the additional money for one of the others.
I'll let the micrometer crowed work that one out, but I can tell you that
this one is nicely engineered, fits rather well, and any aftermarket decals for
the other kits fit this one without any real issues. It is a kit that I have no
problem recommending for you unless you are antsy about the length difference.
If that is the case, spend the additional money for one of the others.
| REFERENCES |
http://en.wikipedia.org/wiki/T-38_Talon
April 2014 Thanks to me for picking this one
up.
If you would like your product reviewed fairly and fairly quickly, please contact the editor or see other details in the Note to Contributors.