| KIT #: | SW 48004 |
| PRICE: | $45.00 or so |
| DECALS: | Two options |
| REVIEWER: | Scott Van Aken |
| NOTES: | Short run with resin parts |
| HISTORY |
Back in the mid-1950s, the USAF realized that it may need a trainer with a higher performance level than the T-33 Shooting Star. Modern jet aircraft were getting really fast and the T-33 was pretty much late WWII technology. What was needed was something fast (preferably supersonic), easy to maintain, and a logical step up from T-33 to be an advanced jet trainer.
 Northrop came to the rescue with what is to many, a very
nice looking jet aircraft. Clean in design and not encumbered by a lot of
superfluous stuff, the prototype first flew in 1959 and continued in
production until 1972 by which time over 1,100 had been built. So
successful was the design that Northrop designed a light fighter around
it, the N156F which soon became the F-5A. It was later improved to the
F-5E and later to the F-20, which many will claim to be the best point
defense fighter ever built. Naturally, politics and the USAF's refusal to
buy the initial lot of F-20s doomed the plane to nothing beyond
prototypes.
Northrop came to the rescue with what is to many, a very
nice looking jet aircraft. Clean in design and not encumbered by a lot of
superfluous stuff, the prototype first flew in 1959 and continued in
production until 1972 by which time over 1,100 had been built. So
successful was the design that Northrop designed a light fighter around
it, the N156F which soon became the F-5A. It was later improved to the
F-5E and later to the F-20, which many will claim to be the best point
defense fighter ever built. Naturally, politics and the USAF's refusal to
buy the initial lot of F-20s doomed the plane to nothing beyond
prototypes.
The T-38 is still flying, more than 50 years after its initial flight and will undoubtedly see more years of service as many of the surviving airframes are or have undergone a major upgrade program. The T-38 has also served with the air forces of several other nations.
| THE KIT |
For decades, modelers have been screaming for a decent T-38. Yeah, Hasegawa did one in 1/72 and Fujimi in 1/48, but these were merely warmed over F-5s. In several respects, the T-38 is not precisely the same airframe and there are differences in the area under the wings, among other areas, that are different from the F-5. This was the first decent kit in this scale.
 As you know, I don't do the matching to plans thing that
a few crave. I'm also not an expert on the T-38, but from all respects,
it seems to look very much like what a T-38 should look like. I'll
probably have many e-mails telling me that I must be blind or stupid or
both and then go on to point out a long list of glitches, but I've
already given my disclaimer so :Þ
As you know, I don't do the matching to plans thing that
a few crave. I'm also not an expert on the T-38, but from all respects,
it seems to look very much like what a T-38 should look like. I'll
probably have many e-mails telling me that I must be blind or stupid or
both and then go on to point out a long list of glitches, but I've
already given my disclaimer so :Þ
What about the kit itself. If you have built ANY Sword kit, then the treatment of the plastic will be very familiar. Nicely etched detail, a very slightly rough surface, no alignment pins, no flash (OK, some thick mold seamwork), a few sink areas, like gear doors, and ejector pin towers inside all the major pieces. Removing them from the inside of the intakes will take a bit of work with rolled up sandpaper. Injected canopies which are well detailed, of a proper thinness, and a teeny bit cloudy. I find the main gear inserts to be a bit odd, but perhaps that was done to keep the plastic properly thin and prevent large sink areas.
You get a goodly bag of resin bits and here is a rundown of those parts. Instrument panels, seats, control sticks, cockpit tubs (yep, two of them, each holding a single seat), nose gear well, speed brake well, exhaust, canopy actuating arms, speed brakes and various smaller struts. Naturally, the seat tracks for the front seat were broken off my forward cockpit section. There are no optional parts.
Normally,
Sword provides a very thick instruction booklet with their kits. Not so
this one. Two folded sheets (8 pages)with construction steps on 31/2 of
them and painting /decal guides on two. The front page is a history, the
back a big add and the other 1/2 page for paint colors (generic) and
parts guide. Decals are very well done by Techmod and there are two
subjects. Both are in overall white and from the earlier years. First is
 the box art aircraft in standard Training Command markings. No unit
indication is given other than the red tail stripe. I used to be able to
match the stripe with the base, but that info hasn't been used in decades
and has gone away. The other is from the 49th TFW at Holloman AFB and was
used for some weapons training before the AT-38B was developed that could
actually carry a pylon for practice bombs. No 49th TFW markings are
provided, just the HO tail code. and the red tail stripe! The markings
seem a bit 'thin' to me, but perhaps that is just me.
the box art aircraft in standard Training Command markings. No unit
indication is given other than the red tail stripe. I used to be able to
match the stripe with the base, but that info hasn't been used in decades
and has gone away. The other is from the 49th TFW at Holloman AFB and was
used for some weapons training before the AT-38B was developed that could
actually carry a pylon for practice bombs. No 49th TFW markings are
provided, just the HO tail code. and the red tail stripe! The markings
seem a bit 'thin' to me, but perhaps that is just me.
Though it took a while, several decal sheets were designed for this kit, allowing other markings options. Of course, since this was released many years back (and quickly sold out), there has been another short run kit from Wolfpack and a mainstream kit from Trumpeter.
| CONSTRUCTION |
Step number one with this kit is to remove the resin bits from their bags and start removing the resin pour stubs. This took me about an hour and a half. During this I noticed that several parts had broken free of the stubs during shipment and one of the control sticks is missing. I'll write to Sword and ask for a replacement. Since this will be a semi long build (as I wait for an aftermarket decal sheet to be designed and printed), it will give them time to send a replacement.
 Actually, it was more than semi-long as
once the bits came from Sword, the kit sat in its box, un-built and
semi-forgotten until the release of the Trumpeter kit. It was then that I
decided to go ahead and renew construction to make a comparison with the
Trumpeter version. As some of you know, the Trumpeter kit is a bit overscale
with the fuselage being nearly 1/2 inch longer. It seems Trumpeter did not
include the pitot in its initial size calculations and from there things went
awry. But that is a subject for another article.
Actually, it was more than semi-long as
once the bits came from Sword, the kit sat in its box, un-built and
semi-forgotten until the release of the Trumpeter kit. It was then that I
decided to go ahead and renew construction to make a comparison with the
Trumpeter version. As some of you know, the Trumpeter kit is a bit overscale
with the fuselage being nearly 1/2 inch longer. It seems Trumpeter did not
include the pitot in its initial size calculations and from there things went
awry. But that is a subject for another article.
I painted the interior with the standard Dark Gull Grey and used White for the wheel wells and inside of gear doors. The nose wheel well was glued in place and the seats painted. I then picked out the instruments in black and added some other colors for interest. The wings were glued together, the lower inserts having some rather large gaps that needed filled. I also glued together the main wheels. These are at least twice as wide as they should be so I'll have to hunt up replacements for them somewhere. The nose wheel is OK, but is missing the finned ribs on one side.
After marinating a few more weeks, I got the interior sections glued together and inserted into the right fuselage half. Sword has some ledges and indents to help get things to fit properly so this wasn't the issue I thought it would be. I then glued the halves together. Fit is only fair as there are some gaps (actually, pretty much every seam needs filler of some sort). I then installed the resin wheel well/speed brake section, followed by the aft lower fuselage and then the intakes. Much filler, sanding, more filler, more sanding and the fuselage looked presentable.
 My next goal was the intakes. I'd previously glued and
sanded them to shape, and when attaching them to their location on the fuselage,
I'd noticed they were oversize. No matter how you installed them, there was a
step so I chose the upper surface to be more flush and dedicated most of the
filler on this section to the underside.
My next goal was the intakes. I'd previously glued and
sanded them to shape, and when attaching them to their location on the fuselage,
I'd noticed they were oversize. No matter how you installed them, there was a
step so I chose the upper surface to be more flush and dedicated most of the
filler on this section to the underside.
Once the fuselage was cleaned up and relatively smooth, I attached the wings. Fit here is particularly poor with large gaps, especially on the underside where the undersize speed brake well/wheel well it attached. I mostly used super glue to fill the gaps, but also did a skinning of standard filler. While I and many feel super glue to be a superior filler, I like standard filler as well as it is so much easier to sand. When I went to attach the tailplanes, I realized I had goofed. You see, there are no holes drilled in the aft fuselage. One is supposed to drill these where the tailplanes attach, however, I had sanded away all the panel lines in this area so had to make a guess as to where these fit. I ended up using a #54 drill bit to get the right size.
Meanwhile, I worked on the clear bits, first cementing the resin interior section to the aft canopy. I then had to cut away quite a bit of this piece in order to be able to glue this section closed. There is a resin piece that fits between the two main canopy sections. I first placed the rear canopy in place and then fit the bit to the front of it, gluing it onto the top of the rear instrument panel anti-glare shield. If one does not do this, there may well be issues getting the two main canopy sections to properly fit if doing canopy closed. If one is doing them open, it wouldn't be an issue. Attaching the forward canopy and the windscreen only showed this to be even more the case as the fit here was extremely poor. I've built Merlin kits that had better fitting clear parts. I attached them best I could and then broke out the filler to take care of the gaps.
| COLORS & MARKINGS |
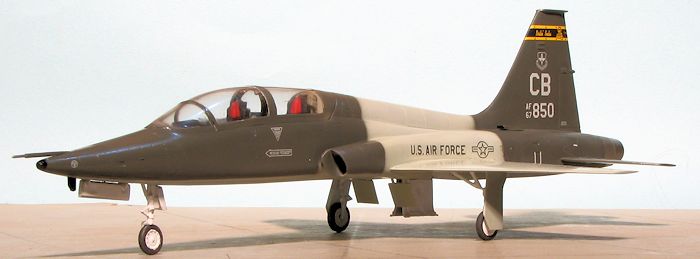
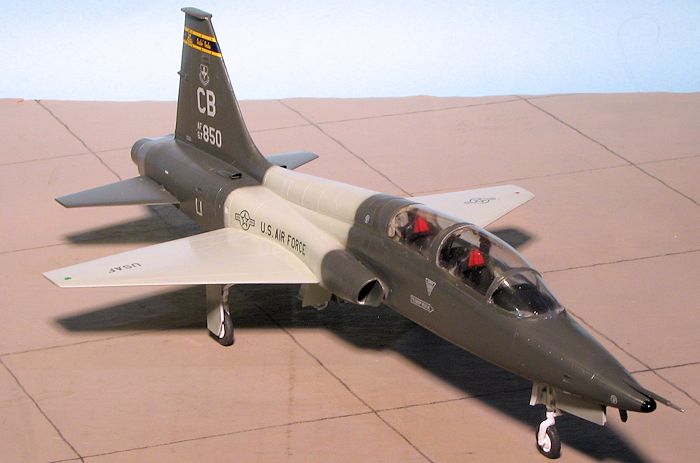
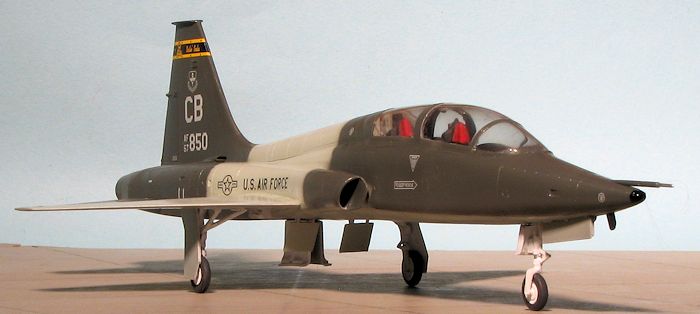
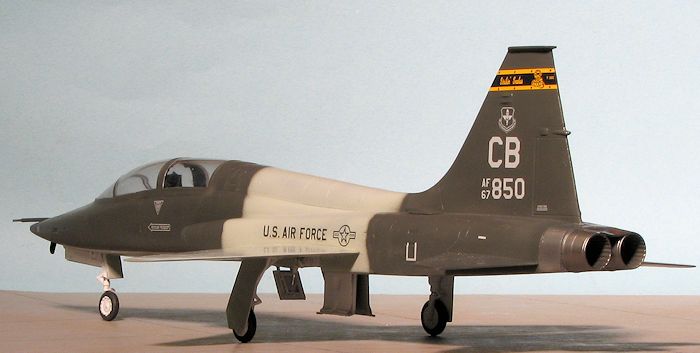 With the airframe complete, I started on painting. For this
one, I decided to do the plane in the current scheme using Caracal Models sheet
CD 48032, which includes several options of bona fide T-38As in the new scheme.
Most T-38s you may now see flying around are the C version with the new glass
cockpits. This scheme consists of ADC Grey FS 16473 and Engine Grey FS 36081.
Both are gloss. Prior to painting this, I painted the rear fuselage section with
Alclad II Aluminum and then masked it off.
With the airframe complete, I started on painting. For this
one, I decided to do the plane in the current scheme using Caracal Models sheet
CD 48032, which includes several options of bona fide T-38As in the new scheme.
Most T-38s you may now see flying around are the C version with the new glass
cockpits. This scheme consists of ADC Grey FS 16473 and Engine Grey FS 36081.
Both are gloss. Prior to painting this, I painted the rear fuselage section with
Alclad II Aluminum and then masked it off.
| FINAL CONSTRUCTION |
The next step was to get it on its landing gear. I
used super glue for this. The fit is only what I'd call fair. The nose gear
attachment point has to be drilled out a bit to get it to fit. The main gear
retraction strut pieces are too large for the opening and need to be trimmed
down. This includes where they attach to the main gear legs. I attached the nose
wheel and then started hunting around for some replacement main wheels. The only
ones I found that would be even close were the main wheels for a 1/72 EE
Lighting. I had an old Airfix F.1A kit that I was saving for a conversion
project and since the conversion set had nice metal wheels, I robbed the kit
 versions. They are about the proper thickness though a touch taller, but they
were a ton better than what came in the kit.
versions. They are about the proper thickness though a touch taller, but they
were a ton better than what came in the kit.
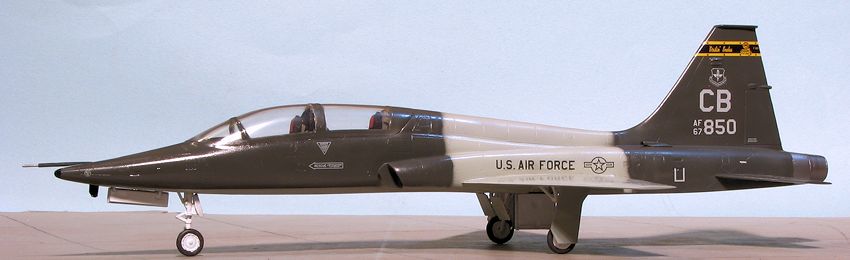
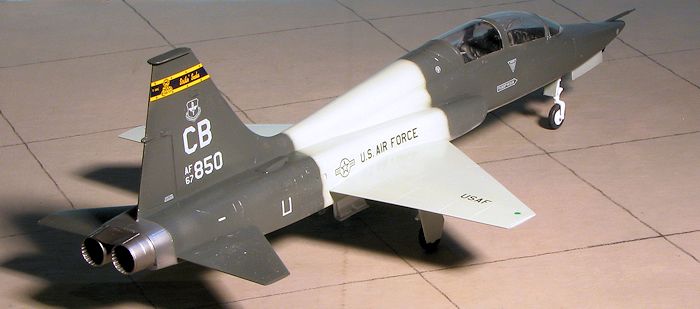
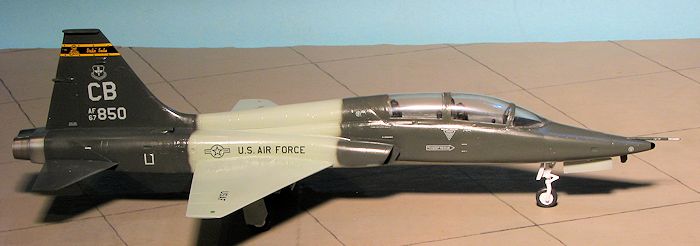
I then put on the decals. For this scheme, I chose to do a 50 FTS plane based at Columbus AFB, MS in 2003. Apparently the repainted planes do not have much in the way of stencils so applying the markings was relatively quick, taking only a few days. The decals reacted well to Solvaset. I did notice that despite the sheet stating all planes were T-38As, the fin band on this one has T-38C written on it. I was also surprised that there was no serial/servicing stencil on the plane. Normally this is where the fuel information and complete serial number are located near the windscreen.
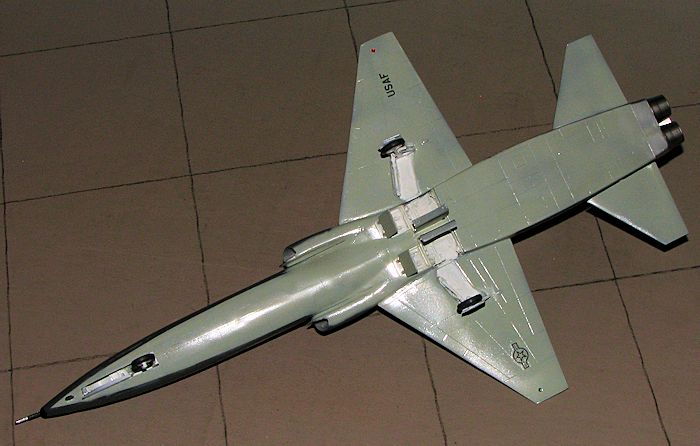
The gear doors were then attached and the pitot tube put on the nose. A bit of touchup painting was done as the tip of the nose needs to be black. The Sword kit did not come with any clear beacons nor any antennas so if you want those, you'll have to add them. I made the nose one from plastic card as the plane just looks a bit odd without it. The model was given a coat of clear and the masking taken from the clear bits.
| CONCLUSIONS |
It is always interesting to me to read the the initial
impressions of a kit in the box (which is generally copied for the kit description) and then see how it
turned out. This is one that looks better in the bo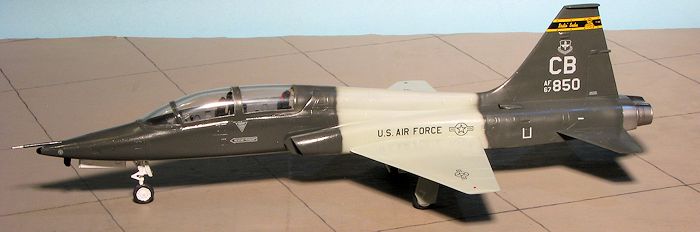 x than it does when it comes
time to build it. Thanks to the generally poor fit, missing details and the
overly fat main wheels, it is one that will have many modelers wondering why
they started it. Now you don't have to. Thanks to Trumpeter and Wolfpack, we now
have newer kits. I have not built the Wolfpack kit, though I have heard it is a
nice one. I have built the Trumpeter kit and like you have heard, it is overscale in all dimensions, being something like 1/47 or 1/46 scale, but goes together quite well. Either kit is probably preferable to
the Sword kit in terms of ease of construction. If you have this kit, go ahead and build it, but if not, you have
better options.
x than it does when it comes
time to build it. Thanks to the generally poor fit, missing details and the
overly fat main wheels, it is one that will have many modelers wondering why
they started it. Now you don't have to. Thanks to Trumpeter and Wolfpack, we now
have newer kits. I have not built the Wolfpack kit, though I have heard it is a
nice one. I have built the Trumpeter kit and like you have heard, it is overscale in all dimensions, being something like 1/47 or 1/46 scale, but goes together quite well. Either kit is probably preferable to
the Sword kit in terms of ease of construction. If you have this kit, go ahead and build it, but if not, you have
better options.
May
2014 Thanks to me
for the review kit. Thanks to
Caracal Models for the
decals. If you would like your product reviewed fairly and fairly quickly, please
contact
the editor or see other details in the
Note to
Contributors.