Sweet 1/144 Sea King
| KIT #: | D001 |
| PRICE: | ¥1000 from www.hlj.com |
| DECALS: | Three options |
| REVIEWER: | Scott Van Aken |
| NOTES: | bagged kit |
| HISTORY |
In December 1957, the US Navy gave the go-ahead to a new programme for a very high performance helicopter with advanced technology, to replace the outdated S-58 (HSS-1). Sikorsky was approached again and submitted a project for a big twin turbine aircraft with a boat-type hull and retractable landing gear for amphibious operations. The aircraft had all-weather capability, a good choice of weapons loads and four hours' endurance. The project was designated S-61 and the HSS-2 prototype flew on 11 March 1959. The prototype was followed by seven pre-production aircraft (YHSS-2) which successfully completed service trials in 1960. The US Navy ordered the first ten S-61B/HSS-2 for delivery starting in September 1961. The helicopters were later redesignated SH-3A Sea King. One of the first production models set up a world speed record of 339 km/h on 5 February 1962.
The main rotor of the medium-tonnage S-61 was of the articulated type, with five interchangeable blades which could be folded automatically by hydraulic actuators. The tail boom could also be folded for stowage on board ship. The all-metal, semi-monocoque boat-type hull was amph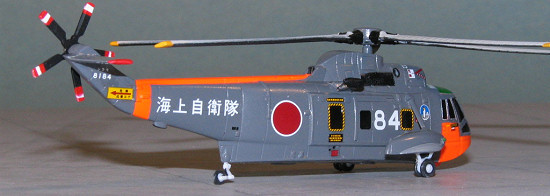 ibious, the twin main wheels retracting into two sponsons. In the SH-3A version 255 were produced, while ten more, ordered as HSS-2Z and subsequently redesignated VH-3A, were assigned to the special American Presidential Department for personnel transport and evacuation services in case of emergency. Nine of the SH-3As were transformed into RH-3As with minesweeping equipment and three were used by the USAF for missile site support and drone recovery. Another 12 SH-3As were converted into the HH-3A for battlefield rescue work, and were fitted with two Emerson TAT-102 turrets mounted at the rear of the two sponsons, and an in-flight refueling probe.
In April 1962, the USAF leased three HSS-2, transformed into 27-seat transport aircraft for services linking the Texas Towers radar installations. Another three S-61As were purchased for this purpose. Sixteen S-61A-4s with 31 seats were acquired by the Royal Malaysian Air Force and nine by the Danish Air Force for rescue work. In response to a Japanese naval specification, Mitsubishi obtained a license to produce the S-61; three were purchased directly from Sikorsky and by February 1972, 43 locally-produced aircraft had been delivered.
From 1966, the SH-3A was superseded by the SH-3D, which had a 1419shp T58-GE-10 turbine and new electronics. The first SH-3D delivered in June 1966 was one of six ordered by the Spanish Navy. This was followed by another four for the Brazilian Navy and 73 for the US Navy. The new variant was also built under license by Agusta from 1967, following an Italian naval order for an ASW helicopter to replace the old Sikorsky SH-34. An initial batch of 24 was built for the Italian Navy and 20 for the Iranian Navy 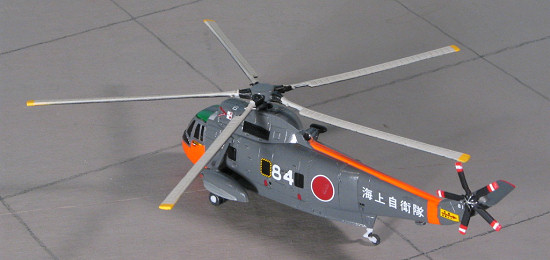 (three in the VIP version); the Italian SH-3D is identical to the American model, apart from the installation of a Teledyne Doppler radar and a search radar on the left side of the nose.
The SH-3D in USN service was upgraded to the SH-3H variant. A non-ASW version, the SH-3G was also produced. These two types included a more powerful engine system which required a larger horizontal stabilizer with a support rod. This was retrofitted to some SH-3Ds. The last USN versions were UH-3H's where all the ASW equipment was removed, making them quite similar to the SH-3G.
In Britain, the Royal Navy also chose the S-61 to replace its old Wessex. Westland acquired the license to build the SH-3 in 1959, and the British specification called for some modifications. Thus a pair of 1521shp Rolls-Royce Gnome H-1400 turbines were adopted, plus other British equipment including an Ekco all-weather radar (easily recognized by the dorsal radome), Plessey dipping sonar, Marconi Doppler navigation radar, etc.
The first British-built Sea King flew on 7 May 1969 and the first squadrons were formed the following August. The Westland version has completely different engines and avionics from the US versions. Westland has built over 200 Sea Kings, including the Sea King Mk.1, 2 and 5 for the Royal Navy, 15 for the Indian Navy (Sea King Mk.42), 22 for the German Navy (Mk.41), 11 for the Norwegian Air Force (Mk.43) and 12 for the Australian Navy (Mk.50). Westland also designed and built a tactical helicopter called Commando, which is directly derived from the Sea King, and the first examples flew in 1973. Commandos have been supplied to Egypt and Qatar and, as the Sea King HC Mk.4, to the Royal Navy.
Though now nearly gone from the USN inventory and long gone from USAF units, the Sea King is still a very important type with many military air arms throughout the world.
| THE KIT |
Please visit the preview for a look into what comes in the bag.
| CONSTRUCTION |
 You wouldn't think that a kit like this would be one that would take time to build. Well, it really depends on what sort of modeler you are. If you want to just treat it like a snap-tite, throw it together and then dash on some paint and decals, then you can probably have this one done in a day. It sure seems as if this was one of the options provided by Sweet.
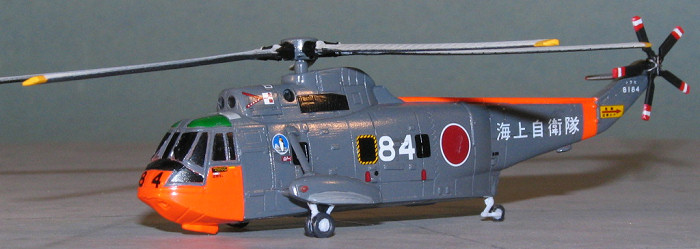
However, the truth is that to have some sort of fidelity to the markings options, you'll need to pay close attention to details and make whatever changes are needed to gain a modicum of accuracy. One thing is to do some research as it seems that the decal and painting guide may not be totally up to snuff. For instance, when I did some looking into things, it seems as if the JMSDF uses both the S-61 and HSS-2, dependent on what the mission is. Both of these are Mitsubishi builds under license. According to some photos I found. The HSS-2 can have the full ASW sponsons or the shorter ones. All the S-61 photos I found had the shorter  sponsons. This means that the upper sponson brace attachment point will be way too big and needs to be filled and sanded flush before attaching the shorter sponsons and braces. I found out about this the hard way! S-61s also seem to have been retrofitted with a spray guard that is unique to JMSDF aircraft, and not included in the kit.
Anyway, first step is to install the rotor attachment point in the fuselage halves and then close the halves. I glued these and used filler on the seams. The tail needs to be sanded down a bit as one half is a bit thicker than the other and once the fuselage is joined, a section sticks out. I also removed the flare/chaff dispensers from the underside as the Japanese don't seem to have these installed. A couple of sink areas on the underside were also filled at this time.
 Once the fuselage was together, I glued in the horizontal stab that I'd trimmed to the shorter version shown in the drawings. It seems as if the larger one was retrofitte
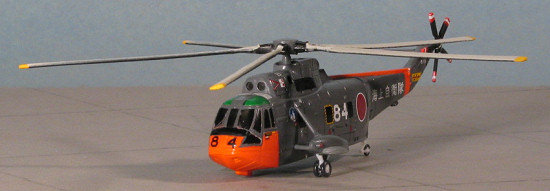 d as I found photos of both sizes. I then masked off the nose section sans spray guard. The inside windows were painted black with the upper ones in green. I did this as there is no cockpit and it would match the fuselage windows. This was then glued in place. I then went about taking care of the too large upper sponson strut opening. I first cut some sheet plastic to fill the holes. When dried, they were cut flush and filler was used to take care of the gaps left over.
Meanwhile, I cleaned and painted the rotor blades and tail rotor. First, the tips were painted white. On the rotor blades, these were then painted a yellow color. Later the upper surface was painted Light Gull Grey with the underside black. On the tail rotor things were a touch more involved. I first painted it white. Then, I carefully masked off the tips and painted those red. When dry, I masked off the red tip and a portion of white, painting the rest of the blade in red. Then I masked off the red/white/red section and painted the remainder in black. I'm sure there is an easier way and I'd thought of using white decal strips, but with all that red, I'd have to put on several layers to prevent bleed through. I then painted the hub of the tail rotor with aluminum.
| COLORS & MARKINGS |
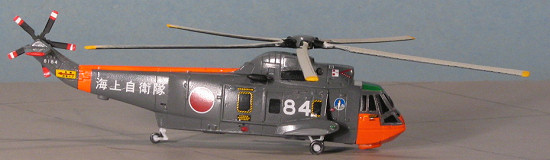 Now for the major portion of the helo. I'd still not installed the sponsons at it was easier to handle with them off. The nose section tail section and upper fuselage were painted white. Then, using Humbrol 'Blaze', I painted the nose, upper fuselage and rear fuselage band. After this dried, I masked off the Day-glo sections and painted the tip of the horizontal stab in red. This was then masked and I glued on the sponsons along with their supports. The rest of the airframe was painted Engine Grey (FS 36081 I believe) using Gunze acrylics. I used this as I had some in the paint piles. Fortunately for me, all these colors are gloss so no need to paint on a clear coat. They also dried pretty quickly as well.
| FINAL CONSTRUCTION |
With all the bits painted, it was a relatively simple matter to finish things up. First I had to paint the main wheel wells with white and I used Floquil for this as their matte white covers quite well. During this time, I glued on the tail wheel. This and the main gear have all the 'open' spaces filled with plastic to increase the strength. These spots were painte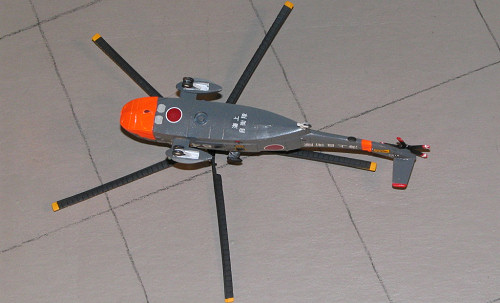 d matte black. I then shaped the wheels as best I could and fumblingly painted the 'tire' sections. These were ill defined and difficult to do so they look like hell. They were glued in place. The outer floatation bags were painted Dark Gull Grey. As a note, you'll have to trim off the little bit that sticks down from the small hump on the lower side of the nose. This will hit the ground and keep the gear from both sitting down at the same time. Either the gear is too short or the sponson attachment point is too high. Probably both.
I then applied the decals. The decals for this kit are done by Cartograf and are superbly printed. The colors are quite nice and they went on without any fuss. A dab of Solvaset on each of them was all they needed to snuggle down. I've found that Cartograf decals need something a bit stronger than Microsol to work and even after applying the Solvaset, I could fiddle with them a bit. I did find that some of the 'window' markings didn't exactly match up too well, but at this scale, it sure beats having to paint anything. It took a few sessions to get it all down and after it was done, the last thing to do was to attach the rotors, a simple task.
| CONCLUSIONS |
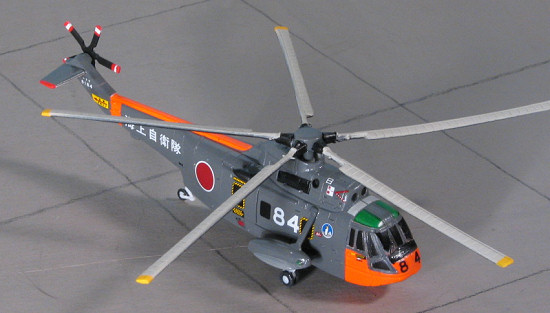
I have to say that Sweet sure does know how to do nice models. Even though this one is a bit more toy-like than their WWII stuff, and even though I had to do some work to get things to look right, it was worth all the effort and produces a neat helo that won't crowd your display shelf.
BTW, the 'one day snap kit' took about 10 days to finish, mostly due to all the painting and masking that one has to do.
March 2006
#1402 in a series.
My thanks to www.hlj.com for the review kit. Get yours direct.
If you would like your product reviewed fairly and fairly quickly, please contact the editor or see other details in the