Meng 1/72 Fiat G.91R
| KIT #: | DS-004 |
| PRICE: | $40.00 SRP |
| DECALS: | Three options |
| REVIEWER: | Scott Van Aken |
| NOTES: |
New Tool Kit |
| HISTORY |
The Fiat G.91 was an Italian jet fighter aircraft. It
was the winner of the NATO competition in 1953 as standard equipment for Allied
air forces. It entered in operational service with the Italian Air Force in
1961, 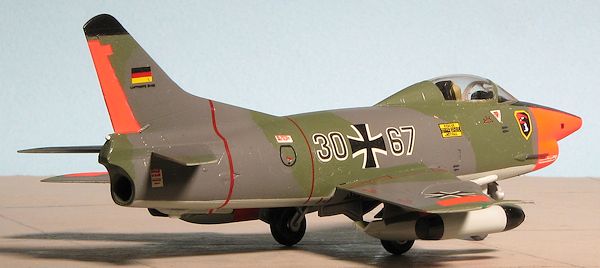 with the West German Luftwaffe,
in 1962, and later with the Portuguese Air Force. It was in production for 19
years. 756 aircraft were completed, including the prototypes and pre-production
models. The assembly lines were finally closed in 1977. The Fiat G.91 enjoyed a
long service life that extended over 35 years. It was widely used by Portugal in
the Portuguese Colonial War in Africa. In addition, both Greece and the US were
seriously considering the type, but neither went forward with large purchases.
Before the USAF was given control over all Army fixed wing tactical assets, the
US Army was seriously considering the type for use as a COIN fighter.
with the West German Luftwaffe,
in 1962, and later with the Portuguese Air Force. It was in production for 19
years. 756 aircraft were completed, including the prototypes and pre-production
models. The assembly lines were finally closed in 1977. The Fiat G.91 enjoyed a
long service life that extended over 35 years. It was widely used by Portugal in
the Portuguese Colonial War in Africa. In addition, both Greece and the US were
seriously considering the type, but neither went forward with large purchases.
Before the USAF was given control over all Army fixed wing tactical assets, the
US Army was seriously considering the type for use as a COIN fighter.
| THE KIT |
 Now you can hock your others or give them to the kids as Meng
has produced what appears to be the best in this scale yet. If you have seen any
of Meng's kits, you are aware of how nicely they are detailed and this one is no
exception. The cockpit has nicely raised detail on the instrument panel and side
consoles. The seat is pretty generic, but getting an aftermarket version for
this aircraft should not be too difficult as it is a variant of the Martin-Baker
Mk.4, one of the most widely used second generation seats ever used. Pavla has
this in their catalog.
Now you can hock your others or give them to the kids as Meng
has produced what appears to be the best in this scale yet. If you have seen any
of Meng's kits, you are aware of how nicely they are detailed and this one is no
exception. The cockpit has nicely raised detail on the instrument panel and side
consoles. The seat is pretty generic, but getting an aftermarket version for
this aircraft should not be too difficult as it is a variant of the Martin-Baker
Mk.4, one of the most widely used second generation seats ever used. Pavla has
this in their catalog.
The interior tub sits atop the nose gear well and there is room above it for weight. There is a blanking plate that fits a few mm back from the intake. The instructions would have you paint it silver. I'll paint mine black. To ensure no errors with the intake lip, that piece is separate. The kit offers optional lowered speed brakes. You can also build the kit gear up, though you will have to come up with your own display stand.
Wheel wells have convincing detail and I found the landing gear legs to be OK, though not as detailed as some may wish. The clear bits have a separate canopy and windscreen. It appears you can pose the canopy open, though there is no extension mechanism visible. The aircraft can be built as the German R3 variant with four cannon or the Italian R1 version with two cannon and four machine guns. To accomplish this, there is a large insert that goes on either side of the cockpit.
Since it was a light strike fighter, there are things under
wings. For the Frecce Tricolori version you have small tanks for the inner
pylons. These are what held the oil for the smoke system. For the other
versions, you have two optional wing tanks of different designs. You pick the
ones you want. The German planes used tanks that had plates on the end of the
fins like on an F-86D/K and those are not included though
 perhaps you could
modify one of the sets. I should also mention that there are two different wing
fence designs. One has the outer pylon molded on it while the other does not.
For the outer pylon you can put a pair of mk 64 bombs, LAU 51, LAU 32 or lAU 3
rocket launchers.
perhaps you could
modify one of the sets. I should also mention that there are two different wing
fence designs. One has the outer pylon molded on it while the other does not.
For the outer pylon you can put a pair of mk 64 bombs, LAU 51, LAU 32 or lAU 3
rocket launchers.
Markings options are for three planes. One is the box art plane from the Frecce Tricolori. I had always thought these planes had different nose cones that were pointed and had no cameras. That is true, but they also flew with standard noses, though the cameras were removed and I believe the windows painted over. The second option is for an LekG 43 plane as participated in the 'Bulls Eye '79' meet. This is in standard Luftwaffe colors. The center of the tanks is in da-glo and not regular orange. The third option is most welcome and is one of the planes the US Army was evaluating in 1961/62. Again, the orange listed in the instructions is really da-glo. The decals are superbly printed and should provide no issues. Instructions are in Meng's booklet form and provide a full color fold-out for the markings options. Gunze paints are referenced. A nice option for what is sure to be the first of several boxings, is a full size patch for the Frecce Tricolori. This is a typical patch used by the Italian Airforce and is either leather or a very high quality and thick vinyl. It comes with a velcro backing, ready to be placed on your flight jacket.
| CONSTRUCTION |
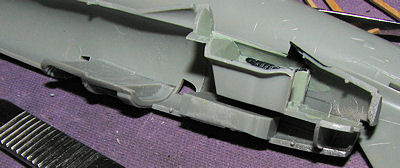
 The kit is designed for two
different armament arrangements and one needs to think about which version one
is going to do rather early in the build. Though the inserts for the guns is not
covered until later in the build, I felt it was important to get this feature
installed in case of fit issues. As I had decided to do the Bundeswaffe version,
I removed and cleaned up those inserts and installed them. They are a touch
small and so there will be gaps that need to be filled.
The kit is designed for two
different armament arrangements and one needs to think about which version one
is going to do rather early in the build. Though the inserts for the guns is not
covered until later in the build, I felt it was important to get this feature
installed in case of fit issues. As I had decided to do the Bundeswaffe version,
I removed and cleaned up those inserts and installed them. They are a touch
small and so there will be gaps that need to be filled.
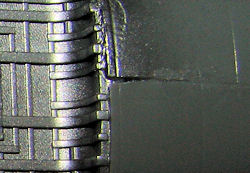 What it actually does is provide
an opportunity to increase the need for filler as the modeler will inevitably
oversand these area removing the sprue stubs. This results in gaps such as you
see in the image. You could probably lay a piece of sandpaper down and remove
them like one does when doing a vacuform kit, but then you'd remove all the pins
from one side of the assembly. Many of these sprue stubs are right next to these
pins.
What it actually does is provide
an opportunity to increase the need for filler as the modeler will inevitably
oversand these area removing the sprue stubs. This results in gaps such as you
see in the image. You could probably lay a piece of sandpaper down and remove
them like one does when doing a vacuform kit, but then you'd remove all the pins
from one side of the assembly. Many of these sprue stubs are right next to these
pins.
 points are well marked.
I glued one side and then trapped them in between the fuselage halves to dry.
This ensures a good fit. I did the same with the cockpit. There is an intake
blanking plate that is supposed to be painted aluminum, but it did not look
right so I went with flat black. I then installed the instrument panel but
realized that I had installed the cockpit a bit too far forward. It was too late
to remove it and this would cause issues when installing the intake ring. There
is more than enough room for nose weight and while none is called for in the
instructions, I put a goodly amount in there just to be sure. I then installed
the exhaust pipe and closed the fuselage halves. After the usual filler, I
installed the intake ring. This required the removal of all of the tab you see
sticking out in the front of the cockpit floor piece, but it did fit once that
was done. Next was the nose and it proved to be a tad oversize.
points are well marked.
I glued one side and then trapped them in between the fuselage halves to dry.
This ensures a good fit. I did the same with the cockpit. There is an intake
blanking plate that is supposed to be painted aluminum, but it did not look
right so I went with flat black. I then installed the instrument panel but
realized that I had installed the cockpit a bit too far forward. It was too late
to remove it and this would cause issues when installing the intake ring. There
is more than enough room for nose weight and while none is called for in the
instructions, I put a goodly amount in there just to be sure. I then installed
the exhaust pipe and closed the fuselage halves. After the usual filler, I
installed the intake ring. This required the removal of all of the tab you see
sticking out in the front of the cockpit floor piece, but it did fit once that
was done. Next was the nose and it proved to be a tad oversize.
 With all the joins filled and sanded down, I attached the wings. These fit quite
well as did the tail planes. There were the usual gaps at the very front and
back, but nothing major. The pylons were next. The outer pylons include the wing
fence. Fit here is only fair and I ended up having to use filler on the gaps.
The inner pylons were not an issue at all.
With all the joins filled and sanded down, I attached the wings. These fit quite
well as did the tail planes. There were the usual gaps at the very front and
back, but nothing major. The pylons were next. The outer pylons include the wing
fence. Fit here is only fair and I ended up having to use filler on the gaps.
The inner pylons were not an issue at all.
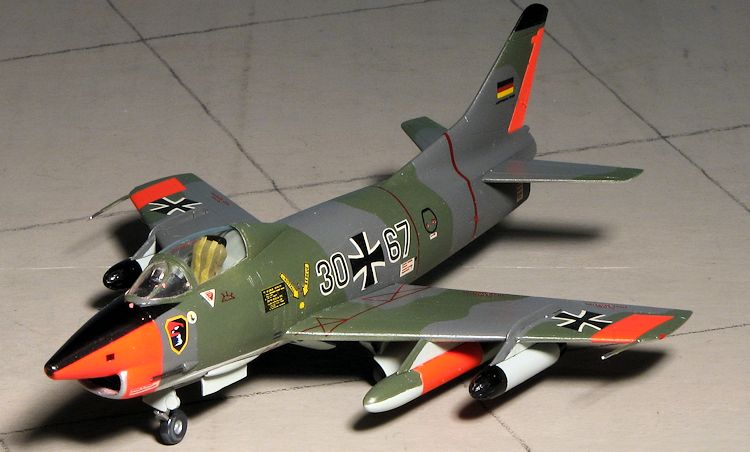
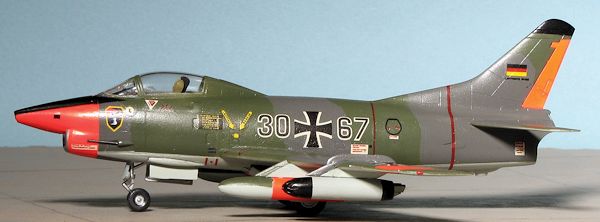
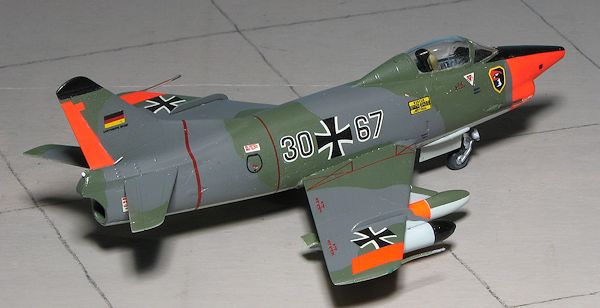
| COLORS & MARKINGS |
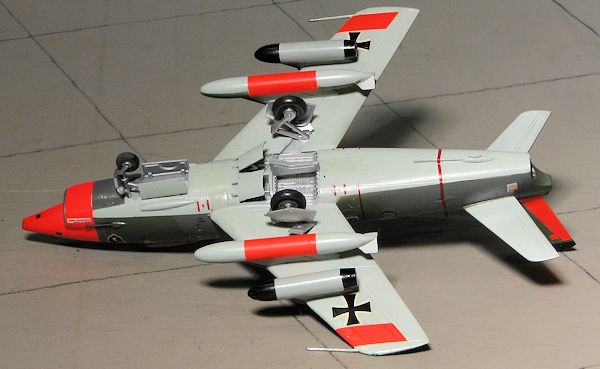
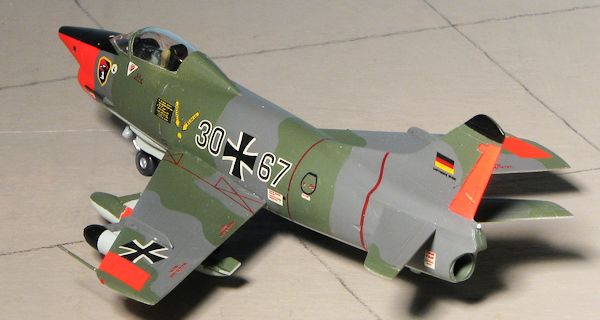 The underside of a number early German G.91s was silver, but I decided to go
with the grey scheme. A bit of background info regarding the wheel wells. I
thought that dark green couldn't be right, but according to information in
Modeldecal set #13, they were painted this shade at the factory. The
Luftwaffe repainted them after delivery in silver because they were too
dark. Something to keep in mind on your German G.91.
The underside of a number early German G.91s was silver, but I decided to go
with the grey scheme. A bit of background info regarding the wheel wells. I
thought that dark green couldn't be right, but according to information in
Modeldecal set #13, they were painted this shade at the factory. The
Luftwaffe repainted them after delivery in silver because they were too
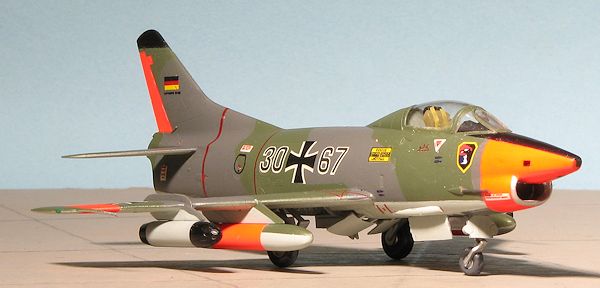
dark. Something to keep in mind on your German G.91. 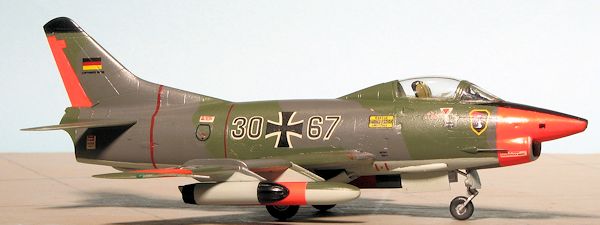 In this
case, I used the markings from Modeldecal sheet #13, which was the 1981
reprint. I simply wanted something different and markings to match the color
scheme of the time. The Modeldecal markings went on well with Microsol and
thanks to the white under the red being off register, I used the Meng decal
markings for the red fuselage bands and the no step area on the wings. These
do not have a white backing and fairly disappeared once they were put on.
The forward of the two red fuselage bands was too short and did not meet all
the way around. I simply trimmed them at the same place to make them look
even. The other kit sheet item I used was the LeKG 41 unit badge. This unit
carried the marking on the nose most of the time. Normally, this is on the
fin in other units.
In this
case, I used the markings from Modeldecal sheet #13, which was the 1981
reprint. I simply wanted something different and markings to match the color
scheme of the time. The Modeldecal markings went on well with Microsol and
thanks to the white under the red being off register, I used the Meng decal
markings for the red fuselage bands and the no step area on the wings. These
do not have a white backing and fairly disappeared once they were put on.
The forward of the two red fuselage bands was too short and did not meet all
the way around. I simply trimmed them at the same place to make them look
even. The other kit sheet item I used was the LeKG 41 unit badge. This unit
carried the marking on the nose most of the time. Normally, this is on the
fin in other units. | FINAL CONSTRUCTION |
Once the markings were on, I added the wheels, gear doors, speed brakes and the things under wings. The nose gear axle stub was short shot so that it was actually missing. I simply glued the nose wheel to the fork stub and left it as it was.
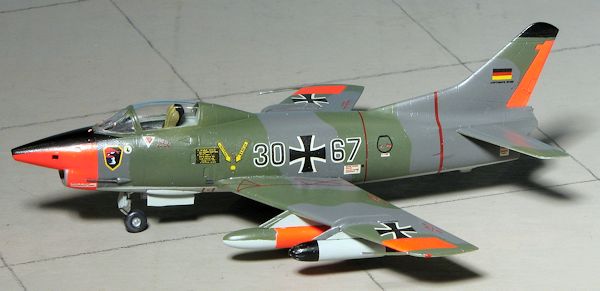 The last items
to glue in place were the gun barrels. These are simply short plastic rods and
as I had bent them removing them from the sprue, I replaced them with short
sections of stainless steel tubing. I also cut small bits of black from the Meng
sheet to simulate the camera windows in the nose. A bit of touch up painting
such as tips of the pitot and formation lights and the masking was removed from
the canopy. I had a bit of bleed-under that had to me taken care of and once
that was done, so was the model.
The last items
to glue in place were the gun barrels. These are simply short plastic rods and
as I had bent them removing them from the sprue, I replaced them with short
sections of stainless steel tubing. I also cut small bits of black from the Meng
sheet to simulate the camera windows in the nose. A bit of touch up painting
such as tips of the pitot and formation lights and the masking was removed from
the canopy. I had a bit of bleed-under that had to me taken care of and once
that was done, so was the model.
| CONCLUSIONS |
February 2013
Thanks to Tom Cleaver for sending this one along to me. I assume he got it direct from Meng.
If you would like your product reviewed fairly and fairly quickly, please contact the editor or see other details in the Note to Contributors.