
| KIT #: | 07004 |
| PRICE: | $32.98 MSRP (if you can find one) |
| DECALS: | Three options |
| REVIEWER: | Scott Van Aken |
| NOTES: | A kit long awaited |
| HISTORY |
There are a ton of websites dedicated to the TSR.2 if you really want detailed information on this aircraft. In brief, during the late 1950s, it was thought that aircraft would be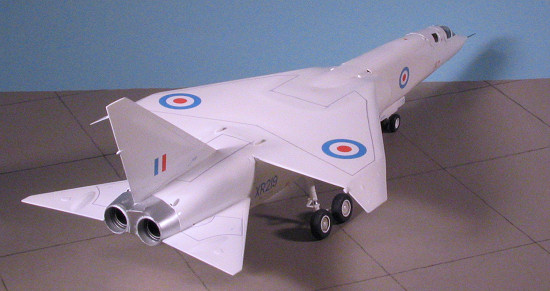 obsolete for defense as well as offense, with missiles taking over in those categories. It was also a time of budget constraints and in several nations there were projects that were most promising, but due to either a lack of perceived need (missiles can do it better and cheaper) or a lack of willingness on the part of the government in question to go the full course in funding the project, these projects were left to die when at a very advanced stage.
In Canada it was the CF-105 Arrow and in the UK it was the TSR.2 that felt the death blow of a very promising and capable aircraft. While it is often easy to blame the politicians for the loss of these projects, in these cases, it was very much their fault for not having the foresight to provide for what would have been exemplary aircraft. In the long run, it ended up costing much more for replacements and the nation in question lost a great deal in terms of prestige and local employment and engineering skills which went elsewhere (often outside the country) when the projects died.
| THE KIT |
When you open the box, you find that it does pretty much fill a rather large container. The TSR.2 is by no means a small aircraft and so the sprues are pretty long. The bits are fairly well molded, though a bit soft by what we'd expect from Japan. The interior is complete and instruments/side consoles are provided for as decals. This is pretty much standard with many 1/72 kits and so isn't 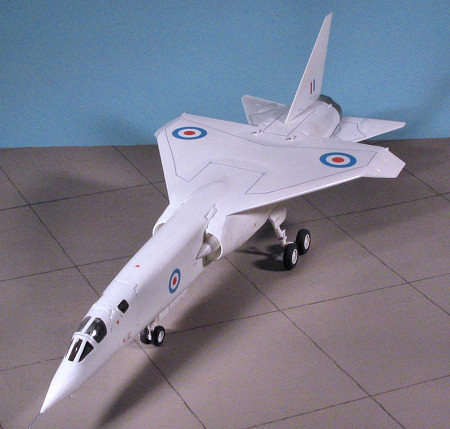 a problem (at least with me). Seats are provided without harnesses and are somewhat generic looking. As a note, it would be nice if at least decal harnesses could be provided as these really add to the look of things.
The kit has moveable rudder and stabilator as well as a bomb bay that has a fuel cell and bomb. There is little in the way of options, though one of the three prototypes did have cameras on the outside of the intakes and these are provided. This same aircraft had an additional strut leading to the rear of the landing gear bogies. The transparencies are thick with poorly defined frame lines, though they are clear enough to make out what is underneath them.
The instructions are a well done booklet with a history, parts layout and nicely drawn construction steps. All color info is by Humbrol numbers so you'll need a conversion chart to decipher what colors these are. I find not providing a generic name for all the colors to be an irritant as not everyone has access to Humbrol paint. The large decal sheet is well printed and provides a plethora of data markings and the wing walk warning stripes. This is good as it helps to break up what is a monotone plane with all that white! I didn't realize it until I started using the decals, but the white was off register. Not a problem on a white plane, but the 'what if' crowd will be disappointed when trying to apply these to a camouflaged plane.
| CONSTRUCTION |
I started construction by looking for subassemblies and things that would be painted the same color. This meant that I assembled the wings and started on the interior. The wings have a rather large gap on the underside at the mating surface. This is particularly bad at the tips and where it meets the flap actuator housings. Filling this was not only time consuming as several applications 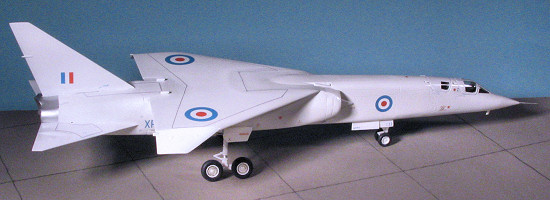 were needed, but the end result was not pretty thanks to the housings. It would have been so much better to have had the flaps as part of the lower wing instead of the upper as it would have made filling the seam so much easier. I should also mention that the holes in the intake for XR220 are already drilled out so if you don't want the camera housings, you'll have to fill them in.
The cockpit was assembled and painted Dark Gull Grey with the seats in various shades of grey and black. I had no trouble with the instrument decals as they did very well with a dab of Solvaset. Fitting the interior into the fuselage halves was a bit of a trial but it was eventually put into place along with the gear bays. I then started to assemble the rest of the fuselage parts. The general fit is not what I'd have expected from a mainstream model company. Few of the parts fit properly and every seam needed filler. Some of the problem was self-induced.
 This kit is designed to have every single thing that can be opened in the open position. This includes the canopies, gear doors, bomb bay, and speed brakes. There is no option to have most of these closed, which is unfortunate as having it all hang out is very un-prototypical. If you look at period photos of this plane, you'll find that unless it was undergoing maintenance, almost all these doors and brakes were closed. I chose to build my example like that and the build turned into a filler nightmare. None of the various bits would fit well and I went through about a month or more of doing little more than adding a part and then several applications of filler to take care of the gaps. The worst of the lot was the fit of the wing to the fuselage. Either the wing is too thick at the front or the area where it attaches is too shallow. Even with a ton of sanding I was unable to get a decent fit
  for the forward section of the wing.
I found that the multi-section fuselage did not fit well and the nose cone was too larg e in diameter. The upper speed brakes did not come close to fitting and all four of them had sink areas in them. I had no trouble with the exhaust section as it fit fairly well.
A couple of things I found to be not well thought in terms of engineering is that the fin and stabilators have to be installed before the major fuselage bits are glued together if you want them to move. Doing so is only asking for them to be broken off during construction. I also found that one has to install the main landing gear during this stage as well. I left mine off and found that I couldn't get them in at a later date. It resulted in my 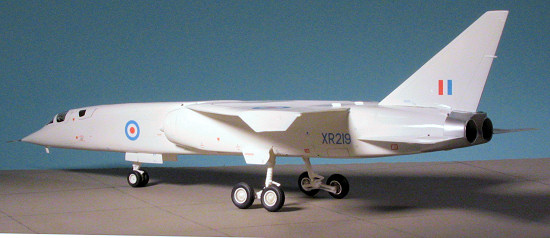 having to cut the mounting tabs to get them in there. I also left off the fin and stabilator until the fuselage was done. It meant that I had to be very careful to get things properly aligned. There has to be a better way to design this section.
Other areas of concern are the clear bits. The canopy hinges do not fit the slots at all well as they are designed to be left open. The forward canopy was quite splayed to allow this to happen. I also found the the forward section of the windscreen is proud of the fuselage by a milimeter or two and so had to have a lot of filler built up around it to smooth it in place.
| COLORS & MARKINGS |
After what has to be several months of building, I finally got to the finishing stages. I painted the whole thing with gloss white enamel and used Alclad II aluminum for the exhaust section. Some may wonder why I painted many of the p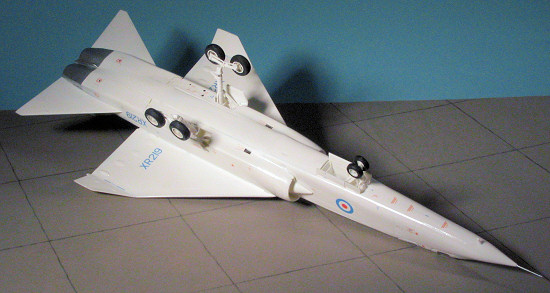 arts at all. Well, you can tell when something is white paint and when it is white plastic. The bare plastic just jumps out as most of us so I painted it all. Actually, I painted it quite a bit more than most aircraft models to get good coverage.
The decals that Airfix now uses are quite thin and go on well. You have to limit yourself to one or two decals at a time as the glue disappears from the paper rather quickly. This means that often I had to pick the decal off with tweezers as it wouldn't slide. The walkway markings on the stabilators were one piece and worked like a dream. The ones for the wings were a multiple of thin line decals and were not at all easy. The long runs on the leading and trailing edges were two decals that were near impossible to line up. The areas near the front of the wing were multiple little decals that were also a pain to get straight. It would have been nice to combine some of these markings to make application so much easier. The rest of the data markings were not a problem as Solvaset worked well on them.
| FINAL CONSTRUCTION |
The only bits to add once the painting and most of the decaling was done were the gear doors and the wheels. I had no trouble with these and since it was a prototype, I didn't have to worry about making it dirty. I mean, it didn't have enough flight hours on it to even accumulate any grunge, though I did put a wash into the main wheels to enhance some of the detail. Once I pulled the masking off the clear bits, the kit was done. It wasn't until I'd photographed the kit that I noticed the right bogie was canted over. Some boiling water took care of that.
| CONCLUSIONS |
 Like many modelers, I was really looking forward to this kit. Like many of you, I'm disappointed at what was actually provided. The Spitfire and Lightning kits of 10 or so years ago are way ahead of this one in terms of detail and engineering. Those that love the TSR.2 will overlook the poor fit and be happy about having one that isn't expensive or in resin. And really, it can be made into a nice model, though it takes a lot more work than one would expect from a major model maker. I only hope that their Canberra and Nimrod are not as poorly engineered as this one.
A huge thank you to Tim Mansfield for the review kit. Were it not for you, I'd not have had the opportunity to build this as the local store sold out as quick as they came in.
June 2006
#1418 in a series
Copyright ModelingMadness.com. All rights reserved.
If you would like your product reviewed fairly and fairly quickly, please contact the editor or see other details in the
Back to the Review Index Page 2017