|
KIT: |
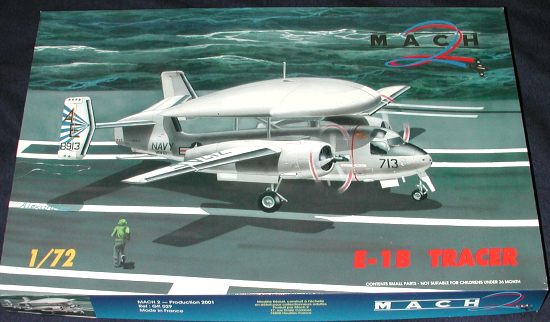
Mach 2 1/72 E-1B Tracer |
|
KIT # |
0029 |
|
PRICE: |
$38.98 MSRP ($32.96 at Squadron) |
|
DECALS: |
One aircraft |
|
REVIEWER: |
|
|
NOTES: |
Short run injected plastic kit |
|
HISTORY |
Carrier airborne early warning was held up for many years by the weight of the radar set needed to be effective. It was fine for really large aircraft who could handle the weight of existing systems, but it had to be light in order to be able to operate from aircraft carriers. Finally, the APS-82 was developed around 1955 and this was in the realm of being able to be carried. The only question was what airframe. Should a new one be built or could an existing one be modified.
Though several designs were considered, including the AF-1 Guardian and the S2F-1 Tracker, there was no money for a new plane. The main problem was wind tunnel time as the antenna for this plane had to be large. Grumman snuck in some models of a plane based on the S2F for this purpose and was able to give a specific proposal to the Navy. The Navy figured they'd go for it, however they wanted the plane to be based on the TF-1 (later C-1A) rather than on the S2F. This was due to the larger fuselage of the Trader which could hold more electronics than the slimmer fuselage of the Tracker. The type was designated WF-1 (and called the Willly Fudd) until 1962 when the number was changed to E-1.
Among some of the differences (other than the huge radome) made to the airframe were twin rudders and a redesigned wing fold system. Instead of over the fuselage folding as on the C-1 and S-2, the E-1 resorted to the 'fold back along the fuselage' method used by Wildcats, Hellcats and Avengers. Needless to say, the new plane was a huge improvement over the existing aircraft and introduced new capabilities over radar systems previously used.
A total of 88 aircraft were built, the first fleet deployment being made by VAW-11 aboard the USS Constellation in 1960. Eventually, the type was replaced by the E-2A and relegated to the reserves. The final flight of an E-1 took place in November of 1977 with VAW-78. Though several nations showed interest in the type, it was never used by any other service.
|
THE KIT |
Mach 2 has been building short run kits for quite a few years. Over that period of time they have improved quite a bit in quality. Some of their earlier kits were nearly impossible to build and had terrible fit problems. This is now the 21st century and one would hope that the newer kits are better. Well, yes and no. While I can't comment on fit, not having built this one yet, I can say that they are not up to the standards of an MPM.
Now you have to realize that short run kits are to be held to a different standard than main-line production kits. Basically, that standard is not as high. The builder needs to have a goodly number of construction skills in his repertoire in order to tackle one of these kits. However they are not beyond the abilities of most intermediate modelers.
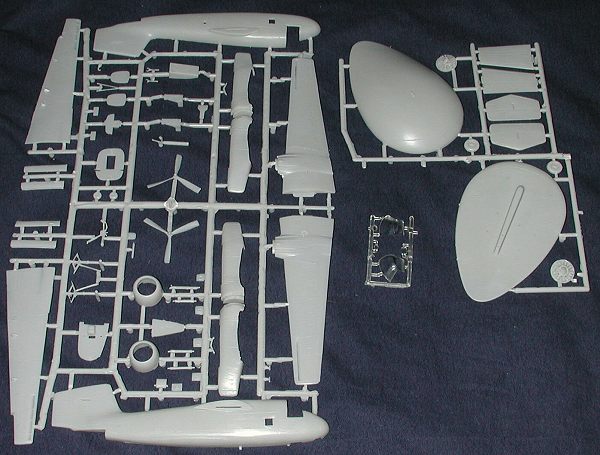
Ok, on to the description of the kit. First off, the plastic is not smooth, having a slightly rough texture to it. I also found a number of bits of 'stuff' on the surface of parts, as if small bits of molten plastic had fallen on the parts and stuck there. They should be a simple matter to sand off. There were also some parts slightly short shot on my kit. This was limited to a landing gear oleo, a flap hinge, one of the control wheels, the back of the main wheels, and one of the front axle stubs. There are sink marks on most of the thick pieces, though the only ones that will cause you trouble are those on the horizontal stabilizers as they are rather large.
Most of the parts have ejector pin marks or stubs. Most will be easy to clean up. Some, such as the one in the arresting hook well, nose wheel well, and that on the face of the instrument panel will be a real chore to fix. You also need to be careful when trimming these stubs off to make sure you are not removing attachment points. This is especially true of the engine nacelles. All of the parts have flash on them though it is mostly of the 'rough edges' type. You know you'll have to clean up every part on a short run kit anyway so that's not a biggie. The sprue attachment points are large and so you should use a razor saw to remove the parts. Some of the more fragile parts will undoubtedly break during this operation so be cautious and don't be afraid to stretch a bit of sprue to replace some of these.
 The panel line detailing is all
engraved and is deep enough so that sanding will not obliterate them. It isn't
of the Matchbox trench variety either. While there is a basic cockpit with seats
control wheels and instrument panel, there is no cabin. You'll have to fill the
nose with a LOT of weight to keep this one from tail sitting. Fortunately all of
the S-2, C-1, E-1 family had a tail wheel as they were marginally balanced as
real aircraft. The clear plastic parts are distorted and show stress fractures
in them. I should also mention that the small side window is too small for the
opening and only one is provided instead of two.
The panel line detailing is all
engraved and is deep enough so that sanding will not obliterate them. It isn't
of the Matchbox trench variety either. While there is a basic cockpit with seats
control wheels and instrument panel, there is no cabin. You'll have to fill the
nose with a LOT of weight to keep this one from tail sitting. Fortunately all of
the S-2, C-1, E-1 family had a tail wheel as they were marginally balanced as
real aircraft. The clear plastic parts are distorted and show stress fractures
in them. I should also mention that the small side window is too small for the
opening and only one is provided instead of two.
It is pretty obvious that the basis for this kit was either the Hobbycraft S2F or the Hasegawa version. There are a number of similarities. This even goes down to the wing fold. Unfortunately, it is not the right type for an E-1. Fixing it will require sanding off the hinges, filling in the wrong hinges and rescribing the panel lines. It just might be handy to have one of the aforementioned kits around to rob parts from.
 The instruction sheet is barely
adequate. It is a single side of a sheet of paper and shows only a few of
the subassemblies. There is no three-view for assistance, there is no interior
painting guide at all, and there is no decal placement guide. I guess Mach 2
figures that only experienced modelers will be building this kit so they don't
need to add all that extra stuff. If that is the premise, then they are right.
Though it says not suitable for children under 36 months, it really should say
'For experienced modelers only'. Most of us will have no major trouble putting
this one together and will know what colors to use for the inside. The outside,
of course, is light gull grey and white. There is also the box art to help with
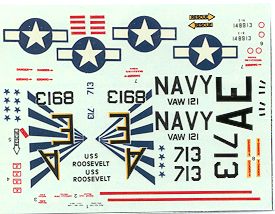
the decal placement. The decals themselves are thick but should work well. I
wouldn't use the national insignia provided as they just don't look right. I
think the border around the star is too thick. Other than that, they should be
quite useable.
The instruction sheet is barely
adequate. It is a single side of a sheet of paper and shows only a few of
the subassemblies. There is no three-view for assistance, there is no interior
painting guide at all, and there is no decal placement guide. I guess Mach 2
figures that only experienced modelers will be building this kit so they don't
need to add all that extra stuff. If that is the premise, then they are right.
Though it says not suitable for children under 36 months, it really should say
'For experienced modelers only'. Most of us will have no major trouble putting
this one together and will know what colors to use for the inside. The outside,
of course, is light gull grey and white. There is also the box art to help with
the decal placement. The decals themselves are thick but should work well. I
wouldn't use the national insignia provided as they just don't look right. I
think the border around the star is too thick. Other than that, they should be
quite useable.
|
CONCLUSIONS |
Bottom line; should I fork out the bucks for this kit? Well, as with all short run kits, you know going into it that it will take some work. You also know that you won't find this aircraft type in injected plastic from anyone else. We can thank the short run folks for having the guts to produce these kits. I've been looking for one of these to come out for quite a while These kinds of kits are subject oriented. You want an E-1, then this is the one to get. I can only hope that Mach 2 or someone else will do a C-1A and offer it with a decal sheet that has multiple options!
You can find this kit and many others at

If you would like your product reviewed fairly and fairly quickly where it will be seen by well over 150,000 visitors a month, please contact me or see other details in the Note to Contributors.