AMK 1/48 L-29 'Delfin'
| KIT #: | amk88002 |
| PRICE: | $40.95 SRP |
| DECALS: | Seven options |
| REVIEWER: | Scott Van Aken |
| NOTES: | New tool kit |
| HISTORY |
The Aero L-29 Delfín (English: Dolphin, NATO reporting name: Maya) is a military jet trainer aircraft that became the standard jet trainer for the air forces of Warsaw Pact nations in the 1960s. It was Czechoslovakia's first locally designed and built jet aircraft.
In the late 1950s, the Soviet Air Force was seeking a
jet-powered replacement for its fleet of piston-engined trainers, and this
requirement was soon broadened to finding a trainer aircraft that could be
adopted in  common by Eastern Bloc air forces. Aero's response, the prototype
XL-29 designed by Z. Rublič and K. Tomáš first flew on 5 April 1959, powered
by a British Bristol Siddeley Viper engine. The second prototype was powered
by the Czech-designed M701 engine, which was used in all subsequent
aircraft.
common by Eastern Bloc air forces. Aero's response, the prototype
XL-29 designed by Z. Rublič and K. Tomáš first flew on 5 April 1959, powered
by a British Bristol Siddeley Viper engine. The second prototype was powered
by the Czech-designed M701 engine, which was used in all subsequent
aircraft.
The basic design concept was to produce a straightforward, easy-to-build and operate aircraft. Simplicity and ruggedness were stressed with manual flight controls, large flaps and the incorporation of perforated airbrakes on the fuselage sides providing stable and docile flight characteristics, leading to an enviable safety record for the type. The sturdy L-29 was able to operate from grass, sand or unprepared fields. Both student pilot and instructor had ejection seats, and were positioned in tandem, under separate canopies with a slightly raised instructor position.
In 1961, the L-29 was evaluated against the PZL TS-11 Iskra and Yakovlev Yak-30 and emerged the winner. Poland chose to pursue the development of the TS-11 Iskra anyway, but all other Warsaw Pact countries adopted the Delfin under the agreements of COMECON.
Production began April 1963 and continued for 11 years, with 3,600 eventually built until 1974. A dedicated, single-seat, aerobatic version was developed as the L-29A Akrobat. A reconnaissance version with nose-mounted cameras was built as the L-29R.
The L-29 was operated by literally dozens of air forces and is still equipping a handful. A considerable number are being operated as warbirds.
| THE KIT |
 detailing and plethora of sunken rivets/screws. I
found absolutely no molding glitches, not even ejector pin marks
inside gear doors.
detailing and plethora of sunken rivets/screws. I
found absolutely no molding glitches, not even ejector pin marks
inside gear doors.  open or closed. You can also
pose the two canopies open or closed as you so wish. They are very
clear so any detail in the cockpit will be easily seen. Two drop
tanks are provided for under the wings. AMK has already opened the
holes for these so if you choose not to use them, you will need to
fill these holes.
open or closed. You can also
pose the two canopies open or closed as you so wish. They are very
clear so any detail in the cockpit will be easily seen. Two drop
tanks are provided for under the wings. AMK has already opened the
holes for these so if you choose not to use them, you will need to
fill these holes. | CONSTRUCTION |
 decal is
actually 3 or 4 sections and getting those on without some of the
outline bits attached is nigh near impossible. You have been warned!
Also, the working time on these decals is rather short as the glue on
the paper backing soon goes away making the final bits difficult to
remove from the sheet.
decal is
actually 3 or 4 sections and getting those on without some of the
outline bits attached is nigh near impossible. You have been warned!
Also, the working time on these decals is rather short as the glue on
the paper backing soon goes away making the final bits difficult to
remove from the sheet. 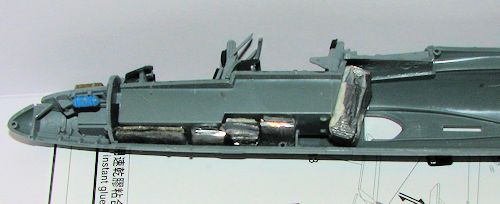 grams
just behind the cockpit assembly and 3 grams under the cockpit. I then
taped the fuselage halves together as well as the wings and the
horizontal stab. Even without the flaps, elevator and rudder, it was
barely nose heavy. I then filled nearly all the remaining openings under
the cockpit and that seems to have been enough. I glued the clear blast
shield to the other fuselage half and when dry, the fuselage halves were
glued together. I used super glue for the seams and a pair of sink areas
I found on the underside.
grams
just behind the cockpit assembly and 3 grams under the cockpit. I then
taped the fuselage halves together as well as the wings and the
horizontal stab. Even without the flaps, elevator and rudder, it was
barely nose heavy. I then filled nearly all the remaining openings under
the cockpit and that seems to have been enough. I glued the clear blast
shield to the other fuselage half and when dry, the fuselage halves were
glued together. I used super glue for the seams and a pair of sink areas
I found on the underside. 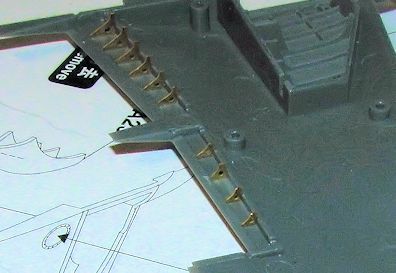 The next thing I did was to
attach the small etched pieces in the flap area. Naturally, I managed to
lose a couple of the tiny one (which is one reason I am not fond of p.e.).
Actually, they fit in the slots quite tightly, making it easy to simply
add a touch of superglue to them once in place. It is getting them there
via tweezers that causes me issues!
The next thing I did was to
attach the small etched pieces in the flap area. Naturally, I managed to
lose a couple of the tiny one (which is one reason I am not fond of p.e.).
Actually, they fit in the slots quite tightly, making it easy to simply
add a touch of superglue to them once in place. It is getting them there
via tweezers that causes me issues!| COLORS & MARKINGS |
| FINAL BITS |
 Aircraft Conversions metal gear would come in handy,
especially if they cast this all in one piece. The main gear attachment
points, like the nose gear, are all quite scale and in this case, the
gear attaches to the rear of the wheel well, just like the real
aircraft. Of course, this isn't the strongest attachment point for a
model, so one will have to be cautious and get a good join. The
instructions would have to attach the wheels and gear doors before
installation, but frankly, that would make attaching the legs and the
retraction strut pieces quite difficult, so I left those off until the
gear was fully dry.
Aircraft Conversions metal gear would come in handy,
especially if they cast this all in one piece. The main gear attachment
points, like the nose gear, are all quite scale and in this case, the
gear attaches to the rear of the wheel well, just like the real
aircraft. Of course, this isn't the strongest attachment point for a
model, so one will have to be cautious and get a good join. The
instructions would have to attach the wheels and gear doors before
installation, but frankly, that would make attaching the legs and the
retraction strut pieces quite difficult, so I left those off until the
gear was fully dry. | CONCLUSIONS |
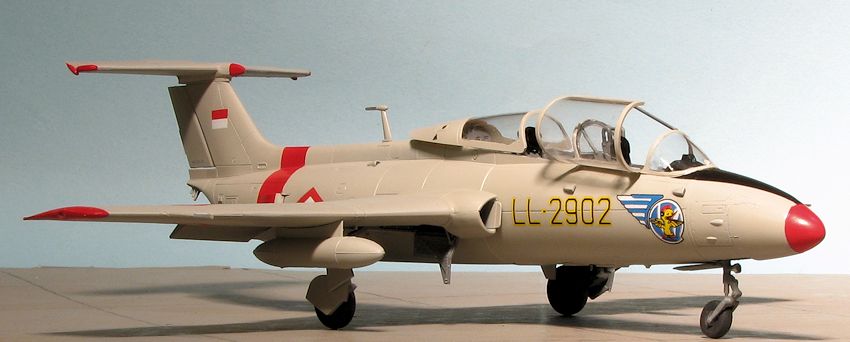
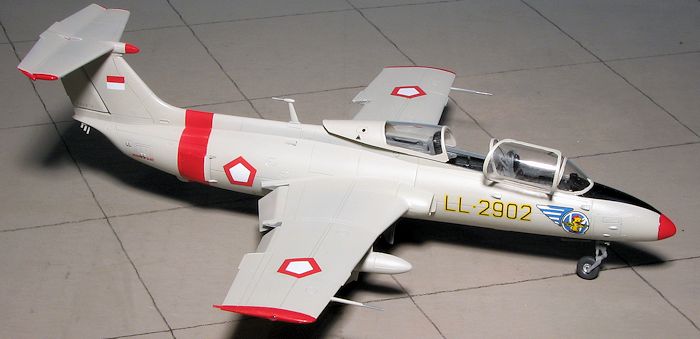
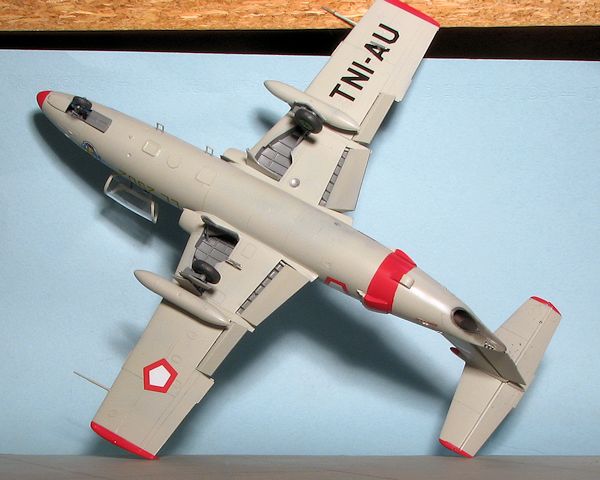
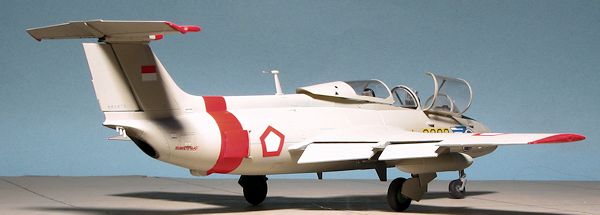 Overall
I have to say that I'm quite happy with the way the kit turned out.
I wish I could paint fuselage bands better, but there it is. The kit
fits quite well and while it does take a bit of patience and careful
building, the end result is a very nice looking model. I especially
like all the nice markings options that are given and I've saved the
remainder of the decal sheet and markings instructions for use on my
Planet Models kit, should I decided to build that one. It must be a
relatively popular subject as the LHS got in several of these along
with their Kfir. The L-39s were gone in a few days and the Kfirs are
still on the shelf.
Overall
I have to say that I'm quite happy with the way the kit turned out.
I wish I could paint fuselage bands better, but there it is. The kit
fits quite well and while it does take a bit of patience and careful
building, the end result is a very nice looking model. I especially
like all the nice markings options that are given and I've saved the
remainder of the decal sheet and markings instructions for use on my
Planet Models kit, should I decided to build that one. It must be a
relatively popular subject as the LHS got in several of these along
with their Kfir. The L-39s were gone in a few days and the Kfirs are
still on the shelf. | REFERENCES |
http://en.wikipedia.org/wiki/Aero_L-29
June 2014
Thanks to www.dragonmodelsusa.com for the review kit. You can get yours at your local or on-line retailer.
If you would like your product reviewed fairly and fairly quickly, please contact the editor or see other details in the Note to Contributors.