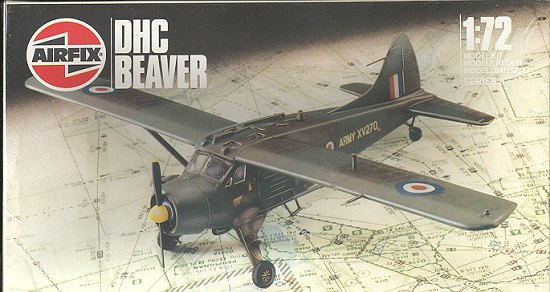
Airfix 1/72 DHC-2 Beaver
|
KIT # |
3017 |
|
PRICE: |
$8.50 |
|
DECALS: |
See review |
|
REVIEW: |
|
|
NOTES: |
Currently (1998) Out of Production |
|
HISTORY |
I think I can say with out fear of contradiction, that most men like a little Beaver. And that is particularly true of those that build models. The DHC-2 Beaver was developed just after WW2 when DeHavilland Canada realized that they needed to design a rugged bush aircraft of be forced out of business. The Beaver was the result of that and it was enough of a success to keep the company solvent for many years.
Though not their first design; that was the DHC-1 Chipmunk, a very capable primary trainer that saw a great deal of use, The Beaver led to the much larger DHC-3 Otter and then to the DHC-4 Caribou, a twin engined, medium lift, cargo aircraft. With the exception of the Chipmunk, probably the largest user of DeHavilland Canada aircraft was the US Army, which bought prodigious numbers of the Beaver, Otter and Caribou.
All of these aircraft has excellent STOL (Short Take Off and Landing) capabilities which made them particularly useful to the Armies that bought the aircraft. That same ruggedness that was appreciated by Canadian and Alaskan bush pilots was what attracted the various military forces to want to purchase these aircraft. All of them have done well in overseas markets and many are still flying.
|
THE KIT |
It is not surprising that the Airfix kit would represent a version used by the British Army. Not all Beavers have all those lumps and bumps on top of the forward fuselage, so if you are doing other Beavers, that needs to be modified.
The Airfix kit has been around for a while, at least the mid 1970s and while devoid of gimmicks is still a child of that era with raised panel lines, a mediocre interior, and oversize parts. My example was in a lovely light blue plastic and relatively devoid of flash. The transparencies are quite thick, especially the roof ones, which have large sink marks in them. Tough to remove, too!
The instructions are very typical of Airfix of the period, but completely adequate to enable one to build the kit. Part numbers and paint colors are called out in the building steps, albeit that paint numbers are Humbrol references. The decals offer two versions; an British Army aircraft in green and brown camouflage, and a US Army one in white and gloss olive drab. I didn't use the kit decals as I wasn't doing either version. The decals themselves are flat and were yellowing so they would have been discarded anyway. As far as I know, there are no aftermarket decals for this kit. A shame too, as it was used by so many different countries.
|
CONSTRUCTION |
Naturally, one begins this kit in the cockpit/interior. Thanks to the thickness of the clear bits, there is no real need to do any detail work here as no one will see it. I painted the interior a green color with black instrument panel. The seats had leather painted on their facings. There is no rear seats in this kit, just the ones in the front.
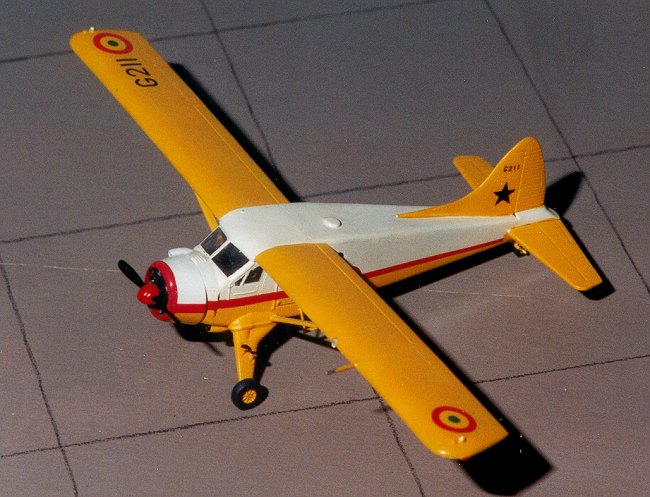
Once that was done, the transparencies were fit into place. No real problems here, though I did have some trouble getting the windscreen to fit properly when closing the fuselage halves. A bit of fiddling around got a decent fit. I then assembled the wing halves and took care of the inevitable filler requirements. Then I went to work on the fuselage. My Beaver was to be one of the Ghana A.F. There was a nice profile in a back issue of Scale Aircraft Modeling that I used as a reference. This Beaver had no upper fuselage windows and only an ADF antenna on the roof so the the entire roof was sanded smooth except for that one antenna. The upper windows were filled (several times) and smoothed out as well. There is a carb intake scoop that fits on the right side and that was glued on.
Once the fuselage was done, the landing gear was glued in place and faired in where needed. Then the tailplanes and tail wheel was glued in place after some cleanup. The engine was painted flat black and drybrushed, then glued into the cowling and that glued onto the fuselage.
Next the windows were all masked. Next step was to glue the wings on and to temporarily install the wing struts to ensure that all fit well. The fit of the wings wasn't bad, but some filler was needed on the top. Then it was off to the paint shop.
|
PAINT & DECALS |
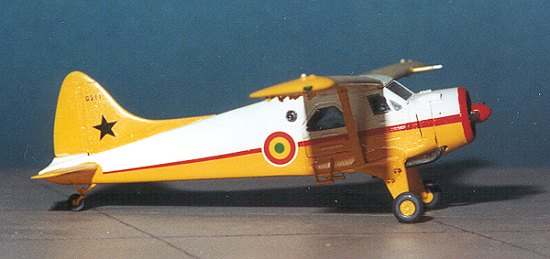
This aircraft was mostly yellow with a white upper fuselage and a red cheat line. Painting took a bit of thought. First, the entire aircraft was painted gloss white. Several coats were needed to get good coverage. After drying, a lot of masking was done for the upper surface of the aircraft. The appropriate location of the cheat line was figured out and the airframe was then painted yellow. I used Model Master enamels for these colors. A white undercoat is imperative for the red and yellow colors. During the masking process, I made sure that the cowling lip was masked off to accept the red. This lip and the spinner were then painted in red, again using Model Master enamels.
The cheat line was made using solid red decal sheet trimmed to the right shape. I chose the red for the cowling based on what matched the decal sheet. While not perfect, it does match up rather well. This red decal was laid just atop the yellow section to make sure there was white behind it so there would be no color changes.
The decals were gleaned from a number of places. The numbers were from various Modeldecal sheets as Ghana uses RAF code styles. The roundels themselves came from several sheets that were at one time on the market. These offered dots, circles, stars and other geometric designs in several colors and sizes on each sheet. They are long out of business, but I still find their sheet quite useful from time to time.
Once the painting and decaling was done, the wheels were added and other detail painting done to the kit.
|
CONCLUSIONS |
This really is a nice kit, while not exactly a new kit anymore and it does have weak wheel/landing gear attachment points ( I have broken the wheels off a number of times), it does make into a very nice model. Hobbycraft have since come out with this aircraft in both 1/72 and 1/48 scale, however, I am not sure if they are any real improvement over this one. Recommended to all skill levels, even though beginners will probably make a mess of it!
1998
Copyright Modeling Madness.com. All rights reserved.
Review copy courtesy of me and my wallet!
If you would like your product reviewed fairly and fairly quickly, please contact the editor or see other details in the Note to Contributors.
Back to Reviews Page 2020