Monogram 1/121 B-58 Hustler
| KIT # | PA-198 |
| PRICE: | $1.30 when new |
| DECALS: | One Aircraft |
| REVIEWER: | |
| NOTES: | 1967 Release |
| HISTORY |
Alone in its class, the B-58 could fly faster than twice the speed of sound, pinpoint targets from an altitude of 60,000 feet, and avoid radar in low-level near-supersonic flight at 500 feet and below. At altitude, the B-58 could cruise at higher speeds than any other bomber in the free world. The Hustler was powered by four General Electric J-79 engines, each delivering 15,000 pounds of thrust in afterburner. The B-58 could fly more than 4,500 miles without refueling. With aerial r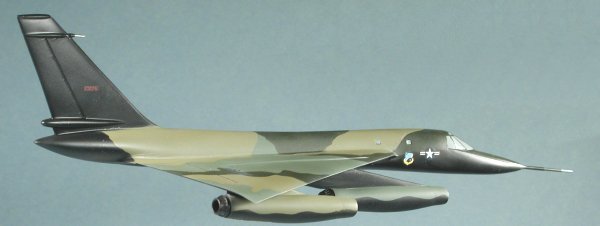 efueling, the aircraft was a true intercontinental bomber. Its electronic bombing and navigation system was ten times more precise than its predecessors, required only two-thirds the space, and weighed just half as much as earlier systems.
The B-58 dramatically reversed the trend toward ever larger bomber aircraft. Helping to minimize the size was a jettisonable pod under the fuselage that held both the payload, which varied according to the mission, and extra fuel. To reduce drag, the “area rule” principle was applied to the design of the B-58 fuselage, giving it a sleek shape. Strong honeycomb skin material reduced aircraft weight and allowed the bomber to withstand the high temperatures caused by wind friction. The unique structure also lessened the susceptibility of material failures due to sonic fatigue.
On December 1, 1959, the first production Hustler left the division and was taken across the runway to Carswell AFB. B-58 production ended two years later, after 116 planes had been built (including eight TB-58 pilot trainers). The Air Force retired the B-58 in January 1970. The Hustler was built by Convair which later became General Dynamics.
Intro courtesy of the Hustler House.
| THE KIT |
This is obviously one of Monogram's earliest kits, with a date of 1957 stamped on the instruction sheet. It also has the required 'operating features', in this case a droppable weapons pod and opening crew hatches. The kit itself is in silver plastic with raised panel lines other than the control surfaces. The white parts of the markings are delineated as raised lines on the fuselage and fin. There are three crew figures in seats (which is incorrect for the B-58 as it has distinctive escape Instructions are of the photo type with a step by step written instruction for each construction sequence. No indication of any required nose weight is given in the instructions, though I'd be willing to bet it may need some. Decals in my kit (now nearly 40 years old) were totally unusable and are for one of the prototype aircraft with all the red markings.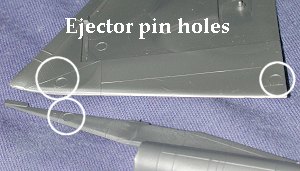 pods), and nothing else in any of the crew compartments. The hinges for the upper hatches are huge and leave very large gaps. There is also a small piece of ground support equipment provided. The kit parts are rife with rather prominent ejector pin holes, many of them on the outside of parts. Detail in the wheel wells is non-existent, as is typical for the time. The shape of the engine pods and the forward fuselage is suspect as well, but it looks enough like the real McCoy to concern me very little.
| CONSTRUCTION |
When dealing with a kit of this age, one has to wonder several things. One, why build it at all since it is such an odd scale. Two, why build it when there is a very nice 1/144 kit available. Three, why build it when you are going to have to do some serious work regarding accuracy and panel lines. Four, screw all those reasons, I want to build it! I then had to come to terms with just how it was to be done. I decided to build it as a stand model, to fill in all the various gaps around the hatches, and to sand off ALL of the raised panel lines. I also decided to get creative with the markings, but more on that later. Next area was the engine pods. These needed their ejector pin holes filled on the inboard engine pylons. The intakes seemed to fit rather well. Test fitting the afterburner cans, I noted that they are smaller in diameter than the back of the engine. No real fix for that as nothing I have in the spares box will fit. The engine intakes fit rather well. Those were glued on and the engines were then sanded down smooth. Fitting them was not a real problem. The folks at Monogram keyed each of them so that it is impossible to put them into the wrong place. While the outer engines fit well, the inner ones had gaps around the pylons that needed to be filled and sanded down. During this phase, the nose pitot tube was glued in place and filler applied to the gap. The weapons pod itself went together rather well, though the tail section (which consists of the four fins and cone in one piece), did not fit at all well. Lots of filler and sanding on that one. Once all of this was done, the kit was ready for paint. CAMOUFLAGE First thing was to paint the clear bits a light blue. With no interior detail, having the transparencies looking into bare plastic would be the best idea in the world. When doing models like this, it is best to paint the canopies a color opposite of the main color of the plane. For darkish planes, a light blue; for light aircraft, a dark blue or black. Once all the usual back and forth was done to cure screw-ups, it was given an nice coat of Future acrylic gloss and then it was time to hunt up some decals.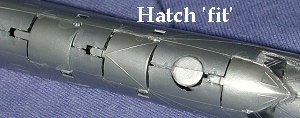 First step was to assemble the wings and the fuselage. My wings had small chips out of the tips, a problem with the rather brittle plastic of the time. Choice here was to replace them with sheet stock or to sand them both to matching shape. I chose the latter. For the fuselage, I inserted the little button to release the weapons pod and firmly glued it in place. Same for the three crew compartment covers and the crew windows. I then glued the fuselage halves together before the glue set and glued in the windscreen so the forward cover would have something to rest on. I then let it dry and while that was happening, The wings were glued together and clamped while they dried. Then the wings were mated to the fuselage.
  Fit was also less than sterling. The gap was such that I ended up doing the initial filling with superglue, followed by a couple of coats of standard filler. On the top the gaps were first filled with epoxy filler and then standard filler to smooth things out. I had also decided to build this kit as a stand model so that meant the gear doors would be closed. For the
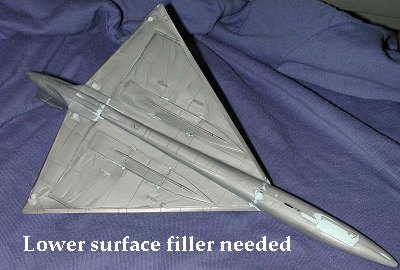 front, the gear doors were undersized so needed a lot of space to be filled in. The main gear doors have holes in the lower wing where the gear door tabs are to go. As a result, the tabs have to be cut off prior to gluing in position and then the small holes in the wings have to be filled. During all this filling and sanding, I took the opportunity to remove the panel lines. Thing about silver plastic is that there is a 'ghost' of where the lines used to be so it is a bit difficult to see that the raised detail is actually gone! Needless to say, after all that sanding, I was left with a very tired sanding arm!
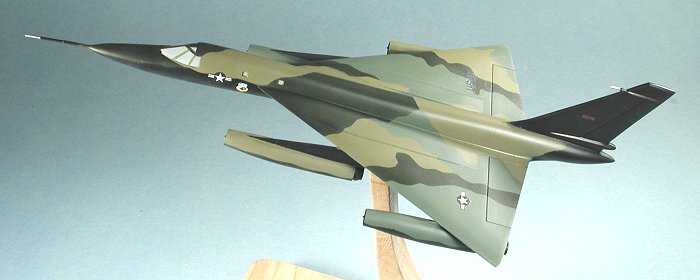
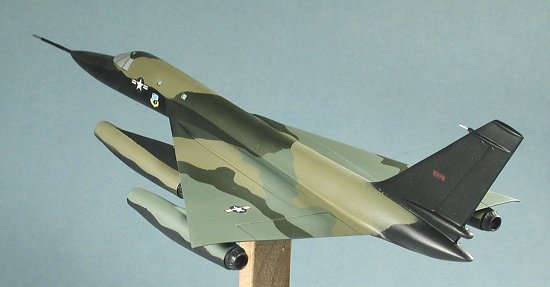 There was no doubt in my mind how to paint this aircraft. I decided to do one of the often talked about, but never photographed camouflaged B-58s. I've heard all the stories, including those from reputable sources, but without a photo or any kind of documentation to prove things, it will remain (at least to me) as one of those legends of the air. The Air Force never does NOT photograph everything it has ever done so I find it difficult to believe that this program was so secret that no photos were ever taken, despite alleged eye-witness accounts. The Air Force Technical Order that covers painting of planes has several camo schemes never used on planes and includes a standard SIOP scheme for the B-58, that is similar to what was used on the B-52D. However you look at it, it makes for a very cool looking model.
 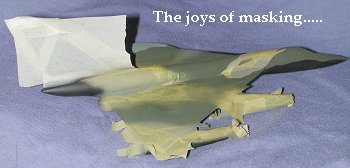 Then the entire underside was painted flat black. This was followed (after masking the fin) with an upper surface painting of FS 34201 Tan. Then that was masked off and the next color, FS 3159 Green was painted. When dry, it was also masked and the final color FS 34079 Green was painted. I masked it as a kit of this small a scale looks rather odd if freehanded with most air brushes. The overspray would be way too large unless you have a brush that can spray something like a 1/32 inch line, and darn few can. It also means hours of masking for minutes of painting, but that is the price one pays. Once fully masked, the black was resprayed to take care of any goofs. I thinned all my Model Master enamels with Floquil lacquer thinner to cut down on dry time and it worked just great with no problems at all.
| FINAL BITS |
 Decals for a 1/131 plane are not the easiest to come by. As a result, I have to cobble something together from what I had in terms of spares. Believing that nothing that could be useful should be tossed (which explains why I can rarely find anything), I started scrounging. From a barely useful Scalemaster 1/72 insignia sheet, I found '10 inch' insignia. From another equally old and badly decomposed sheet by Scalemaster, I found a USAF for the upper wing. For the tail number, I scrounged from a 1/72 F4U-5N sheet and from a T-33 sheet a pair of badges. Finding SAC badges in this scale proved particularly elusive so those that know USAF badges by heart can roll their eyes in disbelief at what I came up with and the rest will join me in a bit of fantasy.
The last parts to be glued on were the afterburner nozzles, which I mentioned before, were a bit too small, but just fine for 1957 when the kit was designed. The model was given a coating of matte clear as any decent camo'd plane should have and 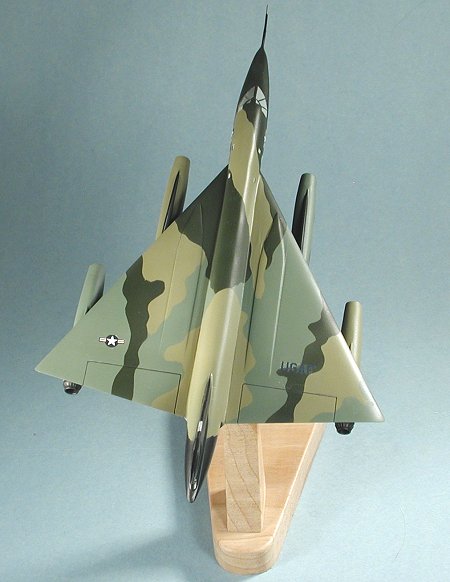 it was time for the stand (no landing gear, remember). For a stand, I have several to choose from that were made for various models that are now hanging from the ceiling in the basement. A simple hole in the lower fuselage around the center of gravity was all that was needed.
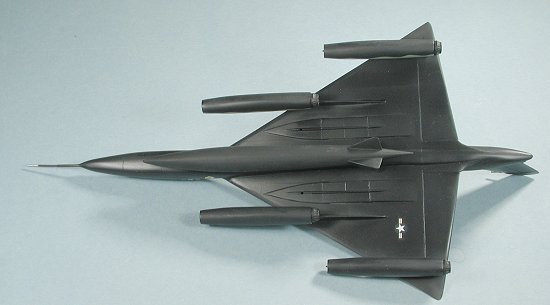
Now I was in a real quandary about the weapons pod. There are several stories about how these were to be used both of them in a low level role. One is that it was to haul iron bombs from a large pallet under the fuselage. However, not having a way to break the air stream when the bombs were released, these bombs tended to drift back up and hit the underside of the plane. Not good. Bombers with bomb bays have a piece that drops down when the bay is opened to cause sufficient turbulence for the bombs to fall as they should. Not having this device probably cancelled the program (if there was one). Another story goes that the plane was to be used as a high speed pathfinder for the same low level mission with many F-105s and/or F-4s in trail. Again, the program was abandon for various reasons (such as getting rid of the fleet of B-58s due to very high maintenance costs). These pathfinder planes would have had electronics in the pod as well as the usual fuel tank.
Going for what looks the coolest, I chose the one without the pod, though I could easily glue on the pod and mount it as such should I feel the need. After all, I did spend quality time sanding and painting the pod and left the attachment slots on the model.
| CONCLUSIONS |
It was definitely a fun build. Yeah, it took a lot of filler and sanding, but even then, the model was started and finished in less than 7 days. Doing a stand model means not having to mess with landing gear and doors. It also means no sweating over interiors if you paint the windows as I did. It is the perfect way to have a somewhat relaxing build without sweating the small stuff and adds to the other oddities I have on stands like my Revell Bison.
May 2003
#1270 in a series
Copyright ModelingMadness.com. All rights reserved.
If you would like your product reviewed fairly and fairly quickly, please contact the editor or see other details in the