| KIT # | 72504 |
| PRICE: | $ |
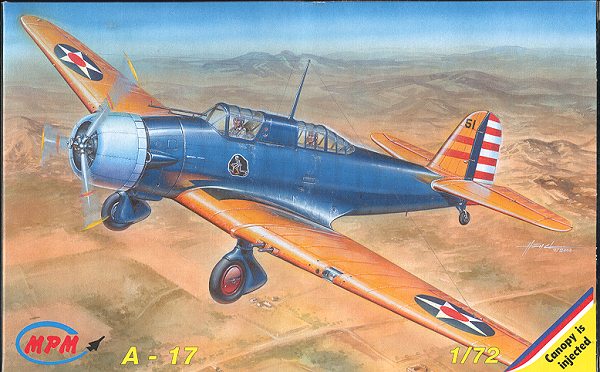
| DECALS: | 2 aircraft, but everyone will do the box art version. |
| REVIEWER: | |
| NOTES: | Short run with resin prop hub |
| BACKGROUND |
For a look in the box and a brief history of the type,visit the preview.

| CONSTRUCTION |
No real surprise here; construction starts with the interior. As I often do, I glued as many subassemblies together as I could prior to real construction. Some say this takes longer and perhaps it does, but it also allows me to paint a lot of like items the same color and not have to worry about scraping away the paint before gluing an item in place.
One thing I did notice is that there is barely any mold seam on the parts at all. The plastic is still pretty soft and thin parts are prone to breakage (as happened with the pilot's roll bar), but clean-up of the bits is a snap. This is also true of the resin prop hub. They've taken a clue from Ultracast and only a thin strip of material connected the prop hub to the rest of the resin block.
 Anyway, the interior parts were all painted ANA 611 Interior Green from the Aeromaster acrylic line. When dry, the sidewall instruments and the instrument panel were painted flat black. Then the bits were treated to a wash of dirty thinner and later dry-brushed with aluminum. I had a bit of trouble with the trough in which the aft machine gun fits. It didn't want to fit properly, but some fiddling around finally had it succumb. The fuselage interior bits fit very well and when I closed the halves together, there was no problem with slippage. The small upper insert that fits between the front and aft cockpit sections fit perfectly with no problems at all.
The landing gear spats were next and while they show the wheels glued in during assembly, it is not necessary and can be done at the end. I also found the stub axle to be larger than the hole in the wheel, but a tiny bit of clean-up took care of that problem.
What really got me was how easy the wing went together. You have a separate center section that is glued onto the lower fuselage. Then the outer wing sections are glued to it and the fuselage. There are three small inserts; one at the lower front to blend in the lower wing section, and one on each corner of the upper wing right against the fuselage. I'm not really sure why these second two pieces are there as they seem unnecessary, but perhaps it is for a later version of this plane with retracting landing gear. Be VERY CAREFUL with these upper wing inserts. I lost one in the wing while installing it and had to break the wing off in order to finally get it out as it got wedged near the tip.
 Once all the inserts and stuff were put in, I added putty to the required areas. This was mostly around the inserts and on the upper wing/fuselage filets. Very little was actually needed, but it seems I cannot build a perfectly filler-free model. Once sanded down, the tail wheel strut was glued on (and filler applied to the join), as were the main gear. There are engravings on the lower wing to show where the gear attaches and it was a painless process.
Next, the machine gun was painted gunmetal (how appropriate), dry brushed with aluminum and then installed. Well, it took a bit of work to get it in place as the fit is quite tight. The gun broke free from the mount and was glued on when the mount was fully glued in place. Next the canopy was glued in place and left to dry. The fit of the canopy is not bad. Not perfect, but very good and better than most short run kits. It is also quite thin and brittle so be careful when removing the sprue attachment points. I'd recommend a razor saw for this. While that was drying, then engine face was trimmed down to fit into the cowling. Not much was needed but it did need trimming. There is no positive stop in the cowling so be careful when sanding and gluing to get it into the right position. The engine face had previously been painted flat black and dry-brushed with aluminum. The opening was stuffed with tissue in preparation to painting.
Back at the canopy, it was masked using Tamiya tape and a steady hand. The frames are not super thick so you do need to be careful when doing all this. By the time that was done, I had a 90% complete airframe. Attaching a couple of scoops to the nose was done and it was then time to consider some paint.
| PAINT & DECALS |
Can't really say camouflage with these planes as blue and yellow won't disguise a thing! The choices for color come down to blue fuselage with yellow wings. The later A-17A (which had retractable landing gear) was flown in overall bare metal, but few A-17s were done in this scheme. Volume 1 of USAAC colors by Monogram Publications has several A-17 photos, including the one on the box art so getting the badges and stuff right wasn't a problem. Makes me wonder why they didn't do a couple more units as it would have taken very little extra decal sheet space. Anyway, the colors are #23 blue for the fuselage and #4 yellow for the wings.
 Looking through my paints, I just didn't seem to have the right colors. The yellow isn't a problem as it is probably close to insignia yellow, but the blue has a slight greenish tinge to it. Off to the hobby shop to find these colors. They are part of the Polly Scale range and though acrylic, they should be OK for overall colors. First, though, there needs to be a white undercoat for the yellow.
To start things off, I painted the canopy area with ANA 611 Interior Green from the Aeromaster Acrylic range. With this dry, the entire airframe (including the cowling and wheel covers) was painted with Floquil Reefer White lacquer to make sure of good coverage and to spot any glitches that may need fixed. Once all the white was dry, the entire airframe was buffed with an old tee-shirt to cut back on the flat.
 Then it was on to the main colors. First of all, the rudder was masked and then the yellow portions were painted. When dry, they were masked off and the blue sprayed. I made sure to mask off the cowling so that the cowl flaps could be painted blue. Probably the trickest part to mask was the lower wing around the landing gear. On hind sight, I could easily have brush painted the gear blue as the coverage of the Polly Scale is really quite good. At least it is with the darkish blue. I also noticed at this time that the panel line engraving is not the same on both sides of the fin. Perhaps it is supposed to be like this, but I have no references to check. With all the colors on and dry, the entire airframe was given a clear gloss coat in preparation for decals
MPM likes to use Propagteam decals and I'm very glad it does. They are thin and the white is pretty opaque. As I mentioned in the preview, there really is only one scheme and that is for the box art aircraft. I'd have liked to have seen a couple of options for this, but perhaps when they do the A-17A they will provide more. The tail stripe decal is overly large so you'll find quite a bit of overlap at the rear of the rudder. Trimming this a bit won't hurt a thing. Once on, I did not seal them as I didn't think it was needed. I also did not weather the plane in any way as 30's military aircraft were kept in immaculate condition.
| FINAL BITS |
There really was little else to do once the decals had been put on. Just attaching the main wheels, the tail wheel, pitot tube, exhaust, and radio mast. The prop was an initial concern, but I had no real trouble with it at all. The attachment points are large and so just a drop of superglue and a touch of accelerator was all that was needed. I should have painted it a gloss enamel for an undercoat, but instead just sprayed the whole thing with Alclad II Aluminum. When it was dry, it was pushed into the engine.
 I had forgotten about painting on the wing walk areas so instead, I used some black decal stripe. The results are pleasing enough. Final tasks were to paint on some landing lights and the navigation lights. I also decided to blacken in all the little holes in the dive brakes. They probably should be red or something, but the black looks convincing enough! The masking came off the canopy and that was it!
Right after taking the pictures, I realized that there was no mention in the instructions regarding offensive armament. This plane did have four wing machine guns, yet only on the box art and on a head-on drawing in the instructions are they shown. A very odd omission and one that you should be aware of when building this kit.
| CONCLUSIONS |
Well, I can only say that I am very impressed by this kit. Start to finish in less than two weeks for me is remarkable. MPM has come a long way in the last decade and it is almost up there with the big boys. The kit was a joy to build and free from all the pains that short run kits can be. I very much look forward to the next release and can only hope that they keep the mold maker for this one around a long, long time!

May 2002
Copyright ModelingMadness.com. All rights reserved.
Review kit courtesy of my kit collection.
If you would like your product reviewed fairly and fairly quickly, please
contact the editor or see other details in the