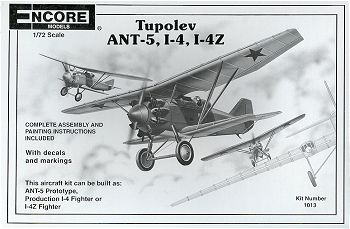
Encore 1/72 Tupolev I-4
| KIT # | 1013 |
| PRICE: | $6.96 |
| DECALS: | Three versions: I-4, I-4z, & ANT-5; all very plain. |
| REVIEW: | |
| NOTES: |
|
| HISTORY |
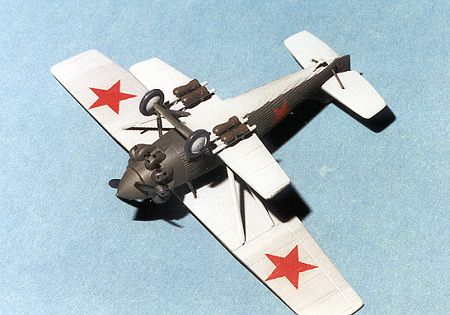
The I-4 was one of Tupolev's first successful fighter aircraft of the 1930's.Made mostly of corrugated metal following information gained from Junkers'saircraft of Germany, it was produced in fair numbers for the day (around 300).Tupolev was mostly known for his bomber aircraft, but the I-4 was a fineaircraft for its day. Liked well by those who flew it, it was able to carry outboth fighter and light bomber duties. Unusual for any day, the sesquiplane I-4was able to carry rocket launcher tubes above the wings. This would have beenimpossible in a fabric covered aircraft. The I-4 was also carried as a parasitefighter on the TB-1 Bomber. Two were carried on top of the wings of the large,four engine bomber, and must have been a sight to observers on the ground.
| THE KIT |
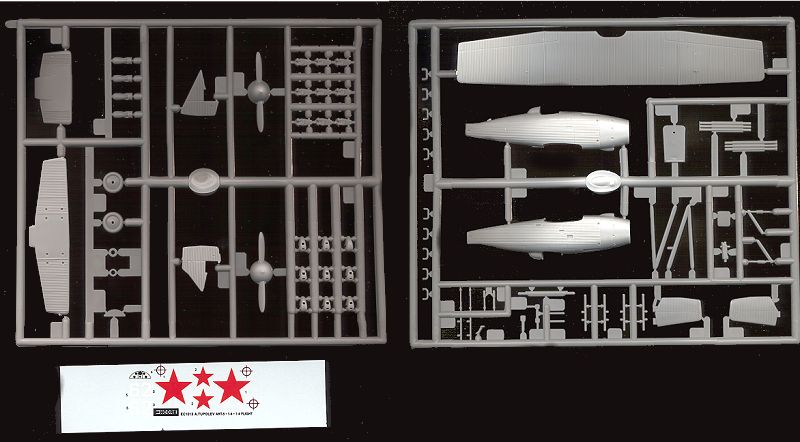
Encore kits come from a variety of sources. They are then repackaged in theUS with very good instructions and a variety of decal options. This kit was madein the Ukraine. General detail on the kit is quite good, but not really up tostandards of today. I would place it as a good short run kit in overall quality.Many of the parts are a bit oversized, and all suffer from some level of moldmismatch. This is obvious on the upper and lower one piece wings as well asother parts. Nothing that cannot be dealt with. The relatively soft grey plasticis easy to work with, but care needs to be taken when removing the smaller partsas they break rather easily. I used a fine toothed razor saw to remove theseparts. The decal sheet is basically just stars and numbers, typical of Sovietaircraft. Color schemes are equally routine with the I-4s in green over lightblue and the ANT-5 in overall silver. There are sufficient parts to make any ofthe three versions. In fact, there are a very large number of parts left over,depending on which version you build.
| CONSTRUCTION |
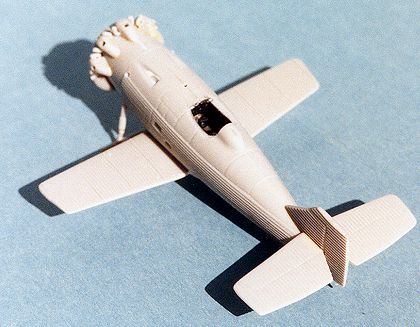
First thing I did was to figure out which version I wanted to build and thenclean up all the mold lines. I decided to build the I-4, so that meant Idiscarded the prop with the rounded spinner, the short lower wing, thenon-rounded cylinder covers, and the pointed rudder. After a rather long timecleaning up parts, the cockpit was assembled. You get floor, seat, stick andrudder pedals. All very reminiscent of Frog kits. This whole deal was paintedaluminum as was the interior of the fuselage. The instrument panel was paintedflat black and installed in the cockpit. There was much cleaning up needed onthe cockpit opening before the cockpit was installed and the fuselage gluedtogether. Naturally the fit was not the best and needed clamped. When the frontwas glued, the large sleeve for the propeller shaft was installed.
Once the fuselage glitches were filled and sanded, the lower wing wasinstalled. That was also filled and sanded at the front and rear where the fitwas not good. The tail skid was installed and then it was on to the fin andhorizontal stabilizers. The I-4 uses a squared off rudder and despite the taband slot, it fits where it touches. The directions show that the aft tab on oneof the horizontal stabilizers needs removed. In reality, the entire horizontalstabilizer needs about 1/8 inch removed from the inside to make the stabilizers line up properly with the rudder. Fortunately the corrugations makeexcellent alignment guides. Installing the stabs as indicated will give themabout a 35% forward sweep! It is as if the stabilizers were designed to fit thefuselage, not flush with the tail. The eventual butt fit seems to be holdingjust fine.
Now on to the part that I dreaded when I finally opened the kit; all thosecylinder heads. Each one was carefully cut off and cleaned up. I removedthe mounting pin from the rear of them as they didn't fit properly. I thenstarted placing them as close to each other as possible, trapping the exhaustpipes in them as I went. As luck would have it, by the time I got to the bottom,there wasn't room on the last one for the exhaust! Fortunately, they are soclose together that a casual look at the kit won't be enough to spot theproblem. It was after this that I decided not to drill out the exhaust pipes!
|
|
|
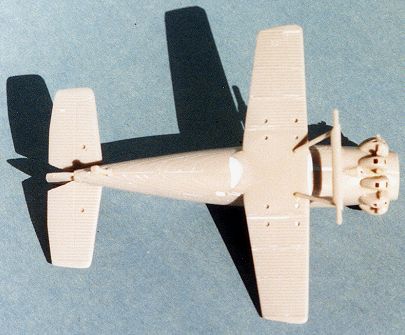
Moving to the bottom of the aircraft, the landing gear parts were removedfrom the sprues and glued to the bottom of the aircraft. There are holes in thefuselage for the forward part of the strut, but not for the back, so the tabneeds removed and the strut just glued on to the bottom of the wing. After thatdried, the bomb racks were installed. Rather crude assemblies, but I guess theyworked. I decided not to install the rocket launchers on the top wing so removedthe mounting lugs for them. The gunsight was also installed. This kit hasno windscreen. It was at this time, before installation of the top wing, that Ifigured the kit should be painted.
| PAINT & DECALS |
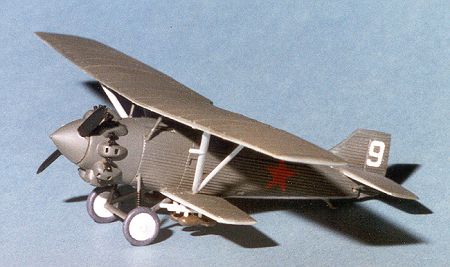
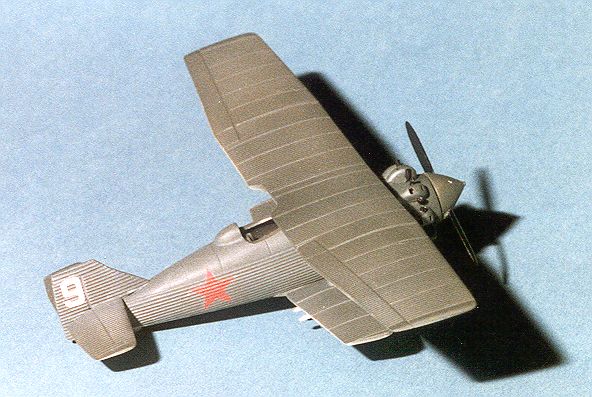
According to the instructions, the upper surfaces are darkgreen and the lower light blue. They give FS numbers for appropriate matches,but frankly it really doesn't matter which colors one uses as long as they areclose. Since I don't have a bunch of Russian paints, I decided to use some niceRLM colors. The undersides were painted RLM 65 blue and the uppers RLM 71 DarkGreen. Looks rather nice. There does need to be some masking around the enginearea as the whole nose was dark green upper and lower. The wing and tailplanestruts were painted light blue, while the gear struts were green. Wheels werelight blue.
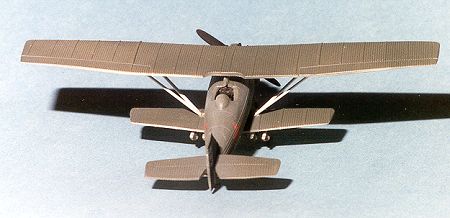
After all this was done, it was time to continue on to finish up theaircraft. The first item on the agenda was the installation of the gunbarrels (which were painted gunmetal) and then the upper wing. As with thelanding gear, the attachment points are given as holes in the fuselage and upperwing. Again, there are no tabs on the interplane and wing struts to fit intothese holes. The tail struts on the other hand do have nice attachment holes,however since the horizontal stabilizers had to be trimmed back to fit, thestruts are too long. A simple matter of trimming them back to fit.
One very helpful alignment piece for the upper wing is on the gun sight, sodon't cut off what looks like a useless appendage. If it weren't for this piece,fitting the upper wing would have been very difficult. There are no slots of anykind on the upper section of the lower wing into which the lower part of thewing strut fits. It is just a case of 'glue it where it touches'. Fortunatelyonce the glue dries, it is a rather sturdy construction. It also makes mewonder what kind of visibility the pilot had if there is this huge piece rightin his central line of vision! Then it was time for the wheels. Naturally, theholes in the hub were too small so they were drilled out with a needle file andglued in place.
All that was left were the bombs and the prop, but first, the decals. Theareas they were to fit on were brushed with Future clear gloss acrylic a coupleof times to give a nice, gloss surface for the decals. The decals themselves arevery thing and comfortingly opaque. They did need trimming as there was a lot ofcarrier. Once in place, Champ setting solution was used to help them snuggledown into the corrugations. In fact, I needed several applications of Champ asthe inevitable air bubbles appeared and required the multiple doses. The lastthings added were the prop and the bombs. The bombs are rather oddly shaped,being wider than they are tall. Must be a Bolshevik design! They were paintedolive drab and attached to the bomb racks.
| CONCLUSIONS |
This is my first Encore kit and though it wasn't really asimple build, I was quite pleased with the result. Those of you who are prone tosuperdetailing will find this a great starting point. It builds no worse than alimited run kit and a lot better than a few mainline kits I have constructedover the years. It is also a neat little aircraft that looks nice in a sectionof mid-war birds. Best of all, no rigging!!
Recommended to those with an interest in 20s and 30s aviation. Not for thebeginner.
| REFERENCES |
Believe it or not, there are darn few of them. The best I found was in ScaleAviation Modeller International , Volume 1, Number 9, September 1995.
Copyright ModelingMadness.com. All rights reserved. No reproduction in any form without express permission from the editor.
Back to Reviews Page 2026