SMER 1/48 Avia BH.11
| KIT #: | 0819 |
| PRICE: | $9.95 |
| DECALS: | Several options |
| REVIEWER: | Scott Van Aken |
| NOTES: |
| HISTORY |
The Avia BH-11 was a two-seat sport aircraft built in Czechoslovakia in 1923, a further development of the Avia BH-9. The main changes in this version involved a redesign of the forward fuselage. 15 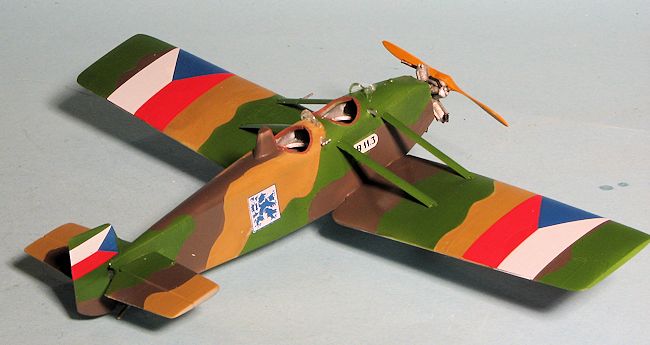 examples were ordered by the Czechoslovakian Army as trainers and general liaison aircraft and operated under the military designation B.11.
Six years after the BH-11 first flew, a new version was produced for the civil market as the BH-11B Antelope. This replaced the original Walter NZ 60 45 kW (60 hp) engine with a Walter Vega of 63 kW (85 hp) and was built in small numbers.
A further development, the BH-11C retained the original engine but increased the wingspan by 1.4 m (4 ft 6 in).
A BH-11A and a BH-11C are preserved at the Prague Aviation Museum, Kbely. This kit is the BH.11A version as used by the Czech Air Force.
| THE KIT |
SMER has been around for over 60 years and produces a variety of items, including model kits. Many are Heller reboxings and some others, but they also have their own line of kits in 1/48 scale, though I think some are actually 1/50. Some of their 1/48 kits are not done by anyone else in this scale and that includes this kit of the BH-11. Now I do not know how old this boxing might be, but it is marked Czech Republic and the decals are by Propagteam so it isn't ancient, though I'm betting the molding is.
Speaking of which, the molding is actually quite clean with only a tiny bit of flash. The detail is raised, but there isn't all that much of it. You get two sprues of light grey plastic and two small clear ones with the windscreens. There are no optional parts. Wings are upper and 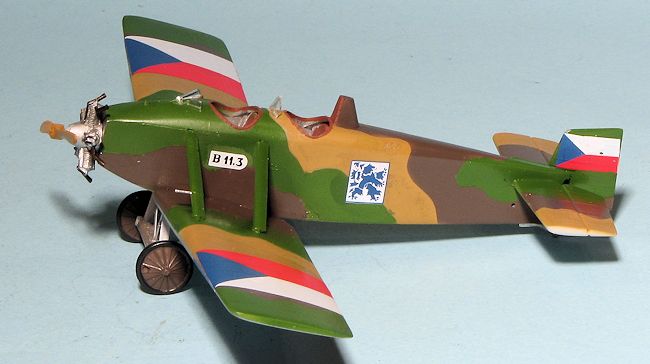 lower quarters that fit into slots in the lower fuselage. There is no fuselage interior detail, just a a couple of seats, instrument panels and sticks. Not even a floor. A pilot figure is provided for the rear seat. This will provide the scratchbuilder an excellent canvas if he wishes to do a bunch of work in there.
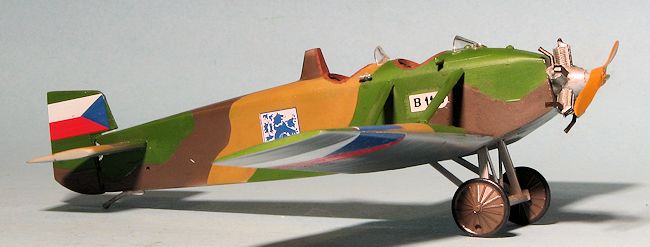
A nicely molded 5 cylinder engine is provided in two halves. There are five separate exhaust stubs. Landing gear is sturdy with a spreader bar and v brace. Wheels are supposed to be canvas covered wires and are OK for this scale. The tail planes and rudder are single pieces. Windscreen pieces are clear but very thick, not like you'll have to look through them or anything.
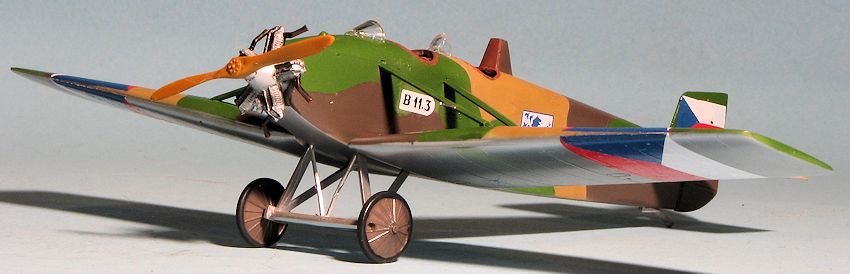
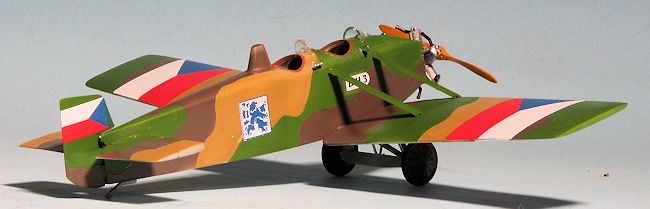
Instructions are well done with a nice history of the time and several well drawn construction steps. All colors are generic with there being a number of options. You can paint the plane overall green with an aluminum underside as shown on the box art. This has the more modern insignia with the blue always forward and the white always up or out. The upper side insignia are outlined in blue while the underside is outlined in red. There are three unit badges for the side. The other set of options has the early flag insignia with the plane painted in a disruptive camo scheme of chocolate brown, sand and green with an aluminum underside. There is a full color placement diagram on the back of the box for this option. Decals look to be very nicely done and are by Propagteam. I'm not sure how old they are, so will be testing what I won't be using to see if a clear coat is needed.
| CONSTRUCTION |
 With a paucity of parts, you would think that this would be a fast build. However, I have learned to be cautious about this so we will see. I started by removing the wing halves and engine halves from the sprues. The engine had some flash that needed to be cleaned up but this and the wings were glued together. There are no alignment pins on the wings, though there are on the fuselage. I noticed at this time that even the aileron hinge lines were raised.
While the wings and engine were drying, I installed both seats and the two instrument panels, These fit into slots on the inside of the fuselage. The backs of the seats are extra wide to accommodate the slots. To ensure both sides would fit, I taped the fuselage halves together while the cement dried. There are ejector marks on the inside of the fuselage (as well as on several other parts), but I left those alone as it wasn't worth the effort to remove them. Once the halves were closed, the seams on them were filled. I had forgotten to install the tail skid while doing this, but in hindsight, I'd probably have broken it off during sanding.
I then cleaned up and glued on the rudder and tailplanes. These fit quite well. Next, I tackled the wings. Each wing has two braces and each brace has a small 'L' shaped piece on one end. Be careful when removing the braces from the sprue that you do not clip these bits away and also there is a tab on the other end. The instructions would have you place brace part number 11 in the front and 12 behind. This will only work with two braces. In actuality, part number 12 goes on the right side and part number 11 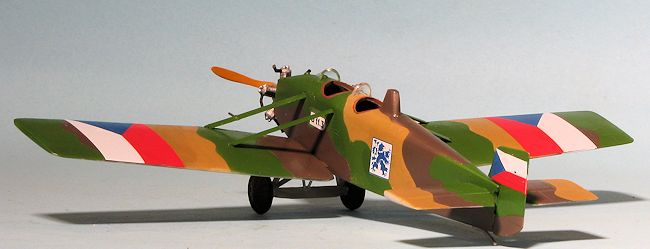 on the other. Each brace has two ejector pin marks that need to be removed. Since attaching the wings can be fiddly, I first glued the struts to the wings and let the glue set up before attaching the wings and the upper strut sections. Even then it is a bit wiggly. Once the glue fully dries, it makes a rather strong assembly. There is a down side to attaching the wings at this time and that is the increased difficulty in painting if one chooses the more elaborate camouflage scheme.
Moving on, the landing gear is next. There is a thin 'v' brace that fits between the legs and lower axle/airfoil. Naturally, mine broke while trying to remove it from the sprue. I was even using a microsaw to do so. The lower axle/airfoil sections is rife with sink areas on one side. This had to be filled and smoothed out before I could assemble these pieces. Once that was done, the four parts were glued together and while it made for a rather loose construct, once the gear were glued to the lower fuselage and the cement dried, it became quite solid.
 I then turned my attention to the engine. This is a fair casting though there were some issues with gaps in the push rods molded on the front. The engine was painted with Tamiya XF-16 flat aluminum using a brush and when dry, some Floquil weathered black was used as a wash. The push rods were painted black and then I had to decide what to do about the five exhaust stubs. The instructions are not very helpful in placing these, but they need to exit from the head of each cylinder. There is no mounting point so I drilled holes in each cylinder head before inserting each of the exhaust sections. When dry, those were then painted. I also trimmed and installed the tail skid at this time.
| COLORS & MARKINGS |
Though there were still some small bits to attach, now seemed like a good time to paint. I started by painting the underside aluminum. I then went with the color recommendations given on the back of the 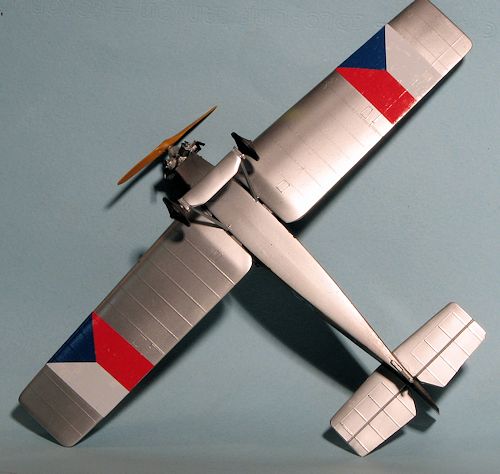 box and used all Humbrol paints for the upper surface colors. I started with the chocolate shade and did large areas to be sure it covered well. I then masked those off before applying the tan. Again, more masking and the green was sprayed on. When it was relatively dry (for some reason, even thinned with lacquer thinner, Humbrol paints take an age to cure), I removed the masking. Despite washing the plastic first, I had areas of paint pull up. Oddly, this did not happen to the areas painted Alclad aluminum. Those areas were touched up with a brush.
I then started applying the decals. I was pleased that they did not fall apart when put to water though they did take a long time to come free of the backing and they have a large carrier film around them which needs to be trimmed off. Of course, not everything went right and the last decal I applied tore badly when I went to remove it from the backing. Good thing there were other decals on the sheet from which I could steal bits to patch it up! The airframe was then given a coat of semi-gloss to seal in the decals.
| FINAL CONSTRUCTION |
 For this part of the build, not much was left. I painted the area around the cockpits and installed the wheels. These are a nice, tight fit so no worries about wobbling. The engine was glued in place as was the prop. There is no concession made to allow the prop to spin. The windscreens are a very tight fit and the final bits added were the rear view mirror, a bump on the upper cowling and the venturi.
| CONCLUSIONS |
I admit that this is not everyone's cup of tea when it comes to kits. Frankly, before I saw it on the store shelves, I had no desire to build it. But there was something about the big flag insignia and I was inspired by Chris Peachment's nicely done Aero Ae-01 of a while back. The end result is not a model with a lot of 'wow' factor, but it is a kit that makes into a nice model and it will not cost you a fortune to buy and build it.
| REFERENCES |
http://en.wikipedia.org/wiki/Avia_BH-11
October 2013
Thanks to me for the review kit.
If you would like your product reviewed fairly and fairly quickly, please contactthe editor or see other details in the