Kitty Hawk 1/48 UH-1Y Venom
| KIT #: | KH 80124 |
| PRICE: | @ $45.00 SRP when released |
| DECALS: | Four options |
| REVIEWER: | Scott Van Aken |
| NOTES: |
| HISTORY |
In 1996, the United States Marine Corps launched the H-1 upgrade program by signing a contract with Bell Helicopter for upgradi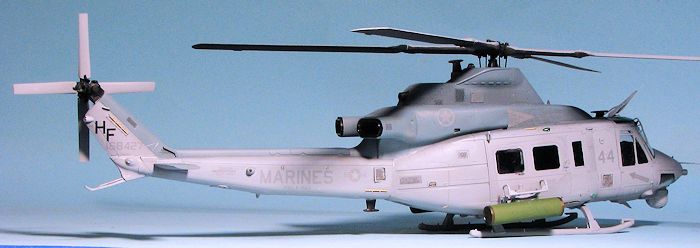 ng 100 UH-1Ns into UH-1Ys and upgrading 180 AH-1Ws into AH-1Zs. The H-1 program created completely modernized attack and utility helicopters with considerable design commonality to reduce operating costs. The UH-1Y and AH-1Z share a common tail boom, engines, rotor system, drive train, avionics architecture, software, controls and displays for over 84% identical components. Originally the UH-1Y was to have been remanufactured from UH-1N airframes, but in April 2005 approval was granted to build them as new helicopters. The Marine Corps plans to eventually buy 160 of the Y-models to replace their inventory of N-models, with aircraft deliveries to be completed by 2016. The UH-1N was retired in 2014.
| THE KIT |
Earlier, Kitty Hawk released their excellent AH-1Z Viper. Since there is commonality between that and the UH-1Y, it is not surprising that there are a few sprues that are the same between the two kits. Specifically, the tail boom assembly and the rotor. They both also use the same large weapons sprue and while you won't be needing the Hellfires on this one, there are lots of other bits that you can use, such as rocket pods and a couple of different types of machine gun.
The kit also includes a nice photo etch fret, but rather than have it for a bunch of stuff more appropriately done in plastic, Kitty Hawk has chosen to use this medium for the various screens on the helo, the front 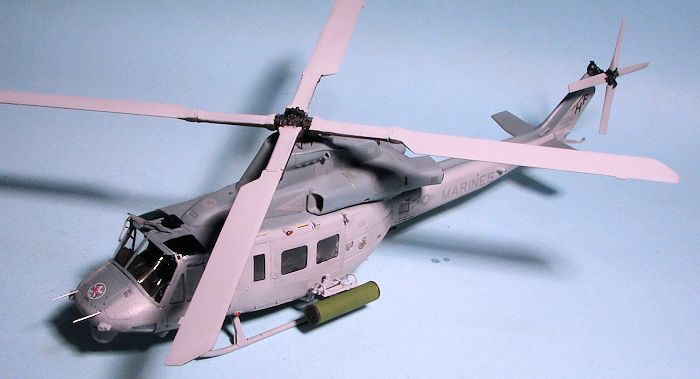 seat harness, and a section that fits between the exhaust. Kitty Hawk has also boxed the clear bits in their own box to help keep them from being damaged during shipment, something I like to see. In addition to the usual windows and windscreen, the FLIR pod is also in clear plastic.
The cockpit is well appointed with multi-piece forward seats with armor additions, both a cyclic and collective as well as foot pedals. In the back, the area around the transmission has seven two piece seats. Forward of that on the outer sides are two avionics racks and a seat is attached to each of those as well. Back in the cockpit we have a nice instrument panel, center console and overhead console. Decals are supplied should you wish to use them.
The kit offers a pair of rather complete engines and you can pose their access hatches open if you wish. It also appears that the cockpit doors can be posed open and I see no reason why you could not do the same to the cabin doors. One thing about modern military helos is that there are a ton of various sensors and antennas that need to be affixed to the airframe. Kitty Hawk would have you completely build the forward section, then the boom assembly and then attach them in the final step along with the rotor assembly. I don't see any reason why not, but I'd do so before affixing any external weapons. These helos do not normally carry weapons unless going in harm's way.
 The instruction booklet is very nicely done with big construction diagrams. There are markings for four aircraft and large full color painting and marking guides in the center of the instructions. Speaking of painting, the instructions state that pretty much everything on the inside is matte black. I have always thought that modern US military planes were painted dark gull grey on the inside, but apparently with the introduction of night vision goggles, black is the appropriate shade.
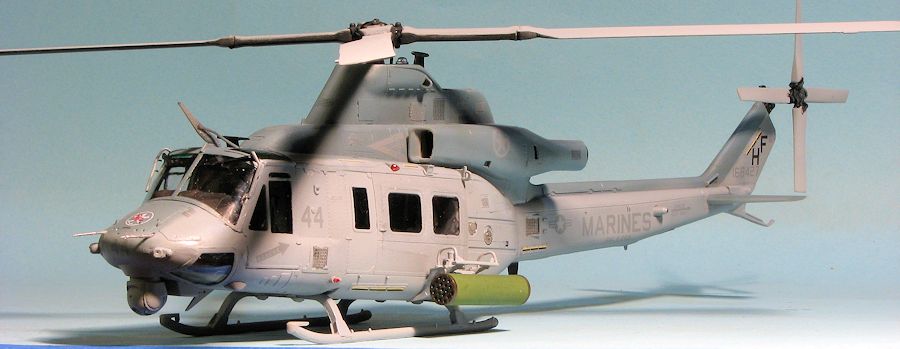
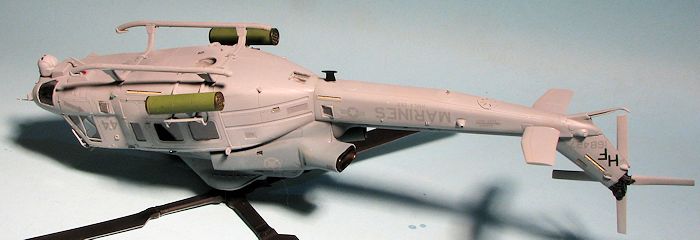
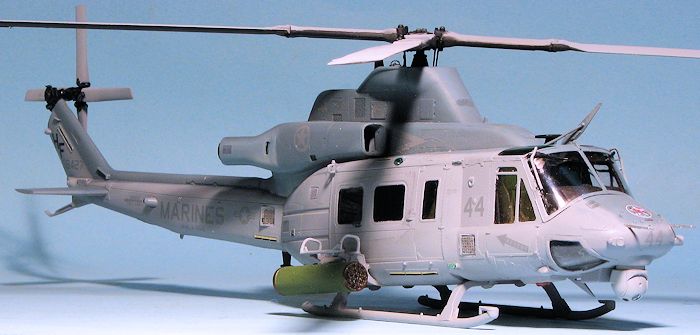
Three of the options are in a two tone grey of what is listed as RAF Medium Sea Grey over FS 36495. This sounds a bit suspicious as the Marines don't use RAF paints. The grey UH-1Ns were in 35237 upper and 36375 undersides and this sounds more like it, but I'm willing to learn if that isn't the case. This scheme is used on the planes from HMLA-269 and HMLA-167 with the latter having a nice black and red tail. The box art plane has a black upper surface and while not identified, is HMLA-169. The fourth option has the grey upper but a green VIP lower scheme. The lower color is listed as FS 34102 but may well be 34097. The decals are very nicely printed and offer full stencils as well as other markings.
| CONSTRUCTION |
 For this one, I started with the interior. This meant the seats and there are a lot of them. I first built up the two front seats. These are handed by the armor plating piece added. Both seats have ejector pin marks in the back of them, but will be hidden from all but IPMS laser flashlights after construction. The lower seat frames are quite fiddly and thanks to the soft plastic, easily broken. The upper attachment points will need to be opened up a bit. I found it difficult to keep things aligned so I temporarily fit the lower section into the floor to keep things sturdy. Even then, when the seats are done, they seem to have a bit of a forward slope.
In the back of the cabin is the area that goes around the gearbox on the real helo. The forward part of this four piece assembly has a framework that fits into it for seats. On mine, only one of the mounting holes was open and I had to drill out the second hole. The seats all fit into slots in this assembly and have separate seat parts. These seven seats and two a bit more forward are all the same. One of the seats had no attachment tab while another had an ejector pin punch a hole all the way through it. Any belts for these seats will need to be supplied by the builder. All of the seat pans have ejector pin marks on the underside so contest modelers will need to deal with these.
I eventually got all the bits attached to the interior. Note that you'll have to open up the right hand cyclic attachment hole as it is flashed over. Also be careful when attaching the item on the left side of the center console as the instructions would have you fit it into one of the holes f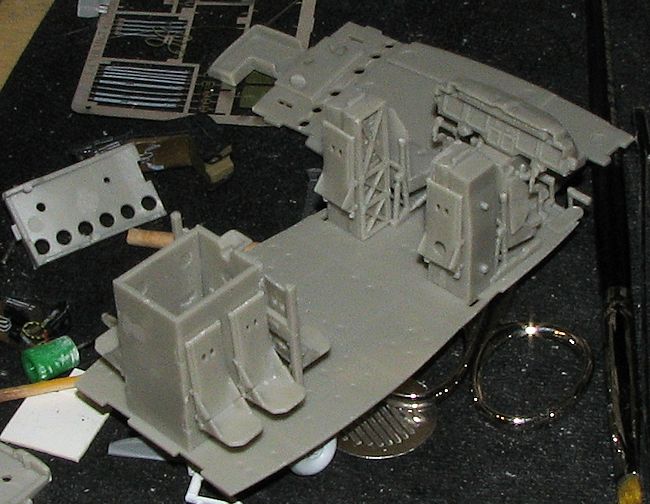 or the left seat. Eventually I got most of the bits installed into the interior. The avionics bay pieces did not fit flush to each other, but I left them as either they are supposed to be like this, or all the black paint will hide the step. Also note that the hoses that come out from under the instrument panel will need to have their bases trimmed down on the side and the bottom in order to fit into the slots prepared for them. Note also in the image that one seat had an ejector pin punch a hole clear through the back.
Once the majority of the interior was painted, I applied the various instrument panel and console decals (the instrument panel was not glued in place in the image), then set about doing some dry brushing to help show some of the detail in there. I then installed the harnesses for the front seat folks and continued building up the interior, which includes a back wall and a roof section. Adding these pieces makes for a rather sturdy construct.
I then glued the interior into one fuselage half, and then when dry, added the small bit at the back as shown in the instructions and glued the other half to it. No real fit issues, though I have gotten to taping everything together while waiting for the glue to dry. While that was happening, I attached all the small photo etch bits into the upper part of the rotor housing. Test fitting each piece is a requirement. If you 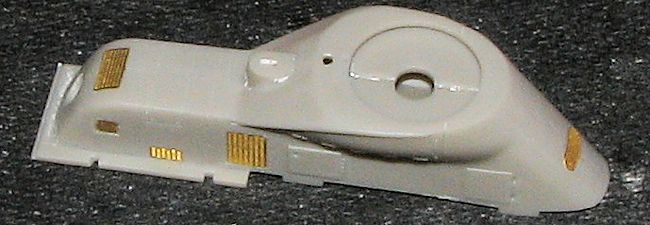 notice the little piece near the back (left), there should be an equal opening on the other side, but in this case it was completely sealed over. As these p.e. areas are supposed to be recessed, rather than do all that work, I simply attached the piece over the filled in area. I also found that some bits did not want to fit all the way into the recess provided.
Meanwhile, I worked on other parts of the helo. I glued the tail boom sections together and assembled the nose piece. Once the latter was dry, I test fit it to the front. It was here that I discovered that when gluing on the instrument panel, I glued it too flat. It needs to be at an angle. Before gluing the nose piece on the fuselage, temporarily attached the windscreen to be sure that the angles all matched before solidly gluing on the nose piece. For this I used super glue an accelerator to ensure no additional slippage or the doors would not fit. This was another of those 'squeeze, glue, accelerator' deals, followed by gap filling and sanding.
Eventually, that was smoothed out, though I lost detail in the process. The intakes were added to the piece that fits just on top of the fuselage. I glued these pieces and immediately test fit the section onto the fuselage to be sure that the various tabs fit into the slots provided. When dry the seams were dealt with, then that assembly was attached using the same method as above to ensure a good fit. I set that aside for a bit and glued the exhaust halves together. My upper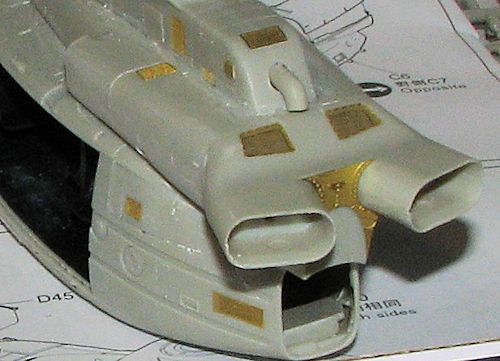 piece was either short shot or damaged as two small pieces were missing. I'll have to replace them with card as they provide a framework for an insert. When that was installed, I installed the engine cover doors. As usual when a kit is designed to have these things open, it took a bit of trimming to get these to fit closed. Meanwhile, I added more p.e. to the boom and to the fuselage section. A situation I ran into regarding the p.e. screens is that often, the small ledge they were to fit into was not completely formed. I eventually got all the photo etch installed and then installed the small J shaped exhaust. This is the wrong shape according to the instructions and photos of the real plane. Not sure why it was molded as such, but once dry, the curve was sawed off.
I then moved to other parts of the helo. The landing skids were next. Each of the cross braces has four ejector pin depressions that will need to be filled as they are a bit too deep to sand. Test fit these cross pieces before attaching the skids as you might have to turn them around for a good fit. Be sure the long one is in the front. I also cleaned up the main rotor pieces. Each of the blades has an ejector tower where it attaches to the hub. This tower has to be removed and scraped flush or the piece to which it attaches will not fit. The smaller hub piece that helps trap the blade needs to be trimmed slightly. If not, it causes the blade to warp upwards. You'll see where to do a bit of light sanding when you get to that part.
Then considerable time was spent attaching various antennas and other bits. Typical of modern aircraft, there are a lot of pieces to attach to the outside. Some are best left off until after painting and markings, so I had a small pile of bits 'to be added later'. Meanwhile, I assembled the weapons pylons. These are overly fussy to build and even some of the small parts had ejector towers to remove. I had to study the instructions several times to figure out how they went together. I also built up the FLIR pod. Thanks to both halves being clear plastic, there is no way to not show a seam when it is installed.
| COLORS & MARKINGS |
I have my doubts on the overall camouflage colors offered in the Kitty Hawk instructions. I am betting that the Venom has the same TPS scheme as the UH-1N did in its later years. This is FS 35237 uppers and FS 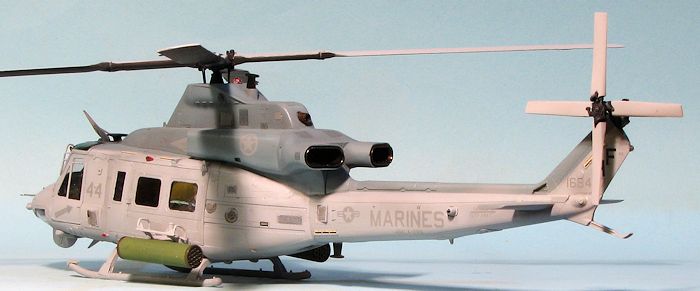 36375 everywhere else. I used Model Master enamels for these paints, spraying the masked clear areas with black first so you wouldn't see greys peeking through to the interior. Then went on the 36375, followed by the 35237 and the usual back and forth to be sure all was covered.
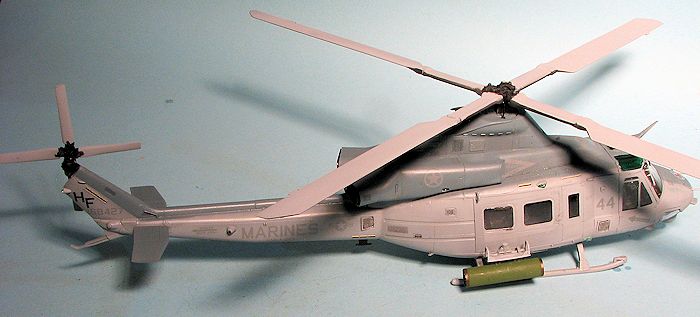
The main rotor is 36375 upper with black undersides while the tail rotor is overall 36375. The hub detail on both of these are matte black and that had to be brush painted for the most part. I then gave the airframe an overall coat of clear gloss in preparation for decals.
Of the four options, I chose the most 'normal' one. The idea of trying to get that red and black checked decal over all those pieces on the fin just wasn't going to happen. Kitty Hawk should provide just the letters/numbers for this as this marking really had to be painted on. I found that the decals are quite nice, but the light grey ones that are supposed to go on the upper portion of the airframe, are the same shade as the darker grey ones that go on the lighter part of the airframe. This means that these markings practically disappear against the darker FS 35237. I only put on about half of the very small data markings, as much as because you wouldn't see them as anything. Once all the decals had dried, I sprayed a clear matte coat on the airframe.
 In the meantime, I masked the FLIR turret using liquid mask and paint it the underside color. Two rocket pods were assembled and painted FS 34097. I also painted the rotor hubs black. Several of the antennas got this treatment as well. A clear matte was sprayed on and when dry, I removed the masking. The nose probes were painted and installed as were the windscreen wipers and the external handles. Naturally, I got a bit of glue on the windscreen. There are a number of lights that have to be painted and attached and I amazed myself by succefully getting them all in place. The tail rotor assembly was then glued on. This was followed by the main rotor. There are four pushrod pieces that go from the rotor head down into the upper fuselage section. No surprise is that I broke three of these either removing them from the sprue or installing them. I replaced the missing parts with wire, though it is not exactly perfect. Something I found odd is that the tail rotor and main rotor are cemented solidly in place with no way to rotate either one. I then brush painted the green above the cockpit and since AK Interactive clears are lacquer based, they crazed the plastic. This was followed by several coats of clear gloss acrylic. This helped smooth things out. Naturally, I got my finger on one side before it dried so that left a mark!
| CONCLUSIONS |
Overall, I'm quite pleased with the result. It is still a kit to be treated as a short run version due to the ease of breaking small parts, a tendency to have mounting holes flashed over or not opened at all, the flash you can easily find in the worst places and the ejector stubs that show up on even some small parts. For that reason, I'd recommend this one to modelers who have experience with short run kits or at least kits that can provide some building issues.
The kit took me about a month to build and I spent much of my modeling time working on it. This one was easier to build than the earlier F-86D and for that I'm grateful. The end result is a very nice looking helo if you don't mind all the lumps and bumps the UH-1 has added on over the decades. It is related to the Vietnam era planes in designation only as I doubt if any of the parts on this one are interchangeable!
| REFERENCES |
http://en.wikipedia.org/wiki/Bell_UH-1Y_Venom
June 2015 Thanks to Glen Coleman and Kitty Hawk Models for the preview kit. This will be on your shelves soon. If you would like your product reviewed fairly and fairly quickly, please contact the editor or see other details in the