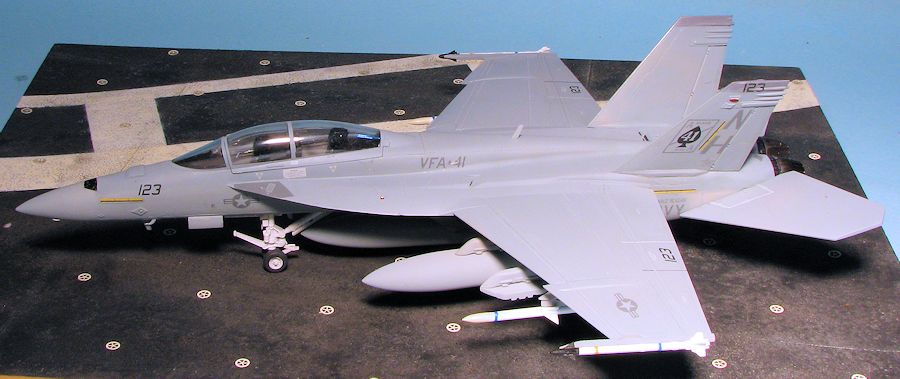
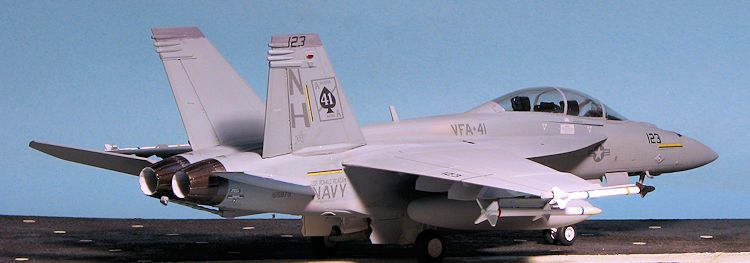
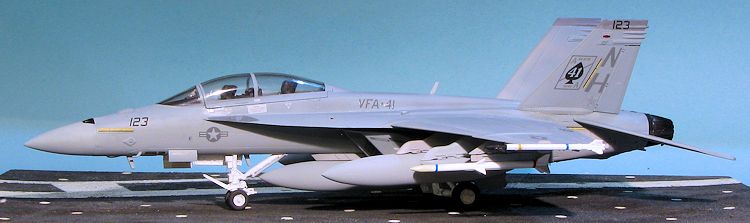
Hasegawa 1/72 F-18F Super Hornet
| KIT #: | 00548 |
| PRICE: | $25.00 or so SRP. This one was $5 from the 'junk kit' table at the LHS. |
| DECALS: | Three options |
| REVIEWER: | Scott Van Aken |
| NOTES: | Basic boxing from 2003 |
| HISTORY |
The average life span of an aircraft in US military service is about 25-30 years; sometimes more if the airframe is extensively overhauled. Most modern tactical aircraft (and we are talking fast jets) have an airframe life of around 5,000 hours. Patrol and cargo aircraft are much, much more, but they don't have to deal with the sort of stresses that are routinely a part of the flight envelope of a fast jet.
This is particularly true of those aircraft that deploy on America's aircraft carriers, where they are flung into the air by powerful steam catapults and then snatched from flight by arresting cables. With the retirement of the F-14 Tomcat coming closer, it was realized that something was needed to replace it.
 The F-18A-D Hornet was already in service and doing a fairly good job of things, despite being unable to meet the original goals of the design in terms of load carrying and range. It was postulated that a modified Hornet would be able to meet the needs of the Navy as a Tomcat replacement and have commonality with the earlier versions of the F-18. Sounded great to the Navy planners and so they OK'd the design.
Well, as things turned out, many modifications had to be made to what was now referred to as the Super Hornet. The end result was a larger aircraft that has almost no commonality with the earlier version other than the designation. It also suffered from an inability to meet all its design goals, but as it was an improvement over the existing F-18 (though not as good an airframe as the F-14), and with nothing else on the horizon, the decision was made to go with it .
The resulting aircraft, which first flew in 1995, is now becoming fully integrated into the fleet. At first, a couple of attack and old Tomcat units transitioned to the single seat F-18E. Now, with the retirement of the F-14, some of the remaining squadrons either have transitioned or are in the process of doing so into the F-18F. The F is a twin-seat version of the F-18E and will be used as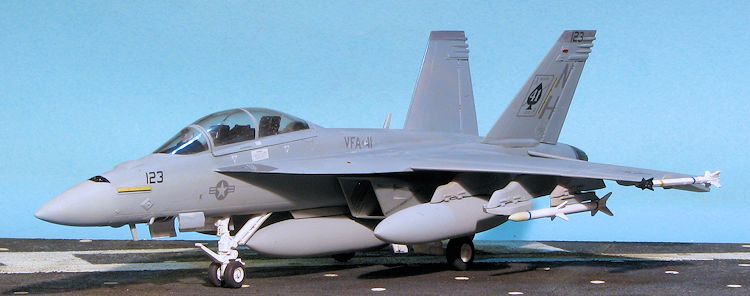 a fleet defense interceptor, much like the F-14, but without its long range Phoenix missile.
The F-18F is able to carry the latest generation of AIM-120 and Sidewinder missiles. It also incorporates as much 'stealthiness' as it can with the gear doors having serrated edges and other parts of the airframe (such as the intakes) designed to be less visible to radar. Those few that have been used in combat (albeit against light defenses) have proven to work as advertised and more are due to be built until it, too will succumb to old age and be replaced by something else on down the line.
| CONSTRUCTION |
The owner of the local hobby shop buys collections. He has a gofer go through the opened kits to be sure they are complete or have not been worked on already. Those that have go on his 'dead kits' sale table. That is where this one was found. The previous owner had glued the wings together and build up the fuselage, attaching the fins though had not gotten as far as the intakes. This is where I stepped it. I'm not all that fond of the new F-18, but I didn't have one in my collection in this scale and the price was right.
The first thing I did was to deal with the seams, something the previous owner had tried to do, but had been quite unsuccessful. During this time, I glued the intake pieces together. These take decals on the inside and this seemed like a good time to go ahead and apply them while they'd be relatively easy to get  to. I then tried to attach the intake pieces. These bits include much of the side of the aft fuselage. For whatever reason, they refused to fit. On one side, I trimmed a bit from the upper surface of the intake piece just under the wing where it was refusing to fit. This succeeded in getting the piece in place, but resulted in a rather large gap at the back of the pice near the tail.
On the other side, I decided to grind away at a raised step under the intake in hopes that would cure the problem. It did make the aft part of the intake assembly section fit better, but the intake itself is a bit farther away from the fuselage than the other side. So neither 'fix' really was a full fix. What it did was require a lot of sanding and filler to smooth things out, much to the detriment of any detail in that area. While some of it will be replaced prior to painting, some of it will remain lost to memory. After that the wings were attached. Fit here is not bad and relatively tight, but not perfect. I can easily blame the previous owner of the kit for poor construction of the fuselage and wings, but will withhold judgment until I build one from scratch.
 With the wings in place, I installed the seats and went looking for the piece that fits behind the rear seat. It was nowhere to be found, its place on the sprue unfortunately empty. I just painted that area black and hope that no one will notice. Then it was time for transparencies. The gun sight was attached. The canopy section has a seam running down the middle of it. It is obvious when you look for it and it is there as injection molding machines cannot seem to handle arcs over 180 degrees. It is good that the canopy is the right shape, but bad in that most of us cannot polish a canopy to its original transparency once the seam has been sanded. On this one, I left it alone. These were masked and attached before heading to the paint shop.
| COLORS & MARKINGS |
This one is in the standard boring scheme of FS 36320 over FS 36375 with FS 35237 bits on the rudder and a few other places. I started with the main colors after filling the white wheel wells and painting the bare metal part on the exhaust with Alclad II steel. For all the main colors, I used Model Master enamels. As I'd already painted the gear wells white, I filled them with Silly Putty. This stuff works very well for this p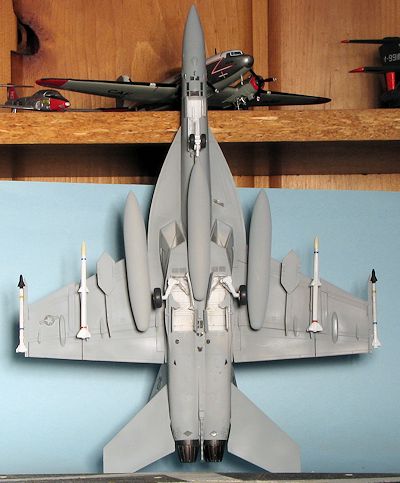 urpose. You can squeeze it into nooks and crannies, it will not stick to anything, and how cleanly it pulls out depends on the level of detail it is molding itself into. Even if it takes a bit, I've never had it not come totally out of the well into which it is placed. Not only that, but it can be reused a number of times. This is the fourth plane I've used this batch on. Note that it is a little bit 'fluid' in that it will settle and if you have piled it too high, it may 'overflow' a bit. It will also stick to stuff a bit so it is best to not set it face down on paper or some other similar surface.
I freehanded the main colors, but did tape off the fin to apply the FS 35237. All three of these colors are quite close to each other so do not contrast well. I know of folks who will deliberately lighten and darken some of these shades to get contrast, but if you look at the real planes, often they seem to almost be a single shade.
Once the paint was on, I installed the landing gear.This was followed by a clear coat in preparation for markings. At this time, I noticed that the previous owner had glued the fins on the wrong sides so that the slime lights were on the inside. I had no choice but to snap off the fins and put them on the proper sides. This wasn't as messy as I thought, but did require a bit of repainting.
Meanwhile, I went through the decal stash to find some markings. After searching around in what I already had for something that wasn't a CAG bird, I came across Superscale sheet 72-881 which had markings for a VFA-41 line bird. This sheet was printed in 2005, making it a decade old. The sheet is designed for the Hasegawa kit so I was in luck in terms of fit, though none of the markings for this scheme are really kit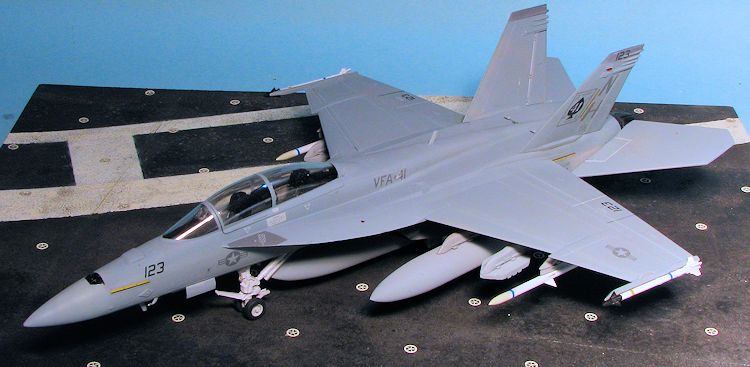 specific. The decals went on without much issue, though they all needed setting solution. Some of the markings such as the slime lights, had to come from the kit sheet. I did not install the wingtip slime lights as the previous owner had already glued on the missile rails and those prevented the decal from being usable.
Finishing touches were a lot more than on your standard WWII single engine prop. First the wheels were glued on and then the gear doors. There are quite a few antenna and probes that need glued on and then there are the fuel tanks. For missiles, I used the Sidewinders from the kit, but chose the AMRAAMs from a weapons set as I didn't want to mess with gluing on the separate fins. I used the kit missile markings. The tail planes were pushed on and I gave the kit a coat of clear matte. The masking was removed and the burner cans and tail hook were glued on. There was the usual detail painting of things like formation lights and that was it.
| CONCLUSIONS |
The kit went pretty much as expected. The intakes on Hasegawa F-18s of any generation are always a trouble spot, though perhaps had I built the entire kit from the beginning, I would not have had any issues. I'll know when I do another of these in the future. This is not a kit for the beginner as it does have some fit issues and small parts. Overall, it makes into a pleasing model and fits right in with my collection.
September 2015
Thanks to me for picking this one up.
If you would like your product reviewed fairly and fairly quickly, please contactthe editor or see other details in the