Hasegawa 1/72 F-15C Eagle
| KIT #: | K24 |
| PRICE: | $19.95 |
| DECALS: | Many options |
| REVIEWER: | Scott Van Aken |
| NOTES: | Base F-15J Kit from 1988 |
| HISTORY |
The biggest success story for McDonnell/Douglas after the F-4 was the F-15 Eagle. Now it is the F-18, but that is another story. The current F-15E is still slowly coming off the (now) Boeing production lines in St. Louis thanks to a continued demand for the aircraft. What is unique about the F-15A/C versions is that they are still being used solely as fighter/interceptors. You want a bomber F-15, then use the Strike Eagle. Even the highly touted F-14 was converted over to the bomber role a decade or so before its retirement, much to the disgust of its crew.
 The Eagle is not a relatively simple aircraft. The skills needed to keep it flying are a bit higher than what is required for the F-16 Falcon. It is also a much more expensive aircraft. For that reason, it has seen little in the way of export sales. Only Japan, Israel and Saudi Arabia have the F-15 in their arsenal. Those Saudi-flown planes are basically maintained by US civilian support teams as the Saudis are not know to want to do anything for themselves that they can pay others to do for them. The Israelis have the Eagle as they have a very strong lobby in the US that buys all sorts of politicians to make sure they have the latest and greatest. The Japanese have the Eagle as they also bought a production license for the plane (after the usual exchange of funds and favors), a typical move for the Japanese when it comes to aircraft or any other large business deal. Other countries have wanted the plane, but couldn't justify the cost of it and opted for the F-16 instead, which in most cases, was really the best move for them to have a capable, modern, multi-mission aircraft.
The F-15J and two seat DJ are manufactured by Mitsubishi and have gone through at least one upgrade in systems. These aircraft are similar to the USAF's F-15C and F-15D. With no real air defense fighter in the works the Eagle will be in this role for some time to come.
| THE KIT |
Hasegawa has issued several F-15 kits over the years. The first one was a prototype aircraft with the squared wing tips. It was quite basic with raised panel lines and minimal detail. However, that was expected from a kit in the early 1970s. This kit was later modified with the cut back wing tips, larger speed brake and proper fins with the right sized anti-flutter weights on the tips. In 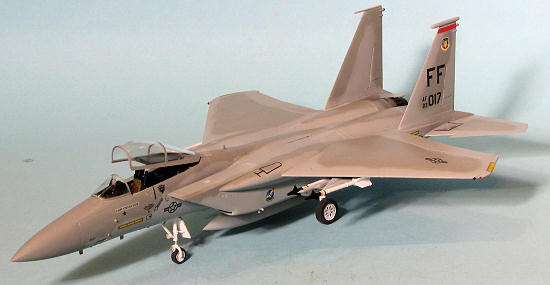 1988 a new kit was issued. The first boxing was this one for the home market. It was also released in a USAF version a short time later, and has been reissued a number of times since then. A two seater has also been done with a change in the sprue that has the B/D bits in it.
The kit has the expected nicely engraved panel lines, a well done cockpit with engraved instrument panel and console detail, nice detail in the wheel wells, etc, etc. It is also built to the modular concept that allows several different versions to be done with one kit. Fortunately for us, the Eagle has not been heavily modified until one gets to the E model, so all the fiddly stuff is kept to a minimum. This kit offers exhaust that are sans the 'turkey feather' coverings. These were removed from USAF Eagles after it was discovered that they were of little use and caused maintenance problems. This means that you can build this kit as a USAF bird with almost no mods. Actually, a substantial percentage of the parts count is the afterburner nozzle assembly. It is equally nice that the USAF fin with the DECM receiver in it is also included in the kit
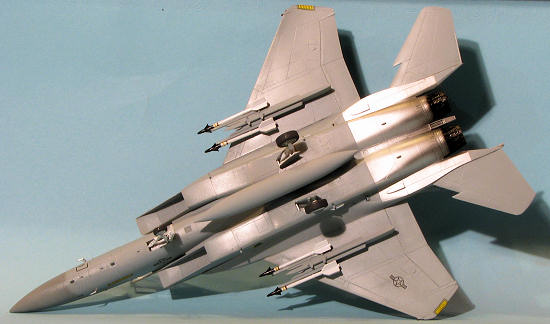
Options are somewhat minimal. One is that you can put decals in place of the instruments should you choose. You also have the option of installing three fuel tanks; one on the centerline and the other two hanging from the wing pylons. No included are any offensive missiles. This is to get you to fork out additional funds on the weapons set. You can also display the speed brake in the 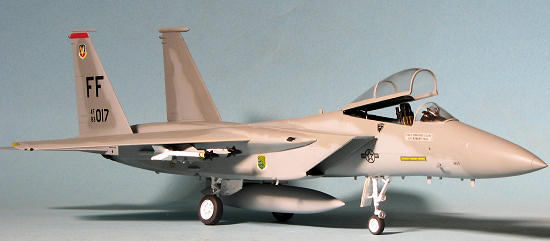 open position, but this was almost never seen open while on the ramp. Finally, the separate canopy and windscreen means that you can pose the canopy open and a canopy brace is provided for that purpose.
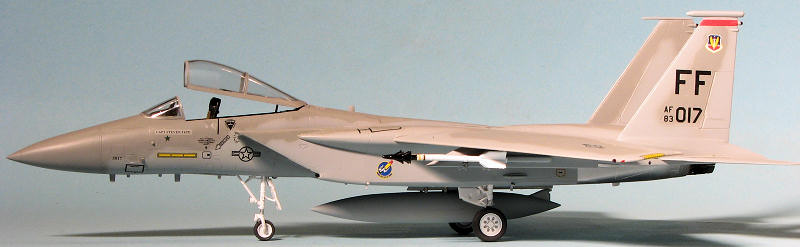
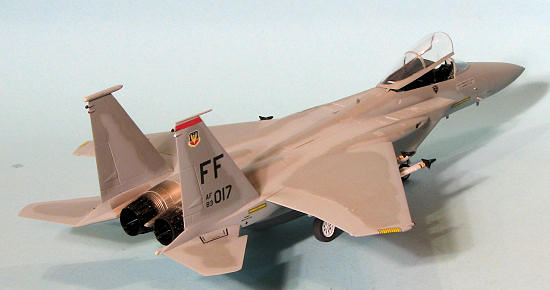
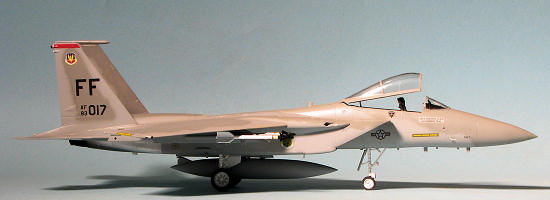
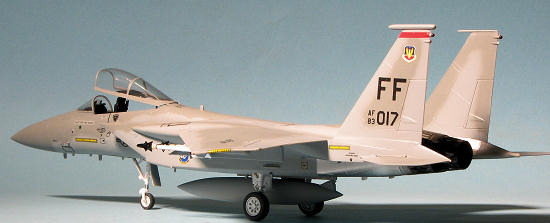
Instructions are the usual excellent Hasegawa offerings with all your colors in Gunze paints and with FS numbers provided where applicable. The rather large decal sheet is festooned with data stencils and offers markings for Eagles with all of the JASDF squadrons flying the plane in 1988. All are painted identically in FS 36320 and 36475, which I believe are light and dark ghost grey, or something like that. It is the rather bland nature of Eagle markings that one doesn't see too many of them built. Fortunately, there are some semi-interesting aftermarket sheets that offer some slightly more interesting markings.
| CONSTRUCTION |
I then did the usual filler thing to the intakes and then did a batch of painting, mostly of bits that were going to be assembled and difficult to paint once the assemblies were together. Then I glued in the lower intake bits and the compressor faces to the lower fuselage and the intake ramps to the upper section. The two intakes were then simply slid into place. I did not want to find out when the fuselage halves were mated that I had glued them too far forward or too far back. In the cockpit I attached the decals for the instrument panel and console and after painting the aft section with a blue green from Pollyscale, some weight was attached to the inner nose section and the cockpit trapped between the nose halves. The area behind the cockpit gets attached next. This needed super glue as the piece itself is a bit wider than the forward nose so each side was glued separately while I held it spread so it would be relatively flush. 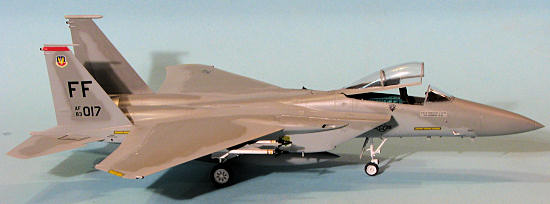 I then glued together the upper and lower fuselage. Fit is about as expected, which is not great. I glued the intakes on the bottom and outer sides first to be sure I got a good fit in the areas where they would be most visible. The next step was to glue in the completed nose section. I should mention that I added a touch of weight, just in case. This was the worst fitting part of the build, but after several sessions with filler and files and sand paper, it looked pretty good. The wings were not an issue and after joining the upper and lower sections, and filling the seams, mostly on the outside part, they were glued on. I also cemented the speed brake in the closed position.
 | COLORS & MARKINGS |
 d II Dark Aluminum. The darker FS 36320 was then thinned and the pattern hand sprayed using an Iwata Revolution on low pressure. This was all later gloss coated using Pledge (Future).
 | FINAL CONSTRUCTION |
 tal assemblies were to be fit to the exhaust assemblies. This would have vastly improved the fit, but I had screwed up. My options were to continue and make the best of it or plunk down major bucks for resin replacements. I did the former. This assembly was painted Jet Exhaust from the Alclad II line.
| CONCLUSIONS |
 I realize that the F-15 is not exactly a WOW model for many, but it is an important aircraft for the USAF inventory, especially since the F-22 has had so much trouble in service. It has been decades since I last built an F-15 and that was the Airfix F-15B, which is still a nice kit, but is a 70s kit with all that implies. Overall it was pretty much what I expected from a 90's Hasegawa kit. Despite my screw-ups, it turned out well and is a fine replacement in my collection for the old Airfix kit.
 July 2012
Thanks to me for picking up the kit many moons ago and to Wolfpak decals for the decal sheet.
If you would like your product reviewed fairly and fairly quickly, please contact the editor or see other details in the
Back to the Reviews Index Page