Hasegawa 1/48 C-21A Learjet
| KIT #: | T003 |
| PRICE: | $5.00 on the dead kit table |
| DECALS: | Two options |
| REVIEWER: | Scott Van Aken |
| NOTES: |
| HISTORY |
The Learjet Model 35 and Model 36 are a series of American
multi-role business jets and military transport aircraft manufactured by
Learjet. When used by the United States Air Force they carry the designation
C-21A.There are 38 Air Force active d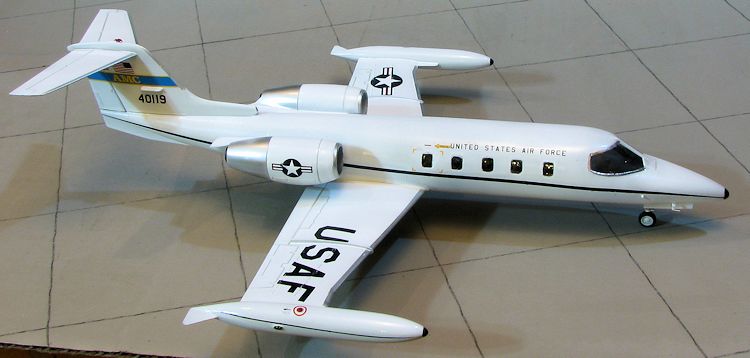 uty aircraft, and 18 Air National Guard
aircraft in the C-21A fleet. On 1 April 1997, all continental U.S.-based C-21As
were realigned under Air Mobility Command, with the 375th Airlift Wing at Scott
Air Force Base, Illinois, as the lead command. C-21As stationed outside the
continental United States are assigned to the theater commanders.
uty aircraft, and 18 Air National Guard
aircraft in the C-21A fleet. On 1 April 1997, all continental U.S.-based C-21As
were realigned under Air Mobility Command, with the 375th Airlift Wing at Scott
Air Force Base, Illinois, as the lead command. C-21As stationed outside the
continental United States are assigned to the theater commanders.
The aircraft are powered by two Garrett TFE731-2 turbofan engines. Its cabin can be arranged for 6-8 passengers. The longer-range Model 36 has a shortened passenger area to provide more space in the aft fuselage for fuel tanks.
The engines are mounted in nacelles on the sides of the aft fuselage. The wings are equipped with single-slotted flaps. The wingtip fuel tanks distinguish the design from other aircraft having similar functions.
| THE KIT |
Let me begin this part by stating that you cannot build an accurate C-21A using what Hasegawa provides in the standard boxing. The reason is that the C-21A has thrust reversers and the kit does not. I do not think anyone makes aftermarket engines for this kit, though they may start now that Caracal Models has produced a decal sheet for it.
This is another rescue kit from the local hobby shop's 'Junk kit' table. This is where the owner sells of started or incomplete kits that he picks up in collections. It is also a place where I like to see what is there that may fit my interests. Over the last couple of years, quite a few of the weekly builds have come from this table.
 The kit consists of four white plastic and one clear sprue.
There isn an interior that consists of a floor that runs the length of the
interior and incorporates the nose gear well. There are two seats, two control
columns and an instrument panel for the cockpit. The forward and inner bulkheads
are split with a complete aft bulkhead. There are five individual and one paired
seat for the cabin area. Windows are to be placed on the inside prior to
cementing the fuselage halves.
The kit consists of four white plastic and one clear sprue.
There isn an interior that consists of a floor that runs the length of the
interior and incorporates the nose gear well. There are two seats, two control
columns and an instrument panel for the cockpit. The forward and inner bulkheads
are split with a complete aft bulkhead. There are five individual and one paired
seat for the cabin area. Windows are to be placed on the inside prior to
cementing the fuselage halves.
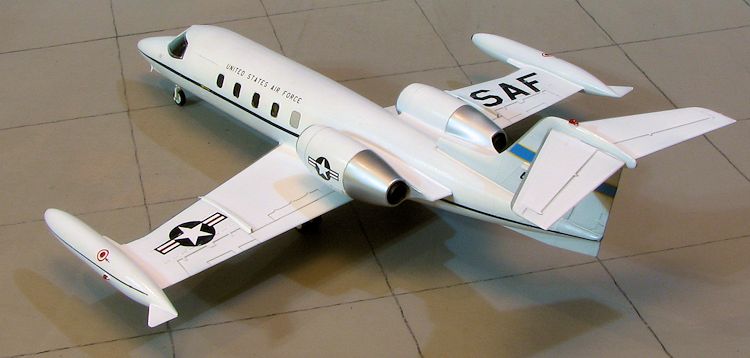
Wings are a full lower section with upper halves. The upper wings contain the upper portion of the tip tanks and one attaches the lower section later. Engine nacelles are in upper and lower halves and one places the initial compressor fan in front with a small exhaust pipe in the rear. The cabin door can be posed open or closed and there is a stair section for the closed option. The cockpit windscreen fits from the outside. Landing gear is well formed with a one-piece strut/wheel combination for the nose gear and separate wheels for the main gear. The inner gear doors are normally closed except during retraction/extension.
Instructions are just about completely in Japanese with Gunze paint references. There should be two decal sheets, one with stripes and US registrations and a full sheet of various Japanese registration numbers.
| CONSTRUCTION |
 This one was already well
underway when I picked it up. The previous owner had already assembled the
fuselage and wings as well as the engine pods. He had masked the clear bits and
engine intakes and painted the airframe in yellow and white.
This one was already well
underway when I picked it up. The previous owner had already assembled the
fuselage and wings as well as the engine pods. He had masked the clear bits and
engine intakes and painted the airframe in yellow and white.
| COLORS & MARKINGS |
Once that was done, I then applied multiple coats of Tamiya X-2 gloss white. Thanks to the engine pods already being attached, when it came to spraying on the various metals for the leading edges of the wings and for the engine pods, I went through a lot of masking tape and it took a considerable amount of time. Eventually, I got everything painted in the base color and metallics. I did have some seepage issues.
 Meanwhile I worked to clean up the landing gear and get
these items ready for installation. Though the previous owner had painted the
wheels, he didn't bother with little things like getting rid of mold seams so
some work had to be done in that regard.
Meanwhile I worked to clean up the landing gear and get
these items ready for installation. Though the previous owner had painted the
wheels, he didn't bother with little things like getting rid of mold seams so
some work had to be done in that regard.
Once I had finished with the painting part of things, I installed the landing gear. This showed that though it will sit on its tail if the rear is pushed down far enough, it would also sit on its nose gear without too much effort. When the gear had dried, I glued on the repainted main wheels and was pleased that, when placed on a piece of glass, all four wheels touched.
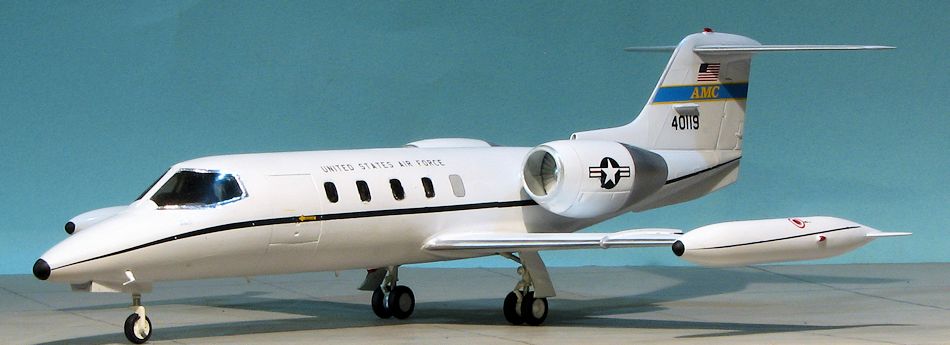
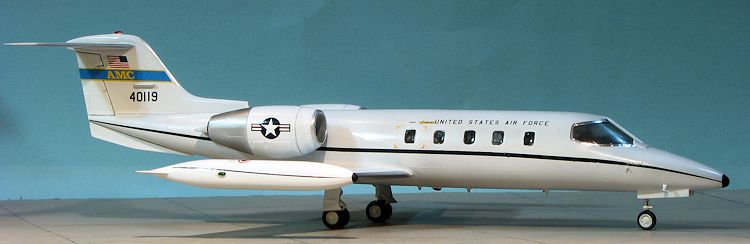
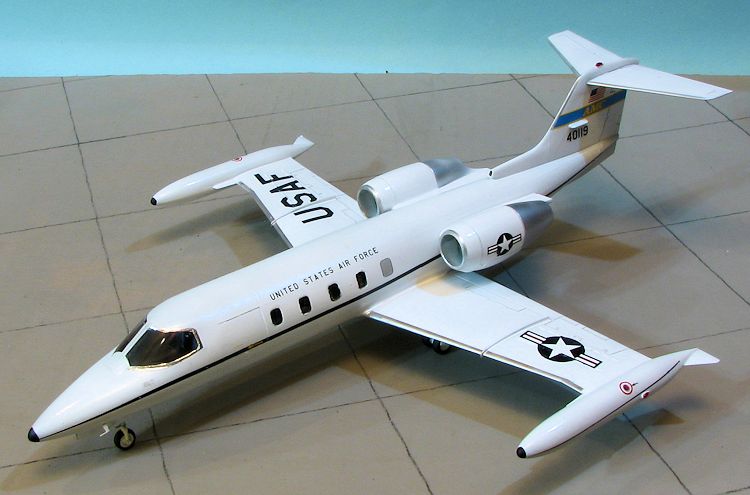
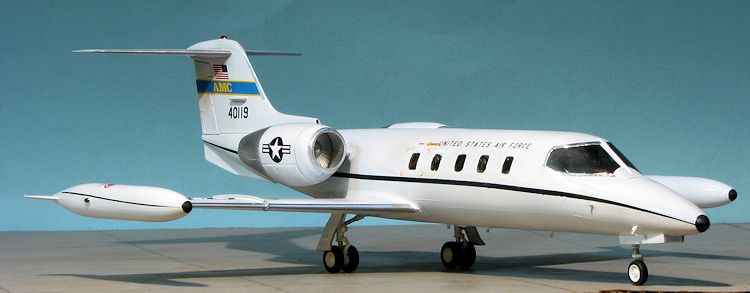
Then on to the decals. For this one I used Caracal
Models new sheet, CD 48096 for the C-21A reviewed last week. I started by
putting on all the common markings. I noticed that Caracal Models did not split
the upper wing markings to take into account the wing fences. So I fudged the
position of the insignia and cut the USAF to fit. The upper markings will need
at least one good application of setting solution to fit down over the little
ridges on the upper wing. I assume these are vortex generators to allow for
better 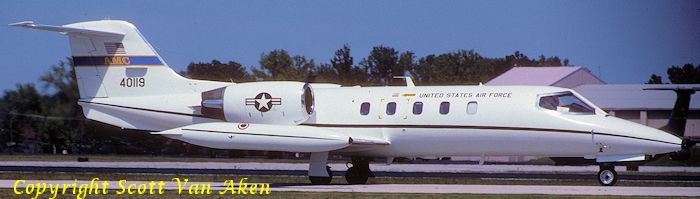 aileron control. The long fuselage stripes were a bit of a challenge.
They are in two sections and I always have difficulty getting cheat lines
straight. Fortunately, a lot of water helped and the Microscale made decals are
not impossibly thin so can handle a bit of movement without folding on itself or
tearing. Modelers will note that the 'US Air Force' logos on the top are not
directly opposite each other. This is due to the entrance door on the left and
the escape hatch on the other side. Note also that the C-21A has five windows on the left side whereas Hasegawa only has four on the kit. Caracal offers a decal for this missing window. I was just about to cut out and apply the 81
TRW markings when I found an AMC sheet sent to me by a reader many years ago. This sheet
contains the markings used by the 375 AW and though the yellow too light (it
should be more gold), it will enable me to build a plane I'd seen and
photographed quite a lot in the mid 1990s.
aileron control. The long fuselage stripes were a bit of a challenge.
They are in two sections and I always have difficulty getting cheat lines
straight. Fortunately, a lot of water helped and the Microscale made decals are
not impossibly thin so can handle a bit of movement without folding on itself or
tearing. Modelers will note that the 'US Air Force' logos on the top are not
directly opposite each other. This is due to the entrance door on the left and
the escape hatch on the other side. Note also that the C-21A has five windows on the left side whereas Hasegawa only has four on the kit. Caracal offers a decal for this missing window. I was just about to cut out and apply the 81
TRW markings when I found an AMC sheet sent to me by a reader many years ago. This sheet
contains the markings used by the 375 AW and though the yellow too light (it
should be more gold), it will enable me to build a plane I'd seen and
photographed quite a lot in the mid 1990s.
So I applied the rest of the decals
using the separate numbers provided on the additional sheet to make 84-0119. I
then attached the gear doors and the gear retraction struts along with the small
pitot tubes under the nose. Had I started this kit from s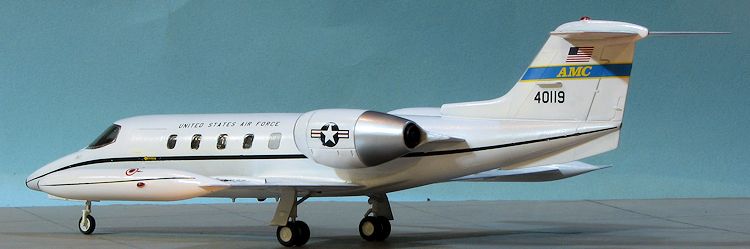 cratch,
I would have made the proper antenna suite, but since I did not, I left things
pretty much as they were. The nose and tank tips were dipped in black paint and
once dry, the masking was removed from the clear bits. This did not go well. The
previous owner had masked the small windows with Scotch tape and during the
intervening years it had become pretty much stuck to the windows. Removing this
meant that I picked each window off in teeny chunks, the result being a less
than smooth window area. Not an issue with the cockpit glass as I masked that
myself. I used Bare Metal Foil chrome to duplicate the area around the window.
Again, were I building this from the start, I'd have used this material on the
leading edges of the engines and flight surfaces or used Alclad II chrome paint.
I then touched up the more egregious glitches and called it done.
cratch,
I would have made the proper antenna suite, but since I did not, I left things
pretty much as they were. The nose and tank tips were dipped in black paint and
once dry, the masking was removed from the clear bits. This did not go well. The
previous owner had masked the small windows with Scotch tape and during the
intervening years it had become pretty much stuck to the windows. Removing this
meant that I picked each window off in teeny chunks, the result being a less
than smooth window area. Not an issue with the cockpit glass as I masked that
myself. I used Bare Metal Foil chrome to duplicate the area around the window.
Again, were I building this from the start, I'd have used this material on the
leading edges of the engines and flight surfaces or used Alclad II chrome paint.
I then touched up the more egregious glitches and called it done.
| CONCLUSIONS |
 won't win
contests and probably won't be shown at meetings, but they fill spaces on my
shelf and give me encouragement when I get to start a fresh version of the kit
in question.
won't win
contests and probably won't be shown at meetings, but they fill spaces on my
shelf and give me encouragement when I get to start a fresh version of the kit
in question.
| REFERENCES |
https://en.wikipedia.org/wiki/Learjet_35
November 2015
Copyright ModelingMadness.com
Thanks to www.caracalmodels.com for the C-21A decal sheet. Without this sheet, I could not have properly finished this kit.
If you would like your product reviewed fairly and fairly quickly, please contact the editor or see other details in the Note to Contributors.