Panda 1/144 B-1B Lancer
| KIT # | 40002 |
| PRICE: | ($15.00 at NA Hobbies) |
| DECALS: | Two Aircraft |
| REVIEWER: | |
| NOTES: |
| BACKGROUND |
For a peek at the naked plastic and a short history of the type, visit the preview.
| CONSTRUCTION |
Before starting on construction of this kit, I had to ask myself a serious question. Did I want to do this on the ground or in the air? This isn't a question that most modelers take lightly when doing a kit. The big questions are; will the gear doors fit into the respective spaces (often the kit is designed so that is not possible), and where am I going to get a stand? That decision having been made, I started closing things up. As I feared, fit was OK, but not perfect. Fortunately, the hot glues work wonders in getting these things to fit. If they can't be trimmed, just flood the offending section with this glue and let them melt into place! This I did and later the entire area will be sanded down where needed. Probably the worst fitting parts were the forward nose gear door, the crew entrance door and the bomb bay doors. The notches in the doors do not match with the bulkhead between the fuel tank area and missile area. I trimmed away at the bulkhead until an acceptable fit was obtained. Then I did a bit of work on the cockpit. This area was painted dark gull grey as were the seats. The seat cushions were painted a green khaki color with the center console and anti-glare panel painted flat black. A very nice instrument panel decal is provided and that was put on. It reacted well to setting solutions so hopes are high that the kit decals will be equally well behaved. Downside of any cockpit work is that most will be nearly invisible when installed! Meanwhile, the cockpit had dried and it was glued into the upper fuselage. The cement points are quite positive so there is no doubt as to what goes where. The aft cone halves were also glued and filler used on it. During this time, the swing wing arm was glued to each wing using the mounts provided. It is a well designed section that should eliminate any possibility of accidentally gluing the wings in one position. When dry, this was placed on the lower fuselage and the wing hold down caps glued in place. After filling and sanding around the cockpit, the small canards were glued in place, the canopy masked and it was time for paint!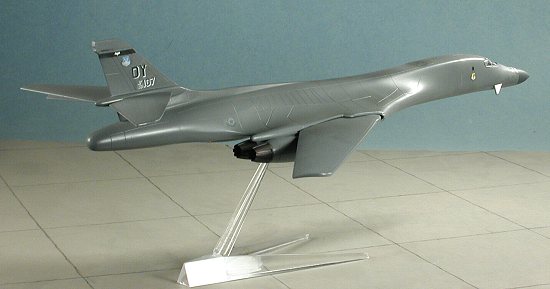 Not so easy, that last question. There were times (fade back to a youth of 29 cent models and no color TV) when stands were (no pun intended) standard equipment in a model. In fact, several of the Comet, Aurora and Revell kits then available did not come with any landing gear and had the doors molded in the closed position. Fortunately, I also build airliners from time to time and several of them still provide stands that will work well on a 1/144 B-1. Test fitting showed that the gear doors fit fairly well and I really wasn't looking forward to trying to paint those rather pathetic wheels.
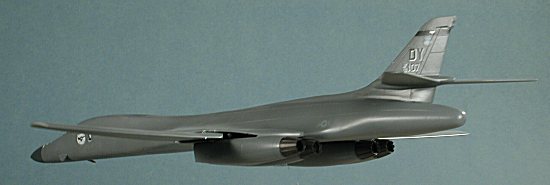 There are several bulkheads and an 'anti-see-through' panel that fit into the fuselage sections so those were installed and the fuselage halves mated while they dried. During that, the engine pods were assembled. There are five 'deflectors' that fit inside each engine pod. I found the forward right one on both pods to interfere with gluing the upper and lower halves, so those were trimmed down to get the halves to fit. No painting info is given for the inside of these, so I didn't paint them, waiting until the final stages to make any decision on that. Regardless of what color is used, little will be seen behind the baffles. Though the fit was good, I puttied the seam and a sink mark that was on the forward section of both engine pods.
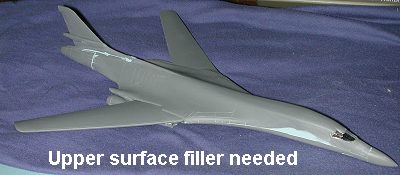 I was feeling pretty good about the whole thing as things had gone rather smoothly to this point. This was the time to glue the upper and lower fuselage together. This is where I ran into the first real fit problem. Yes, the upper and lower sections do mate, but they are not 100% aligned. I think that perhaps removing the alignment pins from the forward fuselage sections will help, but then one loses the 'hold down' effect of these while gluing. Needless to say, there are steps that will have to be filed and filled to get things smooth. Since I was going to be doing some quality filling, the nose and tail cones were glued on and the whole thing set aside to dry.
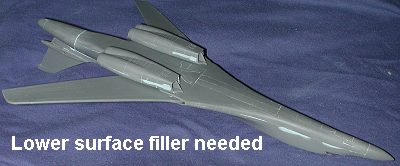 Then I got down to the filler and sanding. Fortunately, the areas to be done are easy to get to and will blend in nicely. It only took a couple of sessions to get things nice and smooth. With that done, I attached the fin. It also had a large gap where it attached to the fuselage so that also needed some filler work. Meanwhile the engine pods were glued to the underside, since the whole shootin' match was to be painted the same
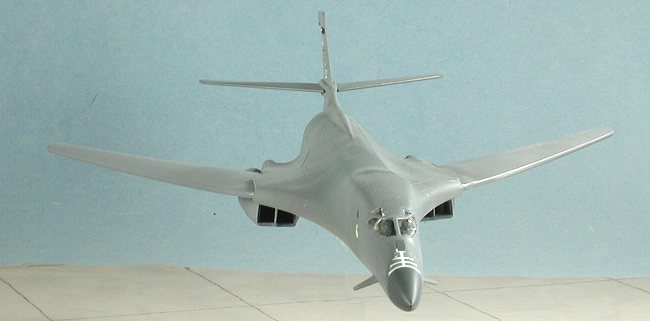
 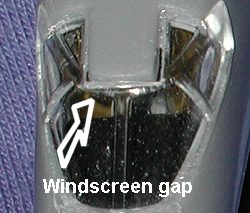 color anyway. As you can see from the above images, this is not a filler free kit! At this juncture, I glued in the cockpit glass. This part is a loose fit to say the least. It fits well enough, but the upper section is actually a bit smaller than the plastic to which it joins so there is a rather substantial gap. Fixing it will take some care with the filler, but it should be possible to fill it without too much damage to the surrounding windscreen. As I had surmised, not much of the interior can actually be seen once the windscreen is in place so no need for a lot of work in the cockpit!
| PAINT & DECALS |
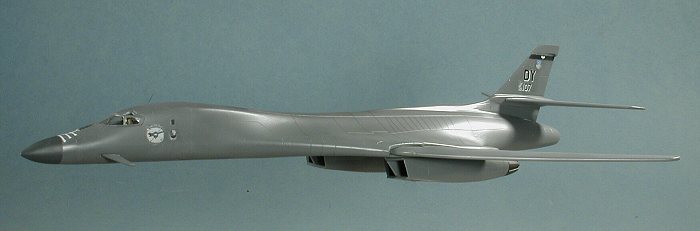
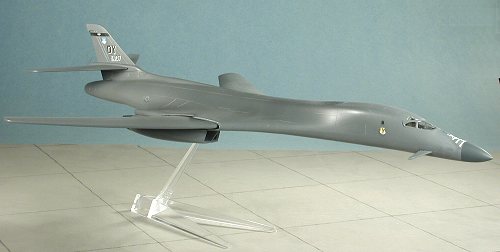
Paint for this one is deucedly simple. It is a single color. Now the instructions tell you to paint it FS 36375. WRONG!! The actual color is FS 36118 (thanks for all the e-mails, folks), though actually it is actually more of a semi-matte on freshly painted aircraft. However, when I've used 36118, it has turned out way too light (see the F-15E review. FS 36081 is the color recommended in the 'B-1 in Action' book (my only reference on the type) and that is what I used on this one. In retrospective, perhaps I should have used RLM 66 overall! Since it is an overall scheme, painting is really quite easy. Now as you can see by the picture above, the radome is also this color on this particular plane. However, on others it is a darker grey. I sprayed the nose RLM 66 and when it was dry, masked it off and painted the rest of the airframe Gunze FS 16081 acrylic. That gave me a nice, gloss surface for decals. The only other color used was Testors Metallizer Burnt Iron for the exhaust. Markings are for the 9th BS/7 BW at Dyess AFB and for the 128 BS of the Georgia ANG, a unit that is either no longer flying the plane or is about to trade them in for something more docile, like C-130s. I chose the 9 BS ones, mainly because it had a more colorful tail marking. MOUNTING The last thing to do for the model was to find a way to display it. I'd already built it wheels up, so I went through my junk drawer in search for a stand. Fortunately, I build airliners as well so had several Hasegawa 1/200 stands. But what really caught my attention was a stand from a Tamiya 1/72 Bf-109E kit. It was clear and just looked right. After gluing the arm to the base, I went about determining just where the center of gravity was on the kit. Once that was determined, a small slot was cut into the bottom of the model until I could just force the stand into place. That was it and the model was done. Just a note that the plane is very 'wiggly' on the Tamiya stand and really needs something a bit more substantial.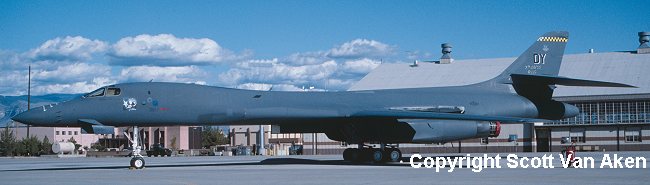
 The decals gave me quite a bit of trouble. The main problem is that they tend to break apart. If you are very, very careful, you can get them in place without having them disintegrate, but I was not at all lucky with the insignia and they shattered into a zillion pieces. Other large decals also broke into sections. I was able to find some insignia of the right size but wrong color and design from an old Microscale insignia sheet. However, wrong is better than none. I can only hope that some enterprising decal maker does a sheet for this kit as the kit decals are not good. They also didn't stick that well and so I zapped them with Solvaset in hopes of preventing major silvering problems when the matte coat was applied. I applied as few as I could get away with for fear of having more of them break up. While that was drying, I decided to remove the overly large canard warning stripes. Imagine my surprise when removing the decals also removed all the paint from underneath it! I also noticed that the setting solution discolored the paint under in. Too strong, I guess. It meant a short trip to the paint shop for a bit of repainting before continuing on. Once painted and after it had a its clear matte sprayed on, I went on several interdiction missions. All systems operated as advertised, and several enemy felines were properly disrupted during the low level sorties. Thanks to the high speed capabilities of the plane, none of the flak fired at the B-1 were successful in swatting it out of the sky.
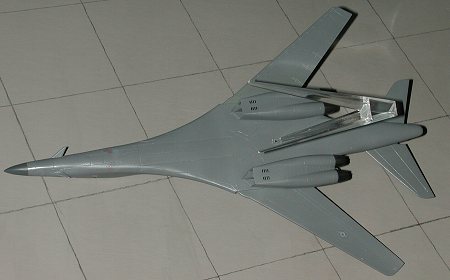
| CONCLUSIONS |
I am pretty pleased with the overall kit. The detailing is a bit thick in places and it isn't a perfect kit, but overall it is pretty good. The instructions give misinformation in terms of colors and the decals are poor, despite being well printed. If an aftermarket decal sheet was made available, I'd be inclined to build another.
October 2002
| REFERENCES |
B-1 in Action, Squadron Signal Publications, 2002. Actually, while it isn't a terrible book, there is a lot of 'dead' material in it such as lengthy interviews with crew and an equally long story of a flight by the author. Not as bad as the B-2 book, unless you like that kind of stuff, but close.
Many thanks toNorth American Hobbies for the review sample. If you want one, you can't find a better place to order it from.
If you would like your product reviewed fairly and fairly quickly, please contact the editor or see other details in the