Hasegawa 1/72 AV-8B Harrier II
| KIT # | 00449 (D 19) |
| PRICE: | $10.98 |
| DECALS: | two options |
| REVIEWER: | Scott Van Aken |
| NOTES: | Basic boxing |
| BACKGROUND |
Please visit the preview for a brief history of the aircraft and a look at what is in the box.
| THE KIT |
 This is the basic boxing for the AV-8B Harrier II. It has evolved into several other boxings for different variants of the basic type. The other 'standard' kit is the AV-8B Plus, kit 00454. For those of you interested in such things, below is a listing of all the current kits in the AV-8B series:
00185 HARRIER GR MK.5 'RAF'
00283 AV-8B 'NIGHT ATTACK'
00380 HARRIER GR MK.7 'RAF'
00449 AV-8B - STANDARD BOXING
00454 AV-8B PLUS - STANDARD BOXING
00642 AV-8B PLUS 'ITALIAN NAVY'
Several more have been added since.
| CONSTRUCTION |
The interior is the first part to be tackled. It is basically a tub, control stick, instrument panel, seat (and not a really good one), and decals for the instruments. I painted the interior and the cockpit sidewalls (which are devoid of detail) using FS 36231 Dark Gull Grey from the Model Master line. The decals were then applied and I took a chance and used Solvaset on them to keep them snuggled down. Only one minor disaster as a side console decal decided to fold over on itself while the solution was drying.
 I also assembled the wing section, filling in four holes on the outrigger gear pods as shown in the instructions. The two holes in the fuselage where the refueling probe attaches were also drilled out. I then assembled the small intake wedge and painted it Dark Gull Grey. The engine intake was painted white while the compressor blades were given a coat of aluminum.
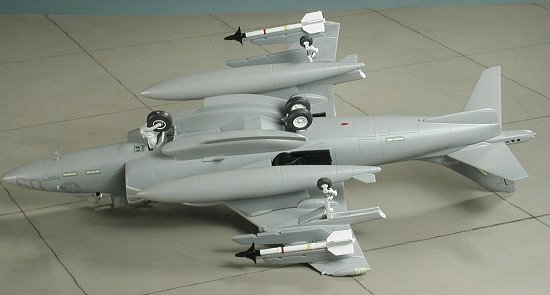
Fitting the interior is a piece of cake as Hasegawa provides positive locators for it. The engine inlet section was also glued in, though it wasn't quite as easy a fit and I did have to fuss with it a bit to get it in place. Back a bit farther are the exhaust nozzle inserts. Basically it is your common black polycaps held into cups on the inside of the fuselage by a spreader bar. This bar is glued in place to keep the caps from falling out and is not designed to have the nozzles move in tandem (see image below). With those in place, the fuselage was glued together. No nose weight was put in as I don't think it will be needed, thanks to the bicycle landing gear arrangement.
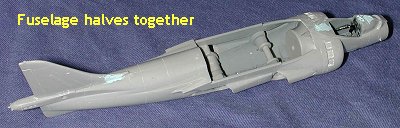 With the fuselage closed up, the rear cap was glued in place as was the forward fin intake. This part is actually narrower than the mating surface at the base of the fin so filler or sanding will be needed to match things up smoothly. During this time, the intakes were glued into place. A few other spots needed filler while I rescribed any lost detail during initial sanding using some finger saws. While that was drying, I assembled the two gun pod sections. These have a rather large seam down the middle that will have to be filled. I also glued the thrust nozzles together. When dry, I filed off the seams with a small, square file as it seemed the best way to get into the very tight areas on the nozzles. These parts were then sanded smooth.
Next, the wing parts were glued in. This consists of the wing itself and a forward section that has the strakes on it. The fit here is good, but there are seams between the wing part and the strake section that will have to be filled. I can understand 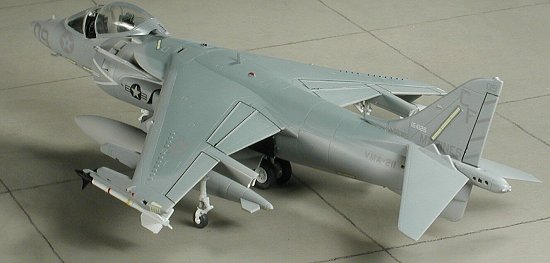 them doing these separately, but it doesn't make for an easier build because of it. Personally, I find that few inserts actually fit as well as one would like. Just to keep things going, the nose section was glued on at this time as well. It also isn't exactly the smoothest fit one could have, again, because of the need to do so many variants from a single basic airframe.
With the wings in place I glued on the gun pods along with the center bit. The alignment stubs on the lower fuselage are not as positive as one would hope and while I'm not sure if they are the reason, the pods do not fit well. I had some gaps that were larger than what they should have been. Next kit, I'm leaving them off and using the strakes. However, this will add a bit more complication to the build when it comes to the forward gear door/anti-efflux barrier.
Gun pods in place, I glued on the fuel dump vent next to them. The kit was complete enough to start on the painting process.
| COLORS AND MARKINGS |
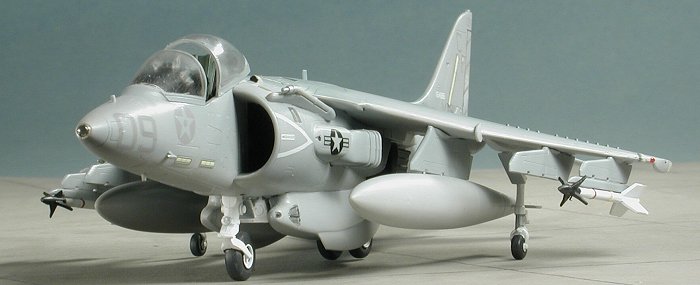
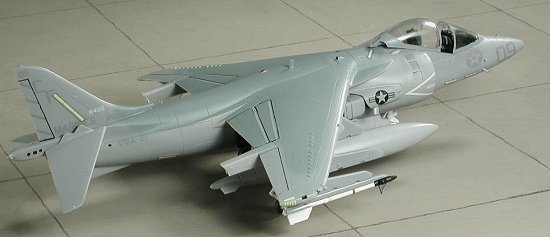
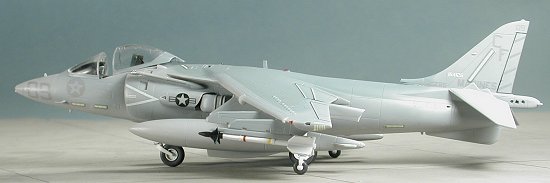
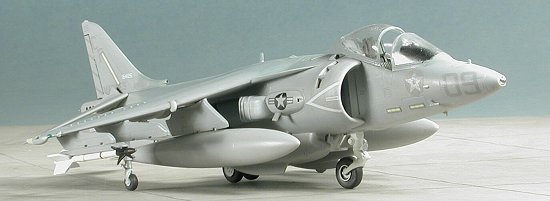
I found a nice scheme on the Sky Models decal sheet for 1/72 Harriers that had VMA-211 'Wake Defenders' scheme in the three greys scheme so I chose that one. The lower grey is FS 36375 with FS 36320 as the middle color and FS 34237 as the darker upper wing grey. I used ColorCoats for the lower colors and Model Master for the 34237. The two lower colors are very close to each other and it is a bit difficult to see where one stops and the other begins. No masking was done and the colors all sprayed on free-hand.
 When dry, I started adding the landing gear bits and a few additional antennas. The Colorcoat paint is a semi-gloss so I figured I could get away with no clear gloss coat when it came time to apply decals. But back to the landing gear bits. The gear wells need to be painted white and this was done with Floquil Reefer White. I also glued the small gear door on to the rear gear strut and glued the forward gear door/efflux blank in place. With the gun pods in place, the two tiny outside doors are closed. Make sure you read the instructions carefully when assembling this area as one can easily put the door retraction strut on backwards! The outrigger struts are a very tight fit and I broke one when pushing it in place. You may want to enlarge the holes for these parts. A nice touch is separate inner main wheel hubs, which makes it much easier to paint the wheel. Getting everything nice and level, however, is not that easy. We cheaters may want to resort to flattening tires a bit to get things right!
 With the kit painted and on its wheels, it was time for decals. The Sky Decals are well printed and went on very well, but do not seem to be designed for the Hasegawa kit. Though nothing is in the instructions about recommended kits, I'd have to think that they are for the Italeri AV-8B. The rudder stripes are too small in height and width to properly fit, the nose numbers are way too large as is the unit insignia when one compares the results with what is shown in the placement diagram. Some of the decals also nearly disappear when they are put in place. This is because their shade is so close to the color of the paint. I had to use the kit decals for most of the common data markings as none are provided on the Sky sheet. The kit decals worked beautifully with the Microscale system and in hindsight, I should have just used them instead. (Late Note: The colors that Hasegawa provide for the exterior scheme are not totally correct. For instance, the darker grey should be 36118, according to many e-mails regarding this. Check other references regarding these colors to get them right.)
| FINAL ASSEMBLY |
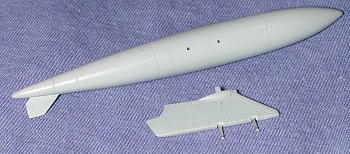 With the decals in place, I attached a few more bits; mostly antenna, probes and such. At this time, I also fixed the self induced problem with the drop tanks. You see, the tanks are molded with the little pegs that fit into the slots in the wing pylon. These are on both drop tank halves and you simply sand off the pair you aren't using. Not reading the instructions, I quickly assumed this was a glitch and sanded them BOTH off. Realizing my mistake, the only real fix was to make new attachment points. This I did by drilling holes in the pylons and inserting sections of straight pin. I then cut them off and guesstimating where they'd fit on the wing tank, made small marks and then drilled the appropriate size holes to accept the pins. It seems to have worked well as one can bend the pins to ensure a good fit and friction seems enough to keep them in place.
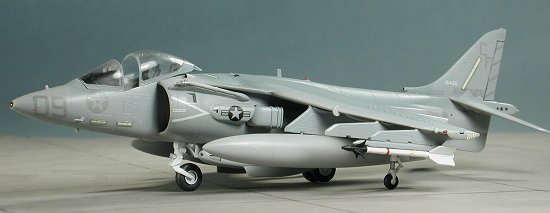 The kit was then given a cleanup to get rid of any decal solvent or glue residue. Then I plugged in the forward and aft nozzles, glued on the various pylons, attached the Sidewinders (one of which suffered a broken fin somewhere along the way) and drop tanks, and gave the kit an overall coat of matte clear. Harriers are not supersonic in any way, shape or form so a very matte scheme is quite normal. I also did some accentuating of controls with an artist's pen as usual. I'd thought of adding some exhaust grunge, but really, the Harrier isn't as filthy in that regard as, say, the Phantom (of course, it doesn't sound as glorious, either!).
Then there was the usual touchup and last minute fussing that goes with any kit. The nose clear bit and gun sight screen were added, the masking taken off the clear bits, and the seat installed. Then the canopy was glued in place and the kit was done.
| CONCLUSIONS |
It was a bit more of a fussy build than I expected going into it, but it has been a long time since I've done a modern jet so perhaps I had just forgotten that they are all like that! The end result is quite pleasing and I know what to watch out for the next time I do a similar kit.
Kit courtesy of me
January 2004
# 1299 in a series
Copyright ModelingMadness.com. All rights reserved.
If you would like your product reviewed fairly and fairly quickly, please contact the editor or see other details in the