| KIT #: | 72142 |
| PRICE: | $16.95 from http://www.scale-model-kits.com |
| DECALS: | One option |
| REVIEWER: | Scott Van Aken |
| NOTES: | "Swifts" Aerobatic Team boxing |
| HISTORY |
The Mikoyan MiG-29 (Russian:
Микоян МиГ-29)
is a 4th generation jet fighter aircraft
designed in the Soviet Union for an air superiority role. Developed in the
1970s by the Mikoyan d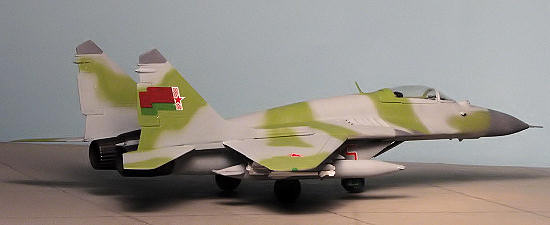 esign bureau, it entered service with the Soviet Air
Force in 1983, and remains in use by the Russian Air Force as well as in
many other nations. NATO’s reporting name for the MiG-29 is "Fulcrum", which
was unofficially used by Soviet pilots in service. It was developed to
counter new American fighters such as the F-16 Fighting Falcon, and the
F/A-18 Hornet.
esign bureau, it entered service with the Soviet Air
Force in 1983, and remains in use by the Russian Air Force as well as in
many other nations. NATO’s reporting name for the MiG-29 is "Fulcrum", which
was unofficially used by Soviet pilots in service. It was developed to
counter new American fighters such as the F-16 Fighting Falcon, and the
F/A-18 Hornet.
The MiG-29S-13 (product 9-13, NATO code-name Fulcrum C) is a nuclear capable
aircraft and the subject of this kit. It is similar to the MiG-29s purchased
by the US from the Moldovan AF as part of arms control in 1997. Most of
those have been scrapped though several are on display in various places in
the US. The MiG-29 is still in front-line service with dozens of countries
world-wide.
| THE KIT |
The
MiG-29 is not new to modelers. Both Hasegawa and Fujimi were quick to
produce kits once the actual aircraft was seen and photographed.
Unfortunately, both of those kits suffer from shape problems that come from
using photos as the sole references. While they both build into nice models,
to many, they are not the best around. Since then, others have produced
MiG-29s in 1/72 including Airfix/Heller and Zvezda. I've not heard any
commentary on those as frankly, Soviet/Russian aircraft are not high on the
'I must build one' list of
 most modelers.
This one from ICM is also not new, having been released several years ago,
but is of the Fulcrum C version that is currently in service. This has a
larger fuselage spine to hold more fuel and is the most noticeable
difference from the earlier Fulcrum A. ICM's kit is molded with nicely done
engraved panel lines and does not seem to be a very complex kit. Cockpit is
tub, bang seat, control stick and instrument panel. This latter item has
some nice raised detail. A clear two piece canopy/windscreen is also
provided, though there is no actuating mechanism to hold the canopy up if
you wish to display it as such. Again, this is typical.
As you'd expect, the fuselage is split into upper and lower sections. The
flying surfaces are all single molds and slot into the fuselage. Intakes fit
into the underside of the fuselage and the greatest probability of fit
issues would be with these intakes. The MiG-29 has covers over the intakes
when operating on the ground and this is provided. To do an 'in flight'
aircraft, considerable work would be needed to remove the already open upper
fuselage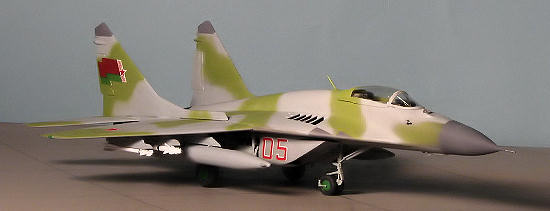 intake doors and replace them with card. I should also mention that
the kit has nicely detailed wheel wells, which is a nice change from the
usual blank holes.
intake doors and replace them with card. I should also mention that
the kit has nicely detailed wheel wells, which is a nice change from the
usual blank holes.
The kit comes with a goodly number of stores, but as this is an aerobatic
boxing, those are shown as not used, aside from cutting the pylons from the
long range tanks. Instructions are a single folded sheet of paper with half
of it devoted to painting and markings. There are well drawn if a bit small
illustrations and a parts layout. Model Master and AKAH paint references are
provided. The lone markings option is for one of four of the 'Swifts'
aerobatic team. The well printed sheet provides the outline for the upper
and lower surfaces and the modeler is to fill in the blanks, so to speak. As
you can see from the box art, it is a very fetching scheme, but perhaps most
will use this kit as a basis for a more war-like color scheme.
| CONSTRUCTION |
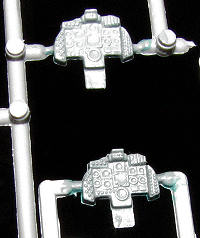 I built this kit concurrently with the Italeri Fulcrum
A kit and noticed that there was much commonality between the two as you can see
by the image of the two instrument panels. Though the
ICM kit is in some ways identical to the Italeri version, they are distinctly
different. In fact, building the Italeri kit allowed me to see how some parts
fit. ICMs instruction sheet is also quite small and at time difficult to make
out what goes where, so I reverted to the Italeri sheet for help.
I built this kit concurrently with the Italeri Fulcrum
A kit and noticed that there was much commonality between the two as you can see
by the image of the two instrument panels. Though the
ICM kit is in some ways identical to the Italeri version, they are distinctly
different. In fact, building the Italeri kit allowed me to see how some parts
fit. ICMs instruction sheet is also quite small and at time difficult to make
out what goes where, so I reverted to the Italeri sheet for help.
First thing I did was the subassembly thing. This meant cockpit and intakes. The cockpit is fairly well done, though the seat is somewhat indistinct. Attaching the main instrument panel was a bit of a challenge as well. In fact, it fell into the airframe several times before I put on the canopy section. Fortunately, it was easy to fish out. I left off the seat until much later. There was some confusion on my part as to how the inlet covers actually fit. I originally put them in backwards thinking the two large ejector pins on the inside of the intake were guides. This was not the case and removing them to put in the proper way later caused some damage that I did not repair. The nose well has a separate upper well piece that was cemented in place. The main and nose well detail is exactly like on the Italeri kit in every regard. I also glued a bit of weight in the nose, just in case, though it seems it isn't needed.
 With the tub done, it was glued in place and the
fuselage halves cemented. Fit here was fair in the rear and poor in the front. I
had to use clamps to hold the forward sections in place. These were also needed
at the extreme rear of the fuselage. Eventually, all was glued in place and dry.
A considerable amount of sanding and filler is needed on the joins, especially
on the nose area. The sides also need to be sanded flat to accept the tail
planes and wings. Engine intake pieces were a particularly poor fit and needed
much sanding, grinding and filler. Eventually they were done and the engine
cooling intakes put on in where I hope they belonged. Once that has been accomplished, the one piece wings and tail
planes can be glued in. Fit of these is not bad, but one does need filler on the
wing/fuselage join. As there is no stub wing, one has to be careful of
alignment.
With the tub done, it was glued in place and the
fuselage halves cemented. Fit here was fair in the rear and poor in the front. I
had to use clamps to hold the forward sections in place. These were also needed
at the extreme rear of the fuselage. Eventually, all was glued in place and dry.
A considerable amount of sanding and filler is needed on the joins, especially
on the nose area. The sides also need to be sanded flat to accept the tail
planes and wings. Engine intake pieces were a particularly poor fit and needed
much sanding, grinding and filler. Eventually they were done and the engine
cooling intakes put on in where I hope they belonged. Once that has been accomplished, the one piece wings and tail
planes can be glued in. Fit of these is not bad, but one does need filler on the
wing/fuselage join. As there is no stub wing, one has to be careful of
alignment.
The fins are separate and include the chaff/flare dispenser extensions. These are not the greatest fit and there is no guide as to how straight the fins need to be. During the usual sand, fill, repeat, I assembled the burner cans and exhaust. I also cleaned up the landing gear in preparation for paint. Then the canopy and windscreen were attached. The canopy section is a little tall in the rear. I did not use filler to match them up. Once installed, these were masked with Tamiya tape and it was off to the paint shop.
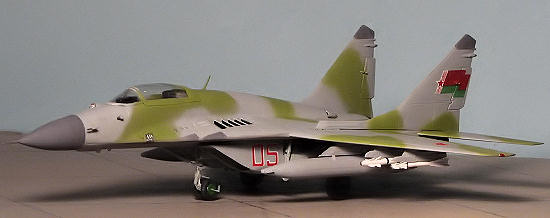
| COLORS & MARKINGS |
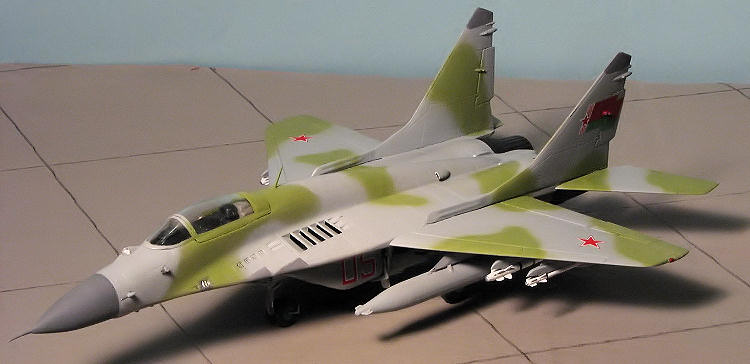
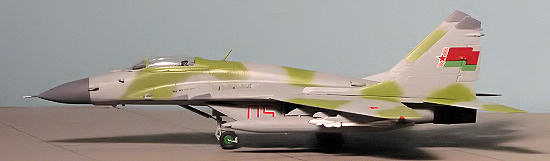
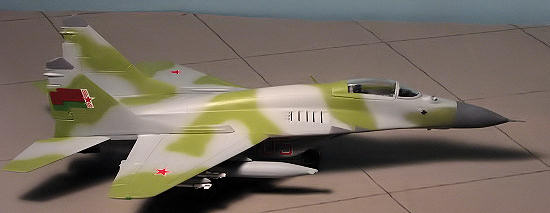
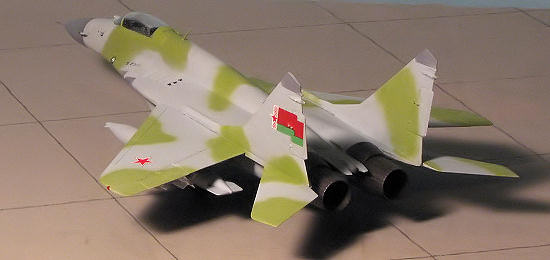
First thing was to choose a scheme. In the latest decal sheet from Authentic Decals, there are a number of nice options. I chose the one for the Belorussian Air Force in grey and green. First step was to paint the nose cone in a dark grey. The instructions call for Dark Sea Grey and FS 36118 is a very close match for that color. I used some of my old Aeromaster Acrylic for this. When dry, it was maked off and the entire airframe was given a coat of FS 36375 light grey. This was also sprayed on the outer gear doors while the bits were still on the sprue. The landing gear legs and inside gear doors got Aircraft Grey, which is the same as ADC Grey.
 Then the exhaust and the upper exhaust flaps were
painted with Alclad II Jet Exhaust. The upper flap sections were then masked.
Grabbing my Skybow AB-100 detail brush, I painted the camouflage with FS 34258
as called out in the instructions. Actually, the instructions give a Model
Master paint number (2029) and that is what it turned out to be. Frankly, it may
not be accurate, but one can never tell. It is pretty green and doesn't look
that bad. Besides, who is to say. The instructions provided no upper surface
camo scheme so I winged it. Anyway, with it dry, I masked off the airframe
around the fin antennas and those on the leading edge of the chine. These were
painted 36118.
Then the exhaust and the upper exhaust flaps were
painted with Alclad II Jet Exhaust. The upper flap sections were then masked.
Grabbing my Skybow AB-100 detail brush, I painted the camouflage with FS 34258
as called out in the instructions. Actually, the instructions give a Model
Master paint number (2029) and that is what it turned out to be. Frankly, it may
not be accurate, but one can never tell. It is pretty green and doesn't look
that bad. Besides, who is to say. The instructions provided no upper surface
camo scheme so I winged it. Anyway, with it dry, I masked off the airframe
around the fin antennas and those on the leading edge of the chine. These were
painted 36118.
I then cleaned up the gear legs and installed them. The airframe was then given several coats of Future to gloss things up. The gear on this kit are quite scale and quite flimsy looking. I doubt that the nose gear will survive much handling. The little wheel attachment stubs are also out of alignment with each other and this would cause some problems later.
While cleaning up the nose probe, I broke it. Rather
than make a new one, I took the section that was left and stuck it on the
radome. This was then blended in with some filler and the radome repainted. I
also took the time to ensure that the wing pylons would fit. All the holes in
the wing needed a bit of enlarging to fit the pyl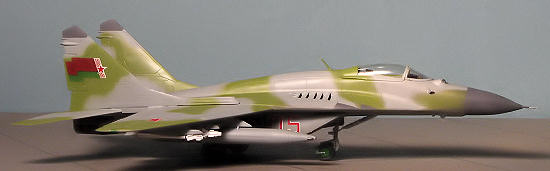 on stubs.
I had never used Authentic Decals before so was interested in how they performed. They are very thin and prone to tearing. On those markings not backed up with white (as in the fin flags), the colors are somewhat transparent and will darken when put on dark backgrounds. The overlap of the red and green on these decals shows as a dark line. I had to use setting solution on the fin decals to get them to snuggle down over the rudder actuator hinges. For this I used Microsol. It failed. I then put on some Solvaset. It worked after a fashion. As I was running out of time to get this done, I decided not to use any of the stencils as it would have added a week to the build. The airframe was then sprayed with a clear matte acrylic and left to dry for a day.
| FINAL CONSTRUCTION |
As always with jets, there are a lot of additional
bits. I started with the wheels which had been painted using Humbrol #3 green
for the hubs and Floquil's weathered black for the tires. Oddly, one main tire
had a raised hub on the back and the other had it sunken down (and a pain to
paint). Though the nose wheels were keyed, they were keyed exactly the same
which meant that if
 installing
them according to the key, one would have the splash guard to the front. It
didn't help that the front axle was skewed fore and aft and up and down. It
required one of the nose wheels to be rather severely sanded down so both would
touch.
installing
them according to the key, one would have the splash guard to the front. It
didn't help that the front axle was skewed fore and aft and up and down. It
required one of the nose wheels to be rather severely sanded down so both would
touch.
Gear doors were not that difficult to install, but again, the small instructions made proper placement somewhat difficult. The engine intakes were so close to the nose well and the doors would not fit properly on the edge of the well. Obviously I had placed the intakes too close when gluing them in place.
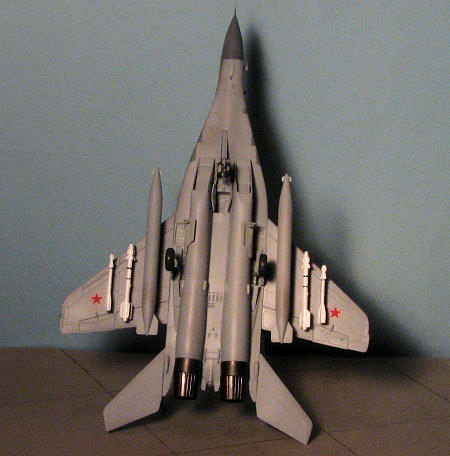
Getting closer to done so I glued on the outer four wing pylons and removed the masking from the clear bits. The missiles had been painted white and black bands put around them to give them some interest. As I was using the fuel tanks, I only attached the R-60s and R-73s. At least that is what they look like to me. The R-27s were left off. Installing the three pitot tubes was fun as was the radio mast, and the IR seeker was glued in place using clear gloss paint. The usual touch up painting was done and so was I.
| CONCLUSIONS |
 As many of you
know, I don't usually build modern jets. This ICM kit was not the cleanest build
I've done, but not really bad, either. I do have to say that I relied on the
Italeri instructions quite a bit as the ICM ones were small and not that clear.
I wasn't as happy with the AD decals as I'd have liked, thanks to them not
backing all the colors in white. In my opinion, in this day and age, there is no
excuse for transparent colors on an aftermarket decal sheet. I have no beef
about the thinness of them as one just has to be careful with them.
As many of you
know, I don't usually build modern jets. This ICM kit was not the cleanest build
I've done, but not really bad, either. I do have to say that I relied on the
Italeri instructions quite a bit as the ICM ones were small and not that clear.
I wasn't as happy with the AD decals as I'd have liked, thanks to them not
backing all the colors in white. In my opinion, in this day and age, there is no
excuse for transparent colors on an aftermarket decal sheet. I have no beef
about the thinness of them as one just has to be careful with them.
The end result is an aircraft of an air force that isn't in everyone's collections. It is also, to my knowledge, the only Fulcrum C around in this scale (though I'm sure I'll be corrected if this isn't the case) and any competent modeler can produce a nice replica with it. Best of all, the kit is reasonably priced and comes with a full set of weapons and stores. If there are any major glitches in the kit, I didn't see them aside from the Fulcrum A instrument panel, and really, I don't care as it looks like what it is supposed to be.
| REFERENCES |
May 2009
Copyright ModelingMadness.com. All rights reserved. No reproduction in part or in whole without express permission from the editor.
My thanks to http://www.scale-model-kits.com for the review kit. Get this and many other great kits at great prices.
If you would like your product reviewed fairly and fairly quickly, please contact the editor or see other details in the Note to Contributors.