Aeroclub 1/72 Pilatus PC-7
|
KIT # |
|
|
PRICE: |
$12.95 |
|
DECALS: |
See Review |
|
REVIEW : |
|
|
NOTES: |
Short Run injection molded |
|
HISTORY |
 Looking for an
aircraft to replace its older Pilatus P-3 piston powered trainers, the Swiss Air
Force contacted Pilatus about a more modern version that would fit into the
training scheme and provide students with experience flying an updated aircraft.
The result was the turboprop powered PC-7.
Looking for an
aircraft to replace its older Pilatus P-3 piston powered trainers, the Swiss Air
Force contacted Pilatus about a more modern version that would fit into the
training scheme and provide students with experience flying an updated aircraft.
The result was the turboprop powered PC-7.
The aircraft is fully aerobatic with a top speed of 310 mph. It is powered by a 550 hp PT6A-25A turboprop that is very reliable and fuel efficient. The PC-7 has enjoyed quite a bit of success in the world trainer market being sold to such diverse countries as France, Guatemala, Burma and Bolivia amongst others.
|
THE KIT |
 The PC-7 kit is one
of Aeroclub's earlier short run releases. Like these kits, it is a real
multimedia production including injected plastic, vacuformed plastic and metal
parts. The only vac piece is the canopy, which is very well done, but of which
there is only one. The major airframe; wings, fuselage halves, cockpit floor,
fin, tailplane and a couple of miscellaneous parts, are injected plastic. In
fact, the wings and tailplane are a single piece. The pieces are well cast and
have minimal flash with no sink marks or ejector pin marks. The gates are very
large so it is best to remove the bits with a razor saw. The rest of the pieces
like the interior bits, landing gear, exhaust and prop are in metal. The prop on
my example was rather poorly done with lots of pits as was the spinner.
The PC-7 kit is one
of Aeroclub's earlier short run releases. Like these kits, it is a real
multimedia production including injected plastic, vacuformed plastic and metal
parts. The only vac piece is the canopy, which is very well done, but of which
there is only one. The major airframe; wings, fuselage halves, cockpit floor,
fin, tailplane and a couple of miscellaneous parts, are injected plastic. In
fact, the wings and tailplane are a single piece. The pieces are well cast and
have minimal flash with no sink marks or ejector pin marks. The gates are very
large so it is best to remove the bits with a razor saw. The rest of the pieces
like the interior bits, landing gear, exhaust and prop are in metal. The prop on
my example was rather poorly done with lots of pits as was the spinner.
The instruction sheet is a three view of the aircraft and a generic verbal description of construction. Fortunately, there isn't much to the kit so it is adequate. There are decals for three versions; two Mexican AF and one Dutch. The Dutch version is quite colorful as is one of the Mexican aircraft. The other Mexican PC-7 is in camouflage. The decals are well printed, though a trifle thick.
|
CONSTRUCTION |
 Construction
is very straightforward and poses no real problem. However, due to the nature of
the kit, you will have to do quite a bit of work to get the wing to fit. This is
because the fuselage cutaway is too shallow for proper fitting. I had to do a
great deal of work with a large file to get to where the wing would properly
fit. The same to a lesser extent for the tailplane.
Construction
is very straightforward and poses no real problem. However, due to the nature of
the kit, you will have to do quite a bit of work to get the wing to fit. This is
because the fuselage cutaway is too shallow for proper fitting. I had to do a
great deal of work with a large file to get to where the wing would properly
fit. The same to a lesser extent for the tailplane.
Fitting the interior is a bit of guess work as to proper parts placement. However, if one sets in the seats and then installs the rest of the interior around them, a good fit can be had. The interior was painted dark gull grey with black above the sill level. The seats were painted black with orange cushions.
Before gluing the fuselage together, I put as much weight as I could in the front to help keep it from tail-sitting. Once the airframe was together and puttied up (you will use quite a bit on the wing fuselage join on the underside), the canopy was cut out of its backing and glued in place. Then the kit was prepped for painting.
|
PAINT & DECALS |
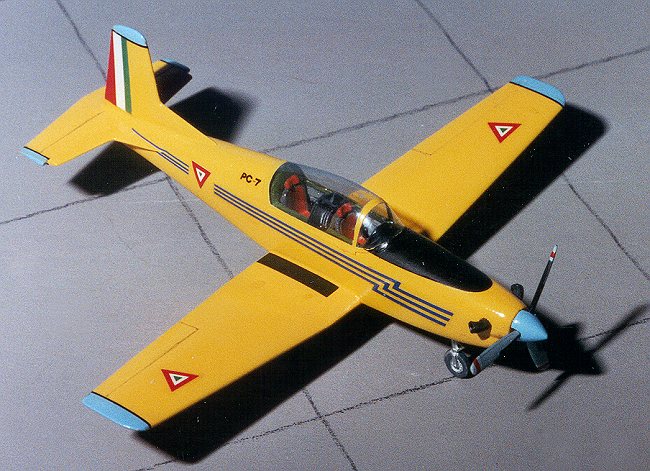
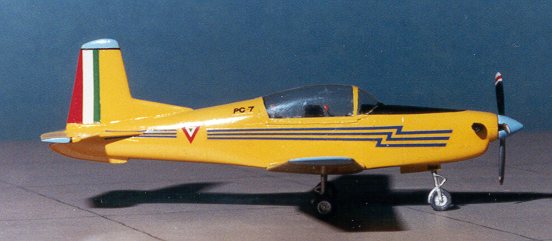
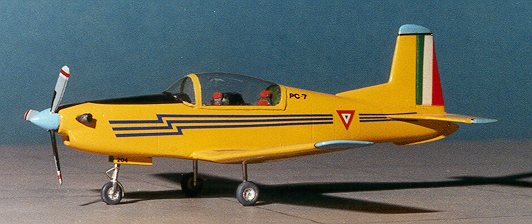
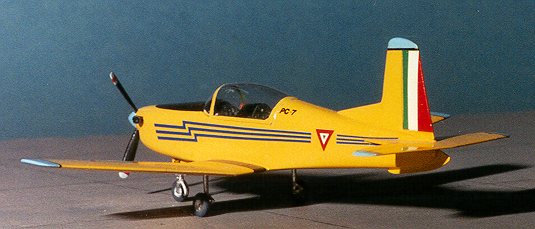
Since I had chosen the overall yellow Mexican AF scheme with light blue tips, the first step was to get a nice, overall gloss white finish on the aircraft. This is needed as yellow is a rather transparent color. The metal spinner was also painted white at this time. The entire airframe was then painted gloss yellow using Testors Model Master enamel paint. When that was dry, the tips of wings, tail and tailplanes were painted light blue. I used a lacquer paint designed for RC car bodies for this and it went on well. This light blue was also painted on the spinner.
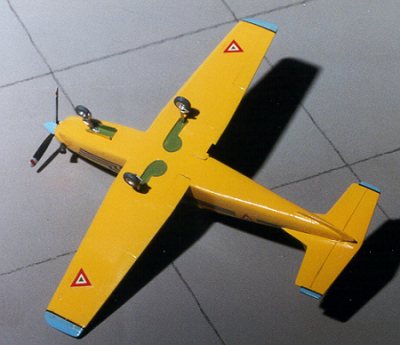
 After it had all dried, the wheel
wells (which are very shallow) were painted chromate green. Looking back, I
should have used chromate yellow instead, but I didn't know any better. The
unpainted metal gear legs were then superglued into place. Fortunately, I had
enough nose weight to prevent tail sitting!
After it had all dried, the wheel
wells (which are very shallow) were painted chromate green. Looking back, I
should have used chromate yellow instead, but I didn't know any better. The
unpainted metal gear legs were then superglued into place. Fortunately, I had
enough nose weight to prevent tail sitting!
Then it was on to the decals. As I mentioned, I did a yellow Mexican AF version. This includes nice rudder stripes in addition to insignia and a neat fuselage flash. The decals went on very well. The light blue areas were delineated using Scalemaster black stripes.
Final construction consisted of making some card nose gear doors, gluing on the main wheels, exhaust and prop. The prop was painted light grey with a black backside. The tips were painted white and a red decal stripe was used for the red warning band. The black de-icing boot on the blade is a small section of decal. Also a decal is the nose anti-glare panel and wing-walk strips. These areas were sprayed with matte clear to tone down the gloss as would be appropriate.
The end result is a very nice little model of this popular trainer.
|
CONCLUSIONS |
To say that this was a simple kit to build would be a bit of a misnomer. The problems getting the wing and tailplane to fit as well as the sketchy instructions takes this kit out of the realm of the beginner and into that of the more experienced modeler. Having said that, those with some experience concerning short run kits should have no problems with the kit at all and will be pleased with the result.
Copyright ModelingMadness.com. All rights reserved. No reproduction in part or in whole without express permission from the editor.
Review kit courtesy of me and my wallet!
If you would like your product reviewed fairly and fairly quickly, please contact the editor or see other details in the Note to Contributors.
Back to Reviews Page 2016