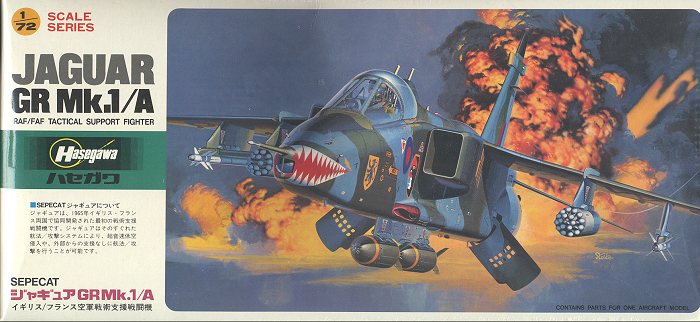
Hasegawa 1/72 Jaguar GR.1/A
| KIT # | E-23 |
| PRICE: | $7.00 back in 1985 |
| DECALS: | Three aircraft |
| REVIEW : | |
| NOTES: |
|
| HISTORY |

Back in the late 1960's the British were in need of a dedicatedground attack aircraft to replace the Hunters and Phantoms that were currentlyproviding that need. Especially the Hunters, as they were getting very tired.That would then free up Phantoms for the air defense role.
Getting together with the French, who also needed a similaraircraft, the Sepecat corporation was founded to build what then became theJaguar. The aircraft were built in both France and the UK, because as similar asthe airframes were, each country had a lot of specific equipment that theywanted installed in their respective aircraft. The French version became theJaguar A and the British one the GR.I. Jaguars have been exported to Ecuador andto Nigeria.
Both countries are still using the Jaguar. At one time they werequite prevalent with the British alone having eight squadrons of the aircraft.That has now been pared down to three as defense drawbacks have taken it toll. Asimilar story with the French, though not quite to the same level as theBritish.
The aircraft has acquitted itself quite well in combat. TheFrench have used it in Chad and during the Gulf War. The British have hadsuccess with it during the Gulf War and also during the myriad of conflicts inthe Balkans. Frankly, the aircraft is very good and what it does and will bedifficult to replace, though a replacement will soon be needed.
| THE KIT |
 Hasegawa's Jaguar was one of many kits produced in a burst of enthusiastic kitproduction in the mid 1980s. It was one of the kits that heralded in the era ofengraved panel lines to the model industry. It is in typical medium grey plasticand the detailing is what one expects from the premier 1/72 aircraft modeler inJapan.
The aircraft can be built as either a British GR.I or a French Jag A. This isbasically a change in nose, a different tail, as well as some differences inordnance. There is no clear bit for the rangefinder in the nose of the Britishversion, which is a shame. It can be drilled out or duplicated by black.
The cockpit is no different from today's Hasegawa 1/72 offerings. It is adequateand has decals for the instrument panels and side consoles. The seat looks thepart, though the fastidious will want to replace it with something from theaftermarket gang.
Decals with this boxing are for three aircraft. One is for a 54Sq RAFaircraft and is shown on the box top resplendent with its shark mouth. TheFrench version is from EC 4/11 and is in the European scheme of green/grey oversilver. The final marking is for the Jaguar International demonstrator, which isbasically a GR.I.
| CONSTRUCTION |
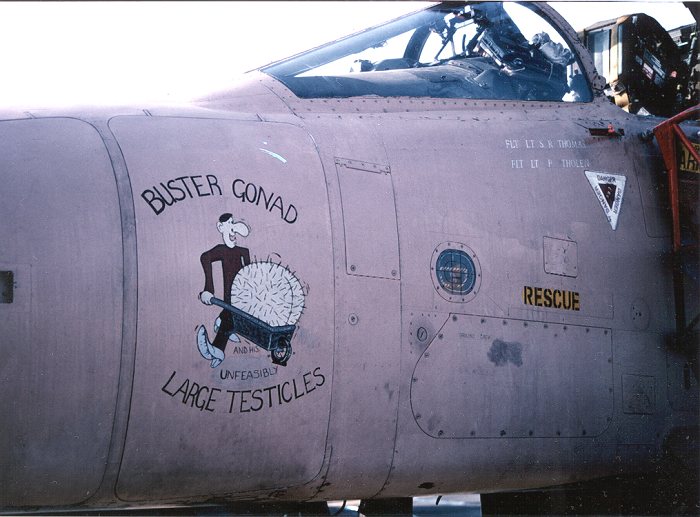
The general fit of the aircraft is good, though there area few areas that need your attention when you get to it. To set the stage a bitfor you, this kit was completed in February 1992. This was about a year afterthe end of the Gulf War. A bunch of very nice decal sheets had been released byModeldecal and Xtradecal that featured lots of British aircraft, complete withthe great nose art of the time. As you might imagine, I was quite taken by allthis and during a bit of a building frenzy, completed this Jaguar, a Buccaneer,a Tornado and a Hercules in 1/72, all with nose art! Haven't done a 1/72Gulf War kit since!!
 OK, now back to building the kit. There arebasically three areas that will give you some trouble. They are the intakes, thewing and the underfuselage section. As it typical with modern jets that haveside mounted intakes, I have found it nearly impossible to get them to fitwithout needing to sand or use filler to get them to match up to the surroundingfuselage. Though there is no ducting past the intakes, they are deepenough to be convincing.
The wing is shoulder mounted so includesa section of the upper fuselage spine in it. This area also needed filler to geta smooth fit. It isn't a major pain, but one that does need careful fitting. I'msure that most of you can get this to fit with no trouble.
Probablythe most difficult part is the section that fits between the two engines on theunderside. I had nothing but trouble with this. Try as I might, I could not geta smooth fit. The result was the need for lots of filler and sanding. It isfortunate that there isn't that much detail on this piece, so not much was lost.The ventral strakes also fit right on the seam so that helps to cover thingsup.
The rest of the kit is very straightforward. The fit ofthe tailplanes is so good that I have never glued mine in! I should also mentionthat this kit has a separate canopy and windscreen so you can pose it with thecanopy open. The landing gear fits quite well, though the main gear is a bitfiddly and needs to be checked often to make sure everything lines up well.
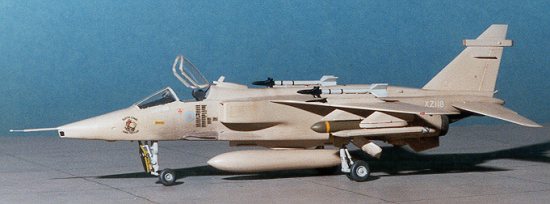
Sowhat were the parts, you ask. First of all, I needed a centerline fuel tank asnone are supplied in the kit. This tank came from Kit Bits. Next, I needed somewing pods. The ALQ jamming pod and the Phimat pod (at least, that's what I thinkit is) were also from Kit Bits. The cluster bombs were from the Airfix weaponsset. There are some ALE-40 chaff/flare dispensers that were from Aeroclub.Finally, the upper wing missile rails were from Aeroclub. Yes, there are railssupplied in the kit, but I stupidly bought aftermarket ones so used them! To install the upper wing rails, the wing fences must be removed. Finally, someSidewinders were scrounged from the spares box. The kit only supplies FrenchMatra a-a missiles, which the Brits don't use.
Placing all thatstuff wasn't a problem, thanks to the instructions given in the decal sheet.More on that in the next section.
| PAINT & DECALS |
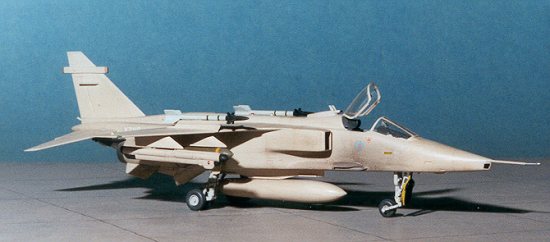
Painting this puppy is really a lesson is simplicity. Theinterior is dark grey, the wheel wells and door interiors are painted yellowzinc chromate and the struts are painted aircraft grey. The rest of the plane ispainted Gulf War Pink using Xtracolor paint. OK, there are a few otherdifferences. For instance the exhaust cones are painted Burnt Iron, as are thecannon housings, and the underside of the aft fuselage. The outer part ofthe nose gear door is painted black as is the laser seeker window. A section ofdecal was used for the rest of the false canopy behind the main gear door.
Oncethe kit was decaled (if you recall, most Xtracolor is gloss so no need for aprior gloss coat), it was then given an overall matte finish. On this finish,the panel lines were outlined with pastels. Also, pastels were used for the gun stainsand some other general grunge. The Gulf Pink deteriorated rapidly in use andbecame really filthy in just a few days of operation. All of that was sealed inand this section was done.
Final assembly basically consisted of unmasking the canopy and installing thevarious under and over wing things. I used the kit pylons for the lower wings.Just removed the mounting lugs.
| CONCLUSIONS |
I think that everyone should have at least one or two Gulf War models. I knowthat this happened 10 years ago, but it was an undertaking that saw the last useof several types as well as some very cool nose art. I for one am quite happywith the kit as it turned out. The Hasegawa kit is a good one and isinexpensive. The rest of the bits should be relatively easy to come by.
| REFERENCES |
Aircraft of the Royal Air Force since 1918, by OwenThetford, Putnam, 1979
Review kit courtesy of me and my wallet!
Copyright ModelingMadness.com. All rights reserved. No reproduction in part or in whole without express permission from the editor.
If you would like your product reviewed fairly and fairly quickly, please contact the editor or see other details in the
Back to Reviews Page 2023