Italeri 1/72 Hawk T.1A
Kit Number: 186
Price: $7.50
Media: Injected plastic
Decals : three aircraft : Swiss, RAF, Zimbabwe?
Date of Review: 29 March, 1996
Comments: I have built several other 1/72 Hawk kits, two Fujimi, an Airfix, and a Matchbox. Of the three, the Fujimi kit was the better, although not by that much over the Airfix. Since then, I have waited for a better and more detailed kit. When I saw some Italeri kits on sale, I bought three Hawks.
What did I get? When I opened the box, I discovered several trees of delicately engraved white plastic and a crystal clear canopy. Things looked good. Further inspection revealed an incredible number of parts for such a small kit. Undaunted, I began the assembly. The interior is very complete with pretty decent seats, instrument panels, joy sticks and a clear windscreen between the seats. The only problem I had with construction came when it was time to glue the fuselage together. Probably due an error on my part, I had trouble getting the nose section to line up properly. This could have been due to the weight I had to add or misalignment of the interior. Anyway, there it was an the only way to fix it was through some sanding and puttying.
The engine intakes fit very well requiring little adjustment. The wings did need a little attention at the front edge, but nothing major. There are four tiny stall strips that need to be added to the wing and the wing fences are also separate, but are easy to install. Another separate item are the six flap actuating hinges. the fit is great, unfortunately, the holes are a bit larger than they need to be so you are left with a bit of a problem. Fortunately, they are on the underside where only the nosey will look. The other bits; landing gear, antennas, fuselage strakes, fuselage gun pod, and missiles went on without a struggle.
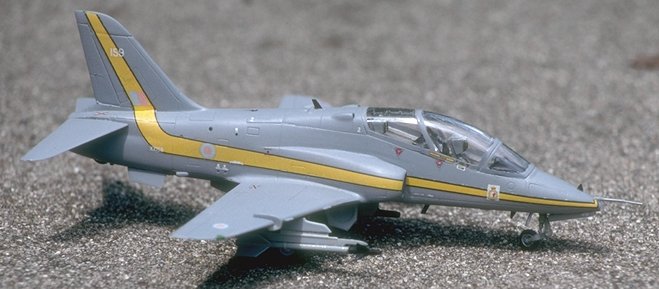
I had decided to use aftermarket decals on this one, so went to my trusty Modeldecals for inspiration. I decided on a TWU display scheme from the late 1980's which consisted of a grey Hawk with a nice yellow stripe down the fuselage and a yellow 'V' under the wings. In order to get the decals to fit properly, it was necessary to fit the gear doors in the closed position, apply the decals, and then cut the decals as I removed the doors. It worked perfectly. It also required me to leave off the center flap hinge and paint that yellow to match the decal prior to installing. Although the display aircraft was most often seen without armament, I added the gun pod and Sidewinders just to make the Hawk look warlike.
Although the kit is a bit fiddly in places, I would recommend this to anyone who wants a proper Hawk.