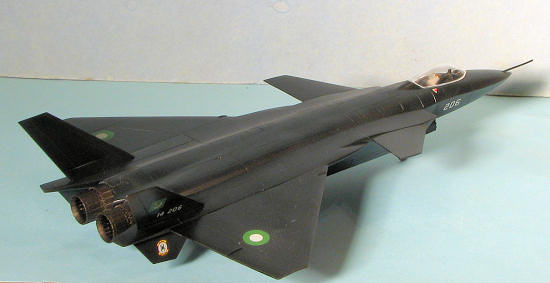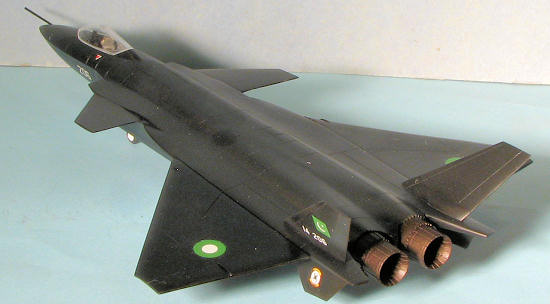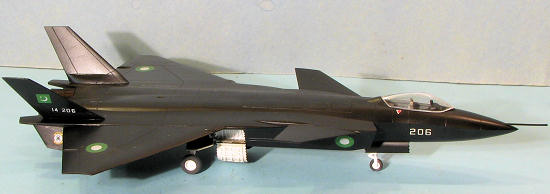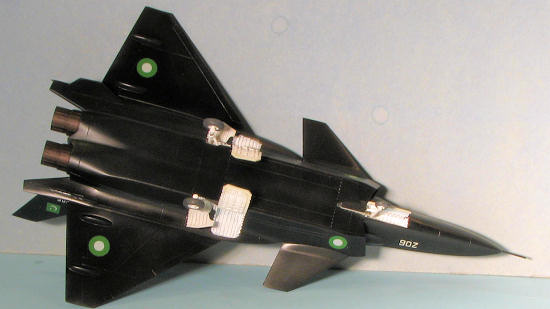
Anigrand 1/72 Chengdu J-20
| KIT #: | AA-2102 |
| PRICE: | $90.00 SRP |
| DECALS: | One option |
| REVIEWER: | Scott Van Aken |
| NOTES: | Full resin kit |

| HISTORY |
 In late 1990s, the Chinese People's Liberation Army Air Force launched the stealth fighter program, Western intelligence applied the codename J-XX. The Chengdu Aircraft Industry Group was selected to be the main contractor for the development. In 2009, the China Air Force commander confirmed that the development of the stealth fighter prototype that designated J-20 was ongoing. No any imagery's of the J-20 prototype came out until it underwent high speed taxing tests in late 2010, considering that the program was kept in high secrecy. The J-20 made its first flight on 11 January 2011. The PLA have not disclosed the engine type. There are claims that the Russians supplied super-cruise capable 117S series engines. As the engine nozzles were clearly non-stealthy, this may be due to the fact that the final "fifth generation" engines had not been completed. The J-20 is expected to use a AESA radar, which should have Low Probability of Intercept modes. The U.S. Department of Defense expects China to have the production fighters in service between 2020 and 2025.
| THE KIT |
This is the first kit of this aircraft in 1/72 scale and I have to say that this is one of Anigrand's best. The kit is not complex consisting of two fuselage halves, a cockpit with a seat (that looks too small to my eyes), detailed gear bays and gear doors with the proper serrated edges that all stealthy planes seem to have, and a nicely done exhaust nozzle There are no large pour stubs anywhere on this kit as Anigrand has removed those for you so only minimal clean up is needed. I've test fit some of the parts on this kit and the fit is just superb. With great fit like that, building it will be a real pleasure. Moving on with the kit bits, the landing gear are somewhat generic and the nose gear has the wheel molded in place. The kit has a very nicely done canopy that is probably resin as well and one of the clearest resin canopies I've seen.
Instructions are rather basic and easy to follow. It is basically a matte black jet with a grey interior and white wheel wells. Annigrand recommends painting the gear legs and wheels in white. The decal sheet is basically two sheets from which you pick the markings that are appropriate. I have to say that to me, it looks like the decals are too small for 1/72 scale and more like 1/144 scale.
| CONSTRUCTION |
First of all, let me mention how impressed I am with the quality of this kit. It is a far cry from what Annigrand was producing just a few years ago. No molding glitches, no pour stubs, and outstanding fit. In fact, I've not built a resin kit that fits any better than this  one. Once the small bits where the pour stubs attach were sanded off, it fit better than the majority of injected kits I've built.
First order of business was to find some weight for the nose. Nothing is mentioned about needing it in the instructions, but I've always gone on the side of caution when it comes to weight so added some. I then started to glue the fuselage halves together, then remembered that there is an interior! This was quickly prepped and glued in place before the fuselage was assembled. With all that large, flat area, it was inevitable that there would be a need for filler and so I used super glue, followed by accelerator and then sanding. A final application of standard filler was used to take care of any holes or depressions in the super glue. This is a great time to paint the interior of the intakes. I used black, though it may well be white.
Then the intakes and the small strakes at the rear that contain the vertical stabs were glued in. Again, a superb fit. This was followed by the wings, then the ventral fins and the vertical stabilizers. I then cleaned up the small flecks of pour stub from the rest of the parts and headed for the paint shop.
| COLORS & MARKINGS |
 So, how do you feel about black? Well, like its 1/144 cousin, this one was painted overall X-18 Tamiya black. Same shade was used for the outer gear door covers. When that was dry, I painted the inside of the doors in white along with the gear legs and the wheels. The two piece exhaust was cemented together and painted Alclad II Exhaust Manifold, though perhaps their Gunmetal might have been a better choice as it is darker. When done, the wheel wells themselves were brush painted white using Citadel Acrylics and the cockpit was painted a dark grey. The bang seat was painted dark grey as well with OD cushions.
| FINAL CONSTRUCTION |
At this time, I cemented in place the landing gear and the wheels. Fit is very good, though it would be prudent to slightly open up the attachment holes for a better fit. Since the kit decals were so undersized, I thought I'd look for something a bit different. As China and Pakistan have cooperated together on a number of different aircraft projects, I thought that perhaps this might be a good tie-in. I have an old PAF decal sheet from a 1981 issue of Scale Aircraft Modeling that I'd never used. Now I realize that this aircraft may well require all low viz insignia and serials, but that would make for a rather boring presentation. So I used the hi-viz decals from the SAM sheet and chose 26 Squadron 'Black Spiders' as being appropriate for this plane. 26 Squadron is currently flying one of the PAF's newest aircraft, the JF-17 Thunder, so is unlikely to switch to a new airframe so quickly, but this is the fun of the whiffer world. I cobbled together a bogus serial, applied the now 30 year old decals (which worked great though took a while to get off the backing) and when dry, had a coat of semi-gloss sprayed on to hold things in place.
I then glued on the gear doors. The exhaust were next and finally the nose probe. I accidentally removed a piece that sticks up thinking it was a mold remnant. It is not. The canopy needed a bit of trimming where the pour stub attached, but otherwise fit very well. Might want to make the large main gear doors the LAST thing you glue on as I knocked them off a number of times while handling the aircraft.
| CONCLUSIONS |
 This is by far the best fitting kit that Anigrand has yet produced. Not only was I able to finish the kit in a short time (more rapid modelers than I can have this finished in under a week), but it required minimal filler (most of it the fuselage join). If you are into prototype or just cool looking aircraft, then I can most highly recommend this one to you.
| REFERENCES |
www.anigrand.com September 2011
Copyright ModelingMadness.com. All rights reserved. No reproduction in part or in whole without express permission from the editor.
If you would like your product reviewed fairly and quickly, please
contact the editor or see other details in the