|
KIT # |
00076 |
|
PRICE: |
@$15.00 |
|
DECALS: |
See review |
|
REVIEW BY : |
|
|
NOTES: |
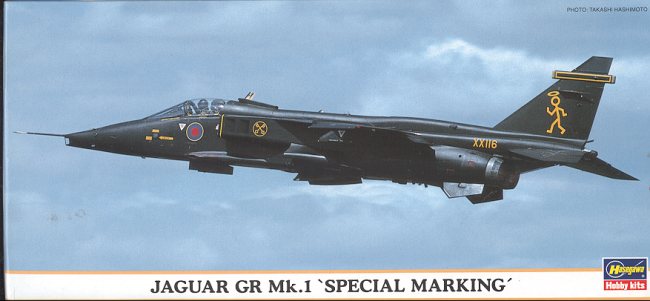
'Special Marking' |
|
HISTORY & KIT |

Please follow this link to get a look at what is in the box.
|
CONSTRUCTION |
As with most kits, the first thing I do is to look for subassemblies. Because of the way that the Hasegawa Jaguar is engineered, this is a simple task. However, several of them need to be prepainted. Those are the intakes and the cockpit parts. The intakes were painted gloss black and the interior given a coat of dark gull grey, as was the instrument panel and the control stick.
 The other subassemblies that can be put together are the main
fuselage and the nose. The fuselage has an insert on the bottom of it that is a
bit tricky to get into place. This is the third Hase Jag I have built and I
never seem to get a perfect fit on this part. Always needs some filler!
The nose is a piece of cake. I left off the nose probe until near the very end
to keep from breaking it off.
The other subassemblies that can be put together are the main
fuselage and the nose. The fuselage has an insert on the bottom of it that is a
bit tricky to get into place. This is the third Hase Jag I have built and I
never seem to get a perfect fit on this part. Always needs some filler!
The nose is a piece of cake. I left off the nose probe until near the very end
to keep from breaking it off.
Once the interior is dry, the decals for the instrument panel and side consoles are installed. These items are a bit too large for the area that they have to cover. You'll have to trim the console ones a bit. As for the instrument panel, I put it on and then let Solvaset curl it around. Once dry, the control stick and instrument panel were glued in place. Then the cockpit was glued into the cockpit section. This piece has an air conditioning section that has two antennas on it. It always needs filler
and is particularly difficult to get to. I do wish the two antennas were separate as it would make sanding much easier and I generally break at least one of them off. After the three fuselage sections have dried, it is time to
stick them together. To say that no filler was needed would be a major fib.
I ALWAYS need filler, though not really that much was required. It was then time
to glue on the intakes. Filler needed here as well. The tail was glued on. No
filler for this or for the underfuselage strakes. It was beginning to look like
an airplane.
After the three fuselage sections have dried, it is time to
stick them together. To say that no filler was needed would be a major fib.
I ALWAYS need filler, though not really that much was required. It was then time
to glue on the intakes. Filler needed here as well. The tail was glued on. No
filler for this or for the underfuselage strakes. It was beginning to look like
an airplane.
I then decided to glue the speedbrakes closed. While it was just
as often seen with them open as closed, I thought that it makes the aircraft
seem sleeker with them up. Fit of these wasn't the best as there were gaps,
indicating that the speedbrakes are a bit too small for the openings. I
 also had to trim off the lower
attachment arm as there was no room for it.
also had to trim off the lower
attachment arm as there was no room for it.
Once all that was taken care of, it was time to fit the upper wing. There were no real problems with this part. I had a pretty good match both fore and aft, though I did need some filler to smooth things out. The worst fit was the right rear section, but again, filler works wonders on these things. I also used some filler to take care of the gaps on the speedbrakes. This kit was building pretty much like the other two I have done. No real surprises.
I next fit the pylons to the wings. These fit quite well, but have no shackles on the underside. They look a bit odd without them and it wouldn't be fitting for a display bird to carry ordnance. I only wish that the kit came with drop tanks! Once that was done, the windscreen was glued on and the nose probe installed and cleaned up. Then the clear bits were masked and it was off to the paint shop.
|
PAINT & DECALS |
 This kit is rather easy to paint. No real need to do any major
masking on it. I mixed up a batch of Testors Model Master Gloss Black enamel and
gave the aircraft and gear doors a couple of light coats. In no time, the
kit was painted. The exhaust and gun ports were painted with Metallizer Burnt
Iron and when dry, the plane was nearly ready for the decals.
This kit is rather easy to paint. No real need to do any major
masking on it. I mixed up a batch of Testors Model Master Gloss Black enamel and
gave the aircraft and gear doors a couple of light coats. In no time, the
kit was painted. The exhaust and gun ports were painted with Metallizer Burnt
Iron and when dry, the plane was nearly ready for the decals.
Before going for the decals, I painted the gear bays and inside of the gear doors yellow chromate using the small bottles of Testors enamel. Then the landing gear struts, which had been painted a light grey, were glued in place. The main gear do not have a very positive locator so be careful when gluing them in. Once dry, the wheels were glued onto the struts. Now the kit was ready for decals.
Doing a special scheme like this generally means using kit decals. With the model glossy as can be, I anticipated no real problems with them. The yellow parts were backed up with white and there was no problem with the black bleeding through. However, not all was well. The yellow surround to the roundels was off register in my example, something you really can't see until you get the decals wet. Bummer. I know of no aftermarket source for these decals so will have to put up with the glitch. Once the decals were done, it was time to go back to finishing up the rest of the kit.
|
CONSTRUCTION CONTINUES |

 The horizontal
stabilizers just press fit in place. This is a feature common with the other
Hase Jags I had built. The gear doors were then glued in place. I drilled out
the landing lights on the nose gear door and installed MV lenses. They just look
better. Then it was time for the seat. I had forgotten about it until this
stage. The kit seat is, well, very plain. I looked through my stash of Aeroclub
white metal seats that I had bought years and years ago when I was heavily into
1/72 jets. It just happens that I had a Martin Baker Mk.9 as carried in the Jag.
You can see from the image that the detail is much better on the Aeroclub seat.
The kicker would be to see if the thing actually fit into the cockpit. Often I
find that these seats are either too wide, too tall or both! This one was both
so I settled for the kit seat.
The horizontal
stabilizers just press fit in place. This is a feature common with the other
Hase Jags I had built. The gear doors were then glued in place. I drilled out
the landing lights on the nose gear door and installed MV lenses. They just look
better. Then it was time for the seat. I had forgotten about it until this
stage. The kit seat is, well, very plain. I looked through my stash of Aeroclub
white metal seats that I had bought years and years ago when I was heavily into
1/72 jets. It just happens that I had a Martin Baker Mk.9 as carried in the Jag.
You can see from the image that the detail is much better on the Aeroclub seat.
The kicker would be to see if the thing actually fit into the cockpit. Often I
find that these seats are either too wide, too tall or both! This one was both
so I settled for the kit seat.
|
CONCLUSIONS |

This really is a super kit. Pretty easy to build, no real traumatic construction problems and it looks way cool when it is done. I must like it if it is the third one I've built! Recommended to all but the bare beginner.
March 2001
If you would like your product reviewed fairly and fairly quickly, please contact the editor or see other details in the Note to Contributors.