Arii 1/100 VF-1A Valkyrie
| KIT #: | A888 |
| PRICE: | 300 yen SRP. I have seen this kit offered on e-paid for as high as $50 (!!) |
| DECALS: | One option |
| REVIEWER: | Scott Van Aken |
| NOTES: | Includes display stand |
| HISTORY |
In the fictional Macross Japanese anime series and its English adaptation Robotech, the first mass-produced transforming aerospace fighter mecha is called the VF-1 Valkyrie. The VF-1 Valkyrie is referred to as a variable fighter in the series Macross, but this is changed to the term veritech fighter in the Robotech series.
 The VF-1 was created between 1980, and 1982 by Japanese mecha designer Shoji Kawamori with contributions by his Studio Nue partner Kazutaka Miyatake. The VF-1 Valkyrie was to be the centerpiece mecha design for the anime series The Super Dimension Fortress Macross which aired between 1982, and 1983. The McDonnell Douglas F-15 Eagle and Grumman F-14 Tomcat with its variable-sweep wing design, served as the main design inspiration of the VF-1. When it came to naming "Valkyrie" was used as a tribute to the real world XB-70 Valkyrie, which was an experimental supersonic strategic bomber developed in the United States in the 1960s.Contrary to popular belief, the VF-1 was created entirely by Kawamori and Studio Nue, without any involvement from Harmony Gold USA or Carl Macek.
I'll leave it to you to google Macross to learn more about the series.
| THE KIT |
 I originally bought this kit about ten years or so ago as it was inexpensive and I'd seen larger, much more expensive versions being offered. It sat, gathering dust (it was on the top of a stack) until one of the folks at IPMS Gateway loaned me his copy of the Robotech series. This was released in the US starting about 1985 and is very much old school anime. However, it is interesting to watch and, of course, features the VF-1 in its various iterations. The VF-1 is able to transform into various different modes including your standard battle robot. This kit does not provide any option other than the standard fighter.
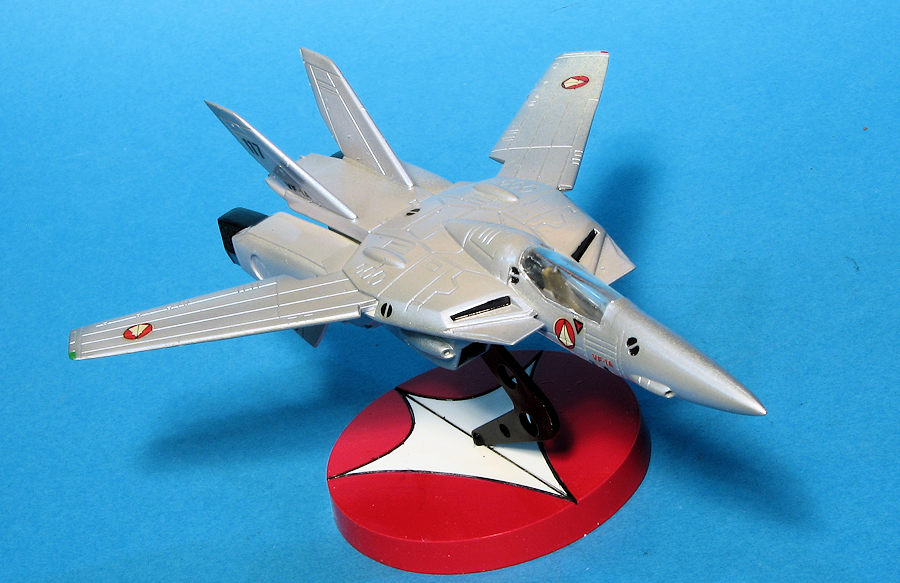
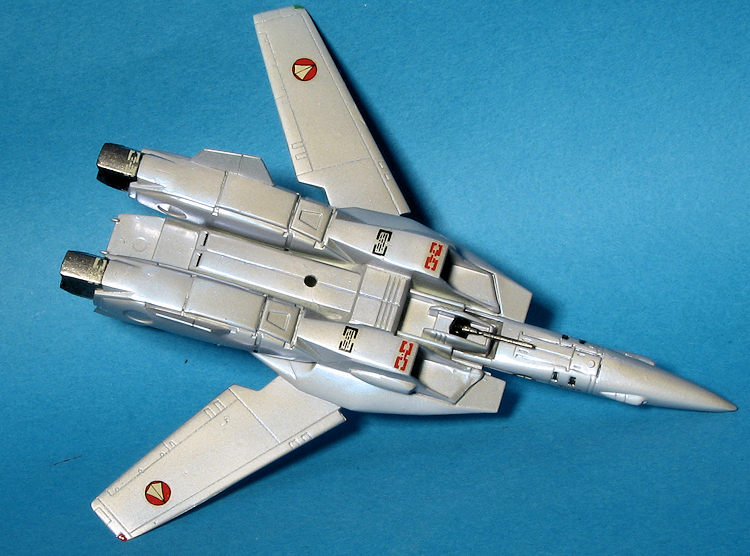
Like the F-14 on which it is mostly based, the rear fuselage is split horizontally so you can place the swing wings between it. The forward section is separated vertically and includes a single piece interior with no pilot. This design will allow for other variants to be produced from basically the same kit. There are no obvious in-flight closed gear door option shown, but this can be achieved without any issues. There is a l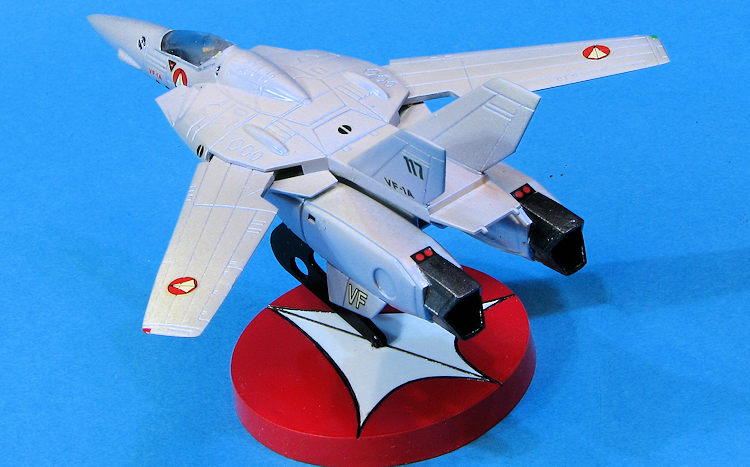 arge pod that fits under the fuselage (laser canon?) and there are holes in the wings for four bomb racks. Eight futuristic looking bombs are included in the kit along with nicely modeled landing gear. If one is to mount the kit on its display stand, the pod cannot be carried.
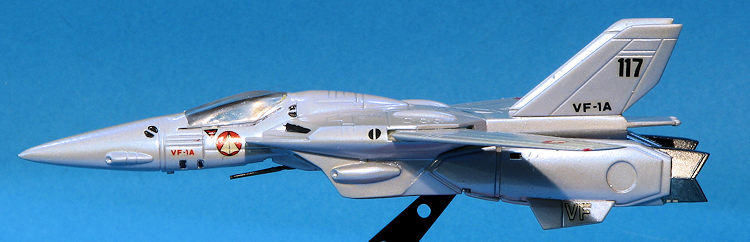
Instructions are adequate for such an inexpensive kit, though 99.5% of everything written is in Japanese. A nice decal sheet is included with what looks like more markings that are required for this one kit. The main colors of the aircraft are light gull grey and white, though really you can paint this any colors you fancy.
| CONSTRUCTION |
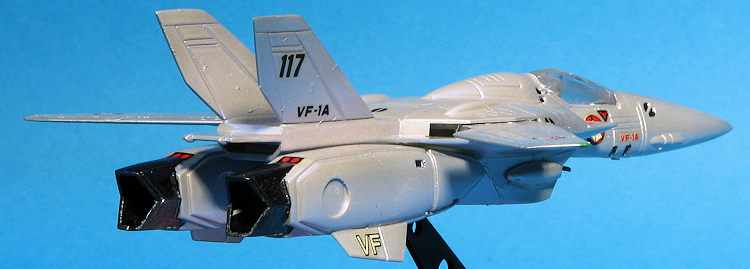
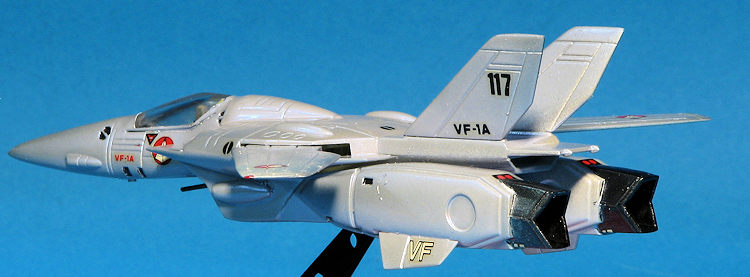
I started building this by working on the main fuselage. The kit has some flash that is more like rough edges than anything which will need clean-up. I assembled the upper and lower fuselages together, trapping the wings in between them. A recurring issue with the kit is less than sterling fit. Every seam will need some work and others will require more than usual. Prepare for it. I used superglue for the most part. The fuselage has a rear jet piece and two intakes to fit. Multiple test fits and adjustments will provide you with the best fit. The two engine pods were next. There is no smooth exhaust trunking, just a final engine stage stuck about an inch from the exhaust.
 These engine pieces also include the main gear attachment points, which are far too shallow for any landing gear. Though the instructions do not show it, the main gear doors can be glued closed. I chose this option as I want to display this on the stand. It also means that I don't build the big centerline pod as it cannot be attached if on the display stand as they use the same hole.
I wanted a clean plane so filled in the pylon mounting holes. This allowed me to toss a lot of pieces. The engine pods are not a good fit (surprise!) and required a bit of filler, but eventually things got properly smoothed out.
Next was the nose section. I painted the cockpit and inside of the forward fuselage pieces with grey primer. A khaki was used for the seat and black for the boxes behind it and the halves were mated. This were then attached to the rest of the airframe. Fit is atrocious. Besides being difficult to get it place, the forward section is smaller all around than the area to which it is supposed to match.
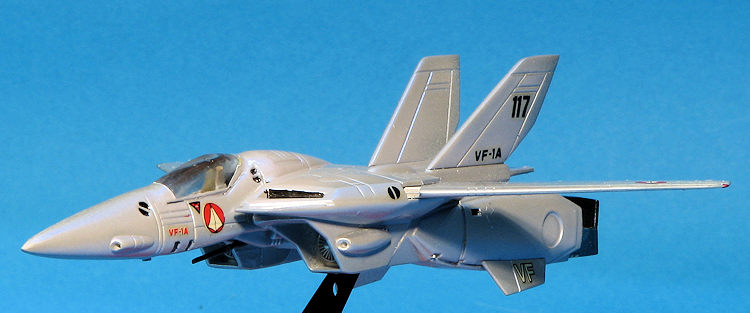 Once that was finally smoothed out, it was time to attach the fins and the ventral strakes. These are a butt fit. I realized during this time that I had attached two inner and two outer engine pods to each other, so beware that this kit is not idiot proof. I then glued on the canopy. It is even more horrible a fit than the forward fuselage. The framework is indistinct and inconsistent as well. I filled in the gaps in the front and back with standard putty and when all was sanded, polished the canopy using multiple grades of sandpaper and a final application of Novus #2 plastic polish. This stuff is superb and easier to deal with than Future. I then masked it and got ready for paint.
| COLORS & MARKINGS |
I did not want to copy the colors of the airplane in the instructions so decided to try something a tad different. I first primered everything with Tamiya extra fine white. Then the airframe was painted using Tamiya AS-12 aluminum. When that was dry, I used Testor's 'Flip Flop Blue'. this is a transparent paint that looks a bit different as the light hits it. I'm not positive that it should be put over silver, and perhaps would 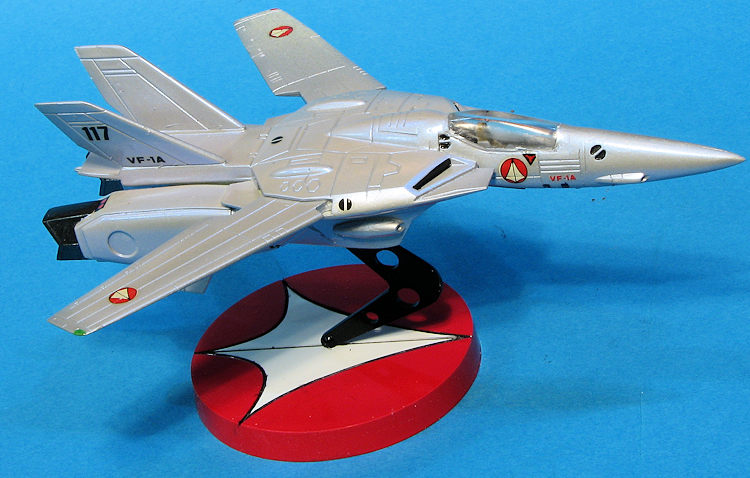 be better over black, but I could find nothing on the 'net about how to use it. I applied several coats and the effect is pleasing enough, though may not show it in photos. We'll see. I am sure that purists will be aghast, but hey, it is science fiction. As I feared, direct lighting washes out the blue effect, though you can see it some of the images where the light is not so direct.
The base was painted gloss white and the center section masked off while the rest was painted TS-8 red from a rattle can. The part that attaches the VF-1A to the stand was painted black (or as Tamiya says 'semi-gross black'. I then brush painted the details on the airframe before applying decals. While there are placement instructions, with a kit like this one can pretty well do things as one wishes. The decals were still quite viable and are a bit on the thin side so care needs to be taken. Microsol was enough to get them to comply with surface variations.
The last thing I did was to attach the lower gun and do a bit more painting before removing the masking. The airframe was then placed on the stand and that was it.
| CONCLUSIONS |
 While not exactly the best fitting kit on the planet, and one where one has to pay attention when building, the end result is an interesting diversion from the norm (unless sci-fi is your norm). The non-standard color scheme saves a ton of masking and doesn't look all that bad. It would have been nice to have a pilot figure, but there it is. There are apparently a bazillion kits out there of this and other versions. This is probably the least expensive. I understand there was one of these done in 1/24 so that has to be huge.
| REFERENCES |
https://en.wikipedia.org/wiki/VF-1_Valkyrie
25 November 2016 Copyright ModelingMadness.com. All rights reserved. Thanks to me for everything. If you would like your product reviewed fairly and fairly quickly, please contactthe editor or see other details in the Back to the Main Page Back to the Review Index Page Back to the Previews Index Page