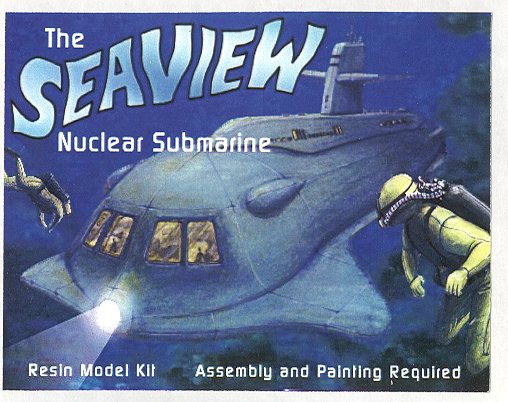
Masterpiece Models SSRN Seaview
|
KIT # |
1 |
|
PRICE: |
$49.95 (now much less) |
|
DECALS: |
For Flying Sub hatch |
|
REVIEW : |
|
|
NOTES: |
Resin kit |
|
HISTORY & THE KIT |
For a preview of this kit showing all the parts and a brief history, go here.
|
CONSTRUCTION |
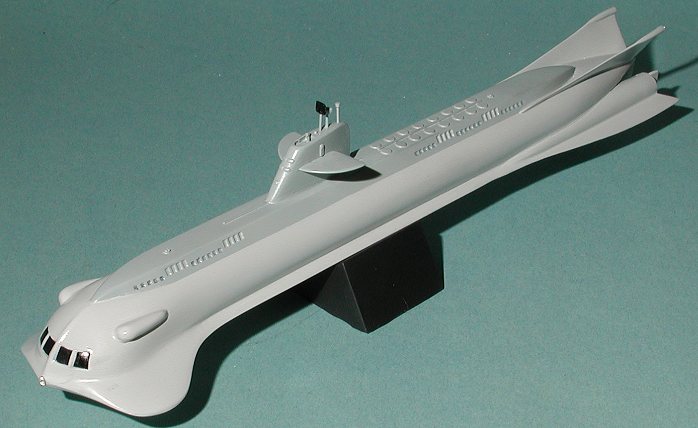
As with any resin kit, the first thing one has to do is to clean up all the mold attachment points and get the parts ready to assemble. This kit is blessed by not having the usual huge resin blocks attached to all the large parts. In fact, the hull was in very good shape. The first thing I did was to take a piece of 220 or 180 grit sandpaper, and attack the excess stuff and mold seam lines. The key to using this heavy duty sandpaper is not to go nuts with it in terms of pressure and to use it wet. This cuts down on resin dust (which is not good to breathe) and makes quick work of the offending parts. This was then followed by 400 grit, then 600 grit and finally 1200 grit. I then washed the hull in warm soapy water to get rid of any mold release agent. While not a common problem with mainline injected kits anymore, it is still used with garage resin kits like this.
Despite careful sanding, there were still some areas that needed filler, so that was taken care of. Meanwhile, I looked at the next parts to be installed. These would be the lower fins, which incorporate the thruster units and rudders. Once the outside was cleaned up, I took a look inside. Not exactly smooth. Not surprising either, as these areas are very difficult to mold. I decided that it could do with an easy fix so I got some sections of thin wall brass tubing, cut them to size and slid them into the cavity. The resin exhaust areas have small notches cut for the rudders. Filling those won't be a problem as all one has to do is slightly trim the resin rudders to fit inside the tubing. To take care of a yucky looking back section, a piece of flat cardstock was inserted into the tubing to provide a flat area in there. If you are really dedicated, you can drill out the length of the lower fins, but I'm not really dedicated so didn't. The tiny gap between the tubing and the wall was filled with superglue and sanded smooth.
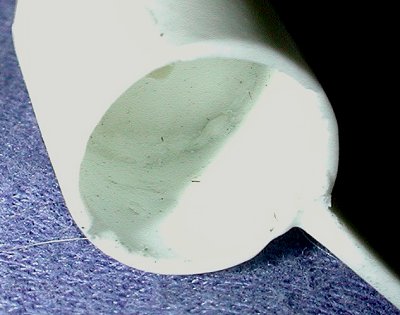 The interior of the exhaust. Not smooth at all! |
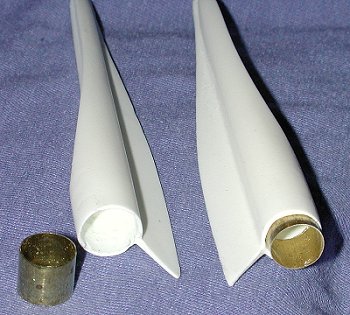 Installing brass tubing is an easy fix. |
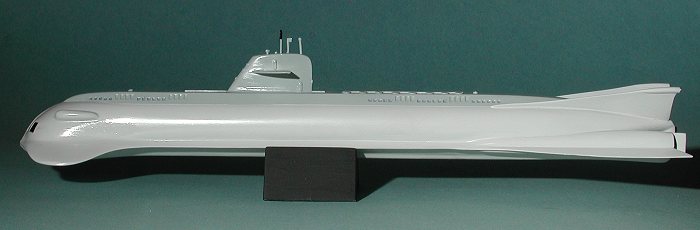
Once that was completed, the lower fins were glued to the hull using superglue. Naturally, the fit wasn't perfect so several applications of filler was needed to fill seams and fill the gaps. I also took this opportunity to repair the broken chines in this area. The chipped sections were cut out and replaced with card stock then faired in with filler.
Next the upper fins. These are quite thin and long for resin parts. This is because it is so difficult to to completely straighten out the resin fins. It took a number of tries using hot tap water and then pressing the still soft resin between two hard, flat surfaces. I was not entirely happy with the results, but used them anyway. Were I to build this kit again, I would copy the upper fins onto plastic card and use the small resin fin tips. No problem with warping.
 These
upper fins also took several applications of filler and sanding to get to where
I thought they were acceptable. Once they were done it was time to trim off the
excess resin from the bridge structure and glue that down. Again, some filler
was needed along the bottom edge to get a smooth fit. All perfectly normal for
what is basically a hand made resin kit. All of the last three paragraphs took
about 14 days as I like to make sure the filler is completely cured before
sanding.
These
upper fins also took several applications of filler and sanding to get to where
I thought they were acceptable. Once they were done it was time to trim off the
excess resin from the bridge structure and glue that down. Again, some filler
was needed along the bottom edge to get a smooth fit. All perfectly normal for
what is basically a hand made resin kit. All of the last three paragraphs took
about 14 days as I like to make sure the filler is completely cured before
sanding.
Next the dive planes were removed from the resin and glued in place along side the conning tower. There are some slots there to help with placement. A bit of filler was needed to fill some small gaps. While that was drying, I cut out the chipped parts of the chine and put in fixes with plastic card and superglue. These were then carefully sanded down to match the surrounding area. Again some back and forth with filler and sanding were needed to get things smooth.
The nose and underside spotlights as well as the tail light areas were drilled out to get ready to accept MV lenses. These are really great and add a lot to the finished kit. Meanwhile, I started cleaning up the stuff that goes in the top of the conning tower. There is a periscope, radar antenna and two other masts. The radar antenna had a sink mark that needed filled. Naturally, I managed to break this part off its support so drilled a small hole in the bottom of the screen and replaced the support with a small length of wire.
|
PAINT & DECALS |
After drying, the kit was repainted in the same colors. This little glitch
delayed construction by about a week. I'm not a quick-build expert and like to
make sure that all is dry and ready before going on to the next step. When the
main part of the kit was dry, the rudders were painted and the various antennas
and stuff attached to the top of the sail. This area was painted and any
touchups done.
FINAL STEPS I made several
failed attempts at doing a good job of painting in the windows along the side so
eventually decided to leave them unpainted. Perhaps one could use stripe decals
cut to size for this job. The Flying Sub hatch decal was not used as it has a
white background, and the sub is a grey color. I might recommend that this decal
be done on clear decal paper or left out altogether. The resin display stand was painted flat
black as was the radar antenna.
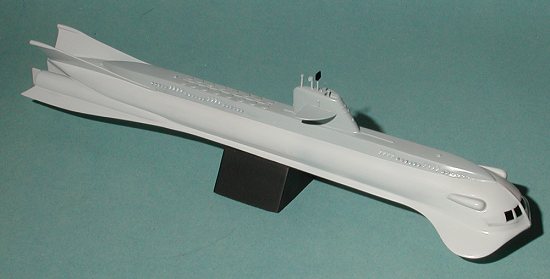
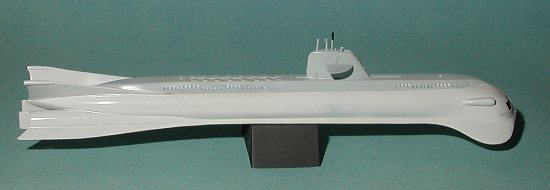
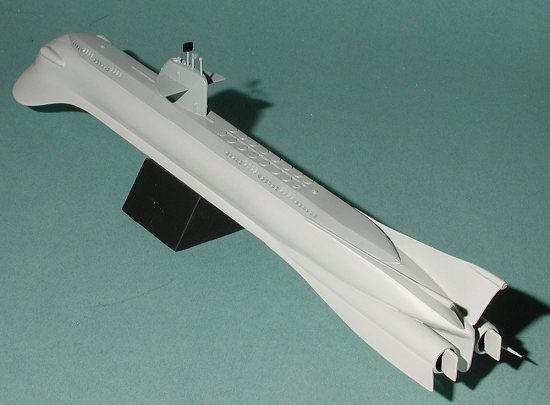 Now off to the paint shop. I had decided not to paint it in a single color. Too
boring. The upper surface was painted with Testors Modelmaster ADC gloss grey.
Then it was masked off and the rest of the sub was painted with Testor's
Modelmaster Canadian Voodoo grey, also a gloss color. When it was dry, it was
apparent that I needed to clean the model more before painting. There were all
sorts of horrible spots on the paint. When I removed the tape, a bunch of paint
came up with it. There was no choice but to strip it and start again. I used
Strip-A-Kit and it was done quite quickly. This time I washed the kits in soapy
water to make sure that I got rid of all the slick spots. I think the SAK also
helped.
Now off to the paint shop. I had decided not to paint it in a single color. Too
boring. The upper surface was painted with Testors Modelmaster ADC gloss grey.
Then it was masked off and the rest of the sub was painted with Testor's
Modelmaster Canadian Voodoo grey, also a gloss color. When it was dry, it was
apparent that I needed to clean the model more before painting. There were all
sorts of horrible spots on the paint. When I removed the tape, a bunch of paint
came up with it. There was no choice but to strip it and start again. I used
Strip-A-Kit and it was done quite quickly. This time I washed the kits in soapy
water to make sure that I got rid of all the slick spots. I think the SAK also
helped.
 After the paint had dried, I started filling in the various
'windows' on the side using a Rapidograph drafting pen. I find this method works
much better than using paint, though that can be done as well. The front windows
were a real quandary. They are really too big for a Rapidograph, and painting
them might really screw things up. While worrying about that, I started
installing the MV lenses I had bought. Naturally, the ones I got for the front
were too big. However, the one for the tailights, though
After the paint had dried, I started filling in the various
'windows' on the side using a Rapidograph drafting pen. I find this method works
much better than using paint, though that can be done as well. The front windows
were a real quandary. They are really too big for a Rapidograph, and painting
them might really screw things up. While worrying about that, I started
installing the MV lenses I had bought. Naturally, the ones I got for the front
were too big. However, the one for the tailights, though
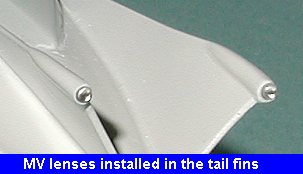 too big for the back,
fit well in the nose so that was glued in. I went back and picked up some more
of them for the tail section.
too big for the back,
fit well in the nose so that was glued in. I went back and picked up some more
of them for the tail section.
|
CONCLUSIONS |
This really was a nice kit to build. The only real areas that gave me some
trouble were the fins, and though it took a bit of time and work, was
accomplished without too much trauma. I know that I deviated from the overall
grey of the TV sub, but think that this two tone one looks very nice. One thing
I did not do but which I will have to do on the next resin kit is to undercoat
it with a lacquer primer such as Floquil. The enamel stuff just doesn't stick
well enough to keep the paint from easily chipping. The lacquer 'bites' much
better and would have saved me many days of repainting.
I really liked this model and would recommend it to all who have an interest in
the subject. It would even make a good introductory kit for those wanting to do
a resin kit. At $50.00 it is very competitively priced with others of this size
and complexity. You can only get this kit from the manufacturer at the link
below.
February, 2001
Copyright ModelingMadness.com. All rights reserved Review kit courtesy of Masterpiece Models If you would like your product reviewed fairly and
fairly quickly, please contact
the editor or see other details in the Note to
Contributors.
Back to Reviews Page 2018