| KIT #: | ? |
| PRICE: | €39.95 from Flying Fish Models |
| DECALS: | None |
| REVIEWER: | Scott Van Aken |
| NOTES: | Resin with wire. Upper stage |
| HISTORY |
Launch Date: 12 April 1961 06:07 GMT. Landing Date: 1961-04-12 07:55:00. Flight Time: 0.0750 days. Call Sign: Kedr (Cedar ). Crew:Gagarin. Backup Crew:Titov,Nelyubov. Location of Capsule: RKK Energia Museum, Korolev, Russia.
Of note: First man in space. Record flight duration. Speed (7,844 m/s) and altitude (315 km) records.
 Quote: 'Poyekhali' - 'Here we go!'
Three press releases were prepared, one for success, two for failures. It was only known ten minutes after burnout, 25 minutes after launch, if a stable orbit had been achieved.
The payload included life-support equipment and radio and television to relay information on the condition of the pilot. The flight was automated; Gagarin's controls were locked to prevent him from taking control of the ship. A key was available in a sealed envelope in case it became necessary to take control in an emergency. After retrofire, the service module remained attached to the Sharik reentry sphere by a wire bundle. The joined craft went through wild gyrations at the beginning of reentry, before the wires burned through. The Sharik, as it was designed to do, then naturally reached aerodynamic equilibrium with the reentry shield positioned correctly.
Gagarin ejected after reentry and descended under his own parachute, as was planned. However for many years the Soviet Union denied this, because the flight would not have been recognized for various FAI world records unless the pilot had accompanied his craft to a landing. Recovered April 12, 1961 8:05 GMT. Landed Southwest of Engels Smelovka, Saratov.
| THE KIT |
 This is the first full kit I've seen from Flying Fish Models and they have chosen a most interesting subject. Real Space kits are few and far between and those of the Soviet Union are even more rare. Flying Fish could not have picked a better subject than the
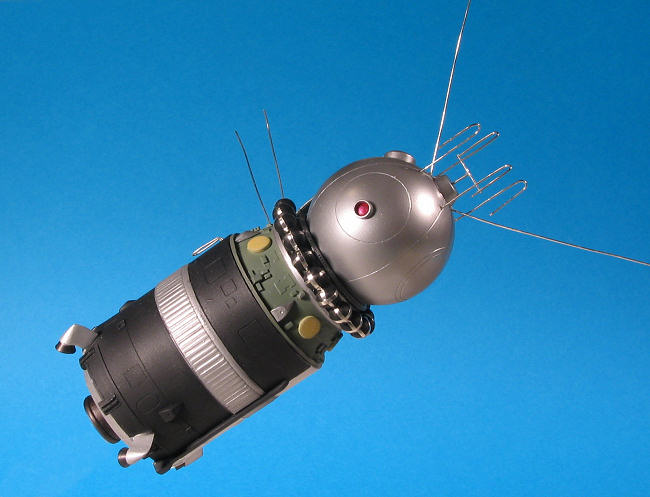
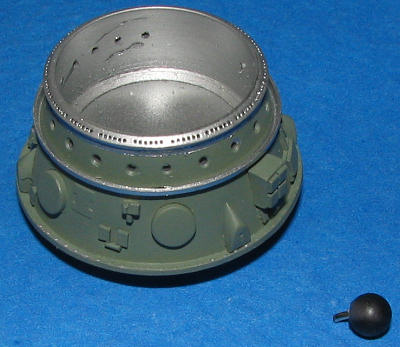
capsule that carried the first man into Space, back over 45 years ago. The Vostok I was a pretty simple spacecraft, consisting of a spherical capsule mounted onto a standard rocket body section that carried its electronics and maneuvering thrusters.
Flying Fish have done a superlative job molding this one. The various parts of the kit are right up there with the best resin molding I've ever seen. Several of the parts will fit into place without having to remove the resin pour stubs. Only the main section will need the pour stub cut back. Test fitting some of the parts shows a superbly tight fit. The majority of the smaller bits are the myriad spheres that fit around the upper portion and the four maneuvering thrusters. The smaller spheres need to be drilled out and a section of paper clip installed to keep them in place. Wire for the various antennas is included as is a scale figure of Yuri Gagarin is also included.
Instructions are quite specific and in both German and English. A detailed drawing of the various antenna is also included. I have to confess that I found the antenna diagram to be a bit confusing as I can't tell where the dimensional lines stop and the antenna parts begin. Perhaps it would be a good idea to use a heavier line to show the antennas. Visiting the Flying Fish website will also give the builder a number of additional hints in building and painting this most interesting model.
| CONSTRUCTION |
 So how hard can this be, you ask. Well, let us find out. First job was to cut off the resin pour ring around the main part of the upper stage. Then I trimmed off the excess bits from the lower portion and, carefully aligning the section with the channels along the side as the instructions touted, glued it in place with a few drops of superglue from the inside. Then I carefully removed the four reaction thrust nozzles from the sprue. The nozzles are very thin resin and easily distorted so much care is needed to clean things up. Attaching these was not an easy task. There are four little rectangles for placement, but I was not sure if these went atop them or butted up to them. I chose the butt option. There were some gaps that need to be filled and this is not easy to sand due to all the detail nearby. One also has to be very careful not to sand the reaction nozzles. This all took a bit of time.
Once the nozzles were in place, it was time to do some painting. Now this is pretty early in the build process, I know, but with models like this, painting has to be done before many of the additional bits are added.
| COLORS & MARKINGS |
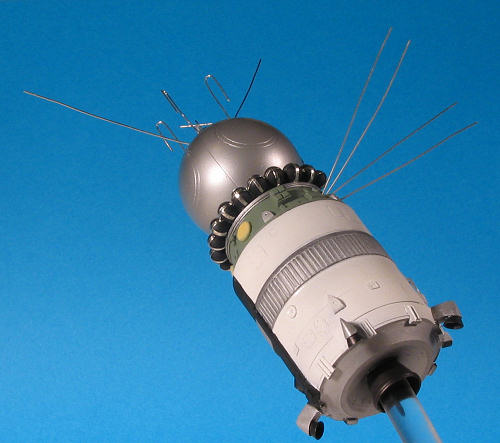
 If I could find one fault with this kit, it is that the painting instructions are not that great. I realize that many of you will do as did I and simply go to their website to use images of the completed kit for this information, but it would be nice to have a detailed painting guide included with the kit itself. Basically, the lower section is half black and half white with a metal band around it and metal lower section. The middle ring is a greenish color (I used Model Master RAF Interior Green for this) with metal trim. The upper section is basically bare metal. For the metallics I used Floquil Old Silver thinned with lacquer thinner. This held up quite well when masked as the four nozzles on the lower section must be masked of as is the large band. I also used Floquil paints for the white and black sections. Of course, all this took time and was not helped by a heat wave of several weeks that made the modeling room just too hot to work in.
| MORE CONSTRUCTION |
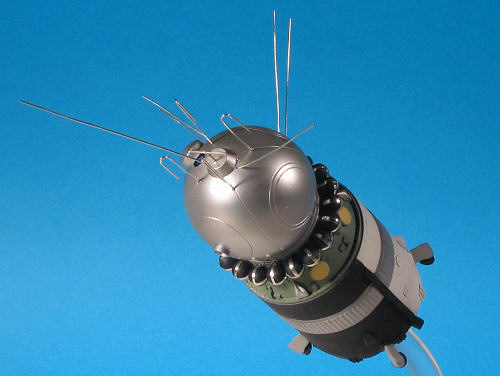
 With all that stuff now dry, I returned to some work on it. This part consisted of attaching all the little spheres around the outer rim of the middle section. I first drilled out the holes in this section with a #65 drill bit and then, after snapping off the spheres, cleaning them up and then drilling holes in each of them, I attached a short section of paper clip into them. These spheres had previously been painted matte black. The instructions recommend attaching little strips of chrome foil to each one prior to installation, but I ignored
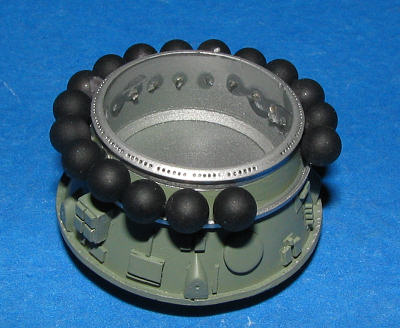 what was probably sage advice. They were then glued on from the inside using superglue. Test fitting the upper module showed that it now needed to have the lower section trimmed to not interfere with the little bits of paper clip that poked through. I should also mention that the holes are not totally uniform in alignment as the latter spheres did not fit in as snugly as the initial ones and I had trouble getting them all in line horizontally with each other. However, I did eventually get things to line up pretty much the way the photos looked.
The next step was to drill out the various antenna holes. Several lengths of wire are provided for this and there is a detailed chart that shows the proper lengths, though it is a bit difficult to follow as the wire and the little guide lines are the same thickness. After messing up all the difficult antenna, I decided to go back a bit and add the 'straps' to the black spheres along the rim of the service 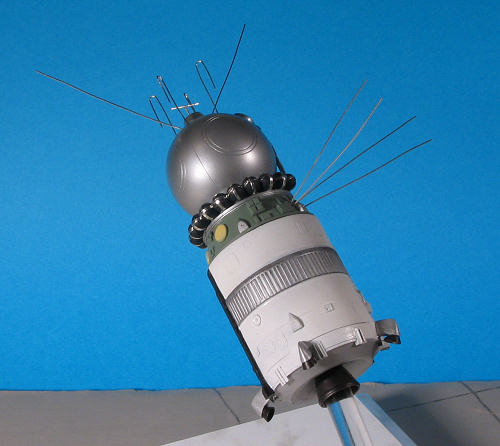 section. Basically, I used chrome Bare Metal Foil for this, cutting thin strips and then simply pressing them in place. Well, I think that 'simply' sort of misstates things as I found this to be not as easy as I'd thought. For one thing, I had difficulty getting everything straight so just did the best I could. I also found that I was glad I'd not installed these prior to gluing the spheres in place. Not only would the thickness of the BMF, as small as it is, be a problem getting them all into place, but I'm sure I'd have trashed most of them in the process. Now an up side to attaching the BMF first would be that I'd be able to align each one much better than doing it in place. At least, I think so.
Now back to the antenna. Using the wire provided in the kit, I bent the two U shaped antennas that fit into the side. I also used this method to help make the 'paper clip' shaped antenna that go on the upper portion. A short post was cut for the very top antenna and later I attached the cross piece. All of the cut pieces had to have the ends filed flat or they'd have looked darn odd and would have been somewhat dangerous with the sharp cut ends. I should now mention that getting this wire straight was an impossible chore. The long pieces should be replaced with something more stiff or even with stretched sprue. With the antenna either in place or cut, I went to work on a stand of some sort.
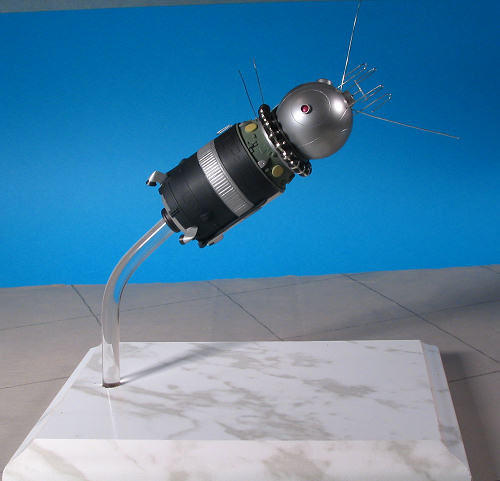
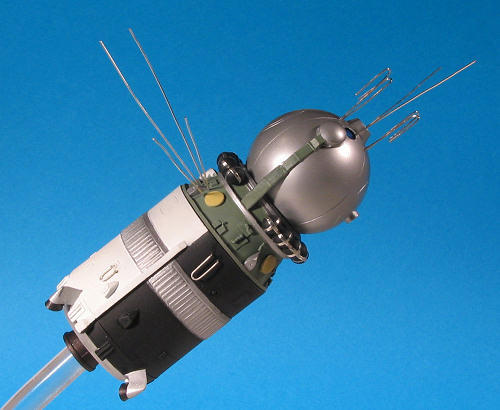
 Looking around, I took one of my old awards plaques and carefully removed the plate on the front. Then I searched out some sort of rod. I found a piece of Plexiglas rod from 20 years back and took it to the kitchen to boil some water. For this thickness, you have to boil water. I did so in a kettle and poured it over a section of the rod. I then bent it as much as I dared to prevent breaking. It took two more kettles of water to get it bent where I wanted it. I then used the biggest drill bit I had to drill a hole in the back of the base. It wasn't enough so I used my motor tool to enlarge the hole until it was a snug fit. I then drilled out the other end to accept a piece of brass tubing. This was superglued in place and the other end left especially long. In the main engine bell, I drilled a hole that went all the way through. Then the short piece of Plexiglas rod was cemented into the hole in the base. When dry, the Vostok was placed on the end of the brass rod. This provided a great display and a good work stand for attaching the long pieces of wire. By not cementing the spacecraft in place, I can rotate it on the stand as I wish for display or travel.
 The final steps were to bring together all the bits. I glued the center section to the lower part, then, aligning the upper section as shown in the photos, the upper ball was glued on. The last resin piece to glue was the power strap from the center section to the crew module. This was painted British Interior Green just like the center section. The last bits were the long wire antennas. Once those were in place, the lower section was given a matte clear coat to cover up all the repainting I had done on it and give it a uniform appearance.
| CONCLUSIONS |
I have to say that it turned out just great. No only that, but it is pretty unique in my model collection as I have almost no real space items on the shelf. Though I'm sure others could finish it in much less time than it took me, I was going slow as to not make too many goofs. I found the kit enough of a challenge to keep my interest and to provide me with a feeling of accomplishment when done. I think you will as well and so can recommend it to you if you feel you can tackle it.
| REFERENCES |
September 2006
#1431 in a series
Copyright ModelingMadness.com. All rights reserved. My thanks to Flying Fish Models for the review sample. If you would like your product reviewed fairly and fairly quickly, please contact the editor or see other details in the